
I think it’s pretty obvious if you read here often that I am just NOT a yarnie. I don’t crochet or knit – well, not in a traditional sense. I do enjoy arm-knitting, and I also enjoy another form of easy knitting: loom knitting. Yes, on the kids’ looms. It’s about all I can handle, haha. But fortunately, it makes up some really beautiful, easy to make cowls! Loom knitting makes for a perfect beginner yarn project. I feel like I can confidently say that, because I’m very much a novice myself. But take a look at what even a beginner can do:

I made up another version last year of the loom-knit cowl. I really liked how it draped, and the softness of it. But I did find myself wanting something that stood up around my neck better this year (and besides… new accessories are always something I want) but I just want to point out, the process is exactly the same as my previous tutorial. With a change in loom size and by doubling up the yarn, you can change to look completely!

Both of these cowls were knitted to 20 rows. The gray one was made on the extra large (42-peg) loom, with one skein of yarn. For today’s cowl, I used the large (36-peg) loom, and two skeins of yarn for extra bulk. They were both made using Lion Brand Homespun yarn, so they’re both soft and fuzzy! But it just goes to show that just a few simple changes can change the look entirely.
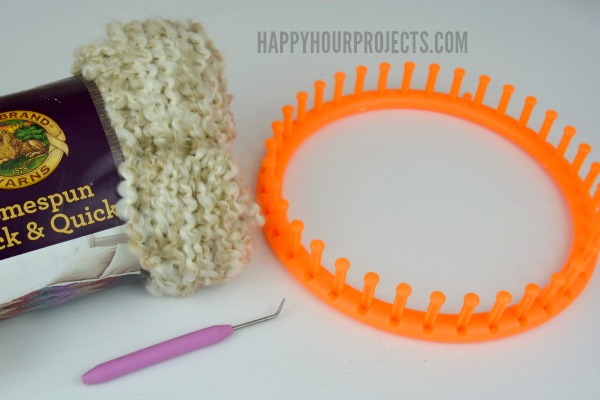
You only need just a couple of items to make this cowl – yarn projects are simple like that! If you’re looking to shop for exactly what I used I’ll leave links below for where to buy these supplies on Amazon. If you make a purchase, it does support my blog (and thank you for that, by the way) or you can just get a closer look at the specs by reading the product descriptions.
- Darice Knitting Loom Set
- Two skeins of Lion Brand Yarn Homespun Thick and Quick Yarn, Pearls
(note, I used less than half of each skein, but used both skeins at the same time)
- One skein of Lion Brand Yarn Homespun Thick and Quick Yarn, Mixed Berries
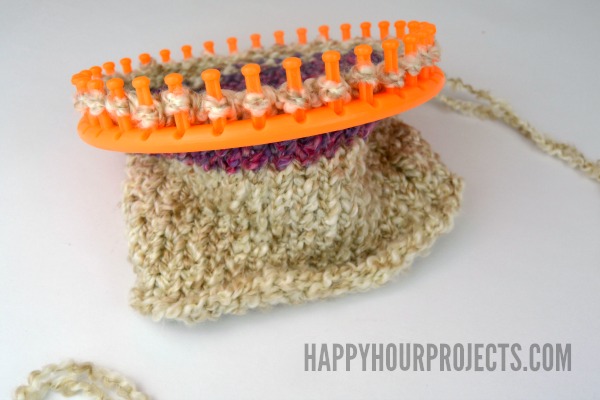
The loom knitter comes with directions for how to knit on it, and I followed the stitch it laid out for hat-making. Instead of cinching off the top, you’ll just leave the end open to complete your cowl. I have a full tutorial for making the gray cowl pictured above, if you’d like to read more right now! The only differences are, of course, using the next size smaller loom, using two skeins at once, and adding this stripe. To add the stripe (which I added after knitting 14 rows) just cut off your yarn, and tie on the next color, leaving short tails. I didn’t bother with two skeins of the mixed berries color, since I was only using about 8 yards of yarn. I had a little bit of the mixed berries color left from other projects, so I used the tails from both ends of the skein. You could also cut off 8 yards, and double it for two 4-yard pieces.

After 3 rows of the mixed berries color, I switched back to pearls, and knitted three more rows, for a total of 20. Because these rows are twice as thick as using a single skein, the cowl stands up around the neck, rather than slouching down.
While the gray version I originally made makes a great all-day accessory, this cowl is wonderful for cold weather wear, zipped up under a jacket! And best of all, you can whip it up during one episode of your favorite show, even if you’re totally new to the technique.

Is it cold where you live? I hope you’re staying warm!

I love your hood idea.
Your cowl is stunning…..I love the yarn you selected!
You did a fantastic job with this cowl! I am a crocheter and could definitely whip one of these babies up but I very much love the look of knitted items. I have been wanting to try knitting. Perhaps one of these looms is where I need to start.
I would love if you shared this at our Yarn Fanatic Linky Party!