
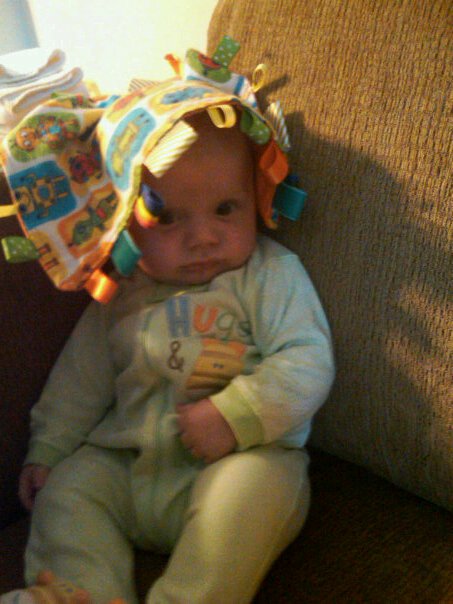
My craft bins are overflowing with girl-things, because not only do I have a girl, but as far as new babies in our friends-and-family circles go, the scales are overwhelmingly tipped toward the pink. But little man Greyson is my newest cousin, and I wanted to bring him a little gift when I met him for the first time over the weekend. And I knew that under the layers of pink, I still had a bit of supercute ROBOTS on-hand that would be perfect for a supercute little guy!
What do you think? I hear little mister is enjoying it. Look at this little squish!!
For those of you who aren’t familiar with taggie blankets, all it is is just a security-sized snuggly with tags all the way around the edges. The vast majority of babies are fascinated with the tags on their toys – I know that’s the case for Raya. So this provides LOTS of tags to touch and drool on. It’s best if you vary the colors, sizes, and textures of your ribbons – but this is another great project that lets you use what you have… hey, have I said that before?
Also, a side note. My cousin said she wished she knew what I was talking about with my sewing terminology. If you’re a beginning sewer (sewist?) with no one else to ask, seriously, feel free to drop me a line. I’d be happy to explain in more detail if it helps. I’m actually largely self-taught, but in my blog-hopping, I picked up some of the “real words” – but I remember how confusing it was when I first got started, and I tend to stick to a fairly beginner level in the majority of my projects. If you can operate your machine, I can probably help you!
Taggie Blanket
Time: One hour.
Supplies:
- Basic sewing supplies (sewing machine, thread, pins)
- 2 – 9.5″x15″ pieces of coordinating fabric (give or take). I like using 2 pieces of flannel, but I’ve used minky and quilting cottons too.
- 4 to 6 various 12″ lengths of ribbon, cut into 3″ lengths.
OK first of all, I normally make these 12″ square, but I only had about 1/4 yard of robots left. So I cut my rectangles to 9.5″ x 15″. Feel free to adjust the measurements, I only listed the measurements I used for the sake of consistency between the pictures and the directions. The part of me that’s just a little bit OCD really does prefer a square, but honestly, seeing how the rectangle turned out, I might make more this way. And I like plenty of tags (and have plenty of ribbon, ahem) so I picked 6 colors of ribbons. Fewer is just fine, you’ll just space them a bit farther apart.
Fold your ribbons in half and pin them around the edge of one of your pieces of fabric. The flat sides will be facing the outer edge of the fabric, with the fold part toward the middle. If you’re using anything stretchy on the like fleece or minky, then pin them to your cotton layer. It’s just easier. Space them equally.
Place your backside fabric, with the right sides of your two prints facing (if you have a right side, that is). If you are using anything stretchy, like minky, you really must pin it in place. My flannels don’t stretch, so I usually don’t bother with pinning anything but the ribbons.
Stitch around the outer edge with the whole thing inside-out. Yes, it looks wrong, but I promise that’s how you do it. Leave about a 3-4″ hole for turning it right side out later. When you do this, backstitch at each end to reinforce your stitches. Also, don’t leave your turning hole right at a corner. It’s a lot easier if it’s on a straight stretch. I would go a little farther down than this, honestly, but you get the idea.
Now, trim your corners. This will give you a much cleaner corner when it’s turned right-side out. Don’t clip your stitch line, but don’t worry about being close. We’re going to reinforce it by topstitching once it’s turned.
Your turning hole will leave at least one tag that did not get stitched in. For safety’s sake, remove the pin while you turn. Or don’t, but if you stab yourself – hey, I warned you. Now turn it.
Once you have it all turned and smoothed out, fold the edges of your open hole in carefully (so that it looks like the rest of your seams) and pin your last taggie back into place. Stitch very close to the edge to secure it. Then keep going all the way around, like so, so that the whole blanket is topstitched.
If quality control is up from her nap, run it by her and see if you did a good job.
If she approves – you’re done, mama! These make fantastic creative and colorful shower gifts, or a nice little something for any occasion. And if you made one you want to show off, I’d love to see it, share a link with me!
And speaking of sharing… I love, LOVE link parties. Don’t you? So beginning this Friday, I will be hosting Freestyle Fridays! Exciting, yes?
Because I can’t stand NOT showing off my shiny new button, I’m going to post it here. You can grab it now and come back Thursday at 5:00 (EDT) to link up and share!
See you soon! ~ Adrianne
Hello, This project brings back memories for me. I worked for the original taggies company many years ago, and in fact wrote the directions for the Patenting process for them. All the original taggies for the first year or so were made by my friend and neighbor and myself in our homes. The ladies that came up with the idea were not sewers so they needed people who did. The original taggies did not have top stitching, it was added later as added security for the ribbons. If you ever see a really old one that has a black and white print with a red back and black/white and red ribbons and no top stitching it is one of mine. The originals were made of fleece fabric. Just thought you might like some background history.
Great blanket! Thanks so much for linking to the Tuesday To Do Party!
Smiles!
Jami
http://www.blackberryvine.blogspot.com
Thanks for linking up to this week's Tuesday Confessional. :) You were featured, so grab a button and get your brag on!
http://www.craftyconfessions.com/2011/08/few-faves-from-this-weeks-tuesday.html
~Macy
Great idea! I'm going to put this on my FB page! Thanks for linking to Thrifty Thursday! :)
you're so creative. I want to learn how to use the sewing machine.
btw, Ihope you enter my low entry giveaway —
http://momdaughterstyle.blogspot.com/2011/07/pambras-original-bra-liner-review-and.html
How cute and what a great tutorial! I would love for you to link up to “It's a Party” on Thursday!
http://acreativeprincess.blogspot.com/
So cute! I am just learning to sew and hae wanted to try these! Thanks!!
Found you through The DIY linky!! Feel free to stop by my blog sometime- I am having a few giveaways this week!
livingcraftilyeverafter.blogspot.com
Kelly
Love this too! I made one for my granddaughter and she is beginning to use it at naptime. It is so cute to see them fingering the silky ribbons! I love the fabric you used–so fun & colorful!
What a great taggy blanket, i love the choice of fabric! Saw you on link party, now google following you, Karima x http://www.karimascrafts.com
You make the cutest things. Of course the little one helps make them a tad cuter too. Have a great day.