• Skip to primary navigation
  • Skip to main content
  • Skip to primary sidebar

  • home
  • about adrianne
  • buy the books
    • DIY T-Shirt Crafts (2015)
    • DIY Stamped Metal Jewelry (2016)
    • Rock Painting for Beginners (2019)
  • videos
  • crafts
    • diy beauty projects
    • kids’ crafts
    • paper craft projects
    • polymer clay
    • sewing projects
  • jewelry
    • bracelet projects
    • earring projects
    • necklace projects
    • jewelry tools & supplies
  • metal stamping
    • beginners’ tutorial
    • video tutorial
    • project ideas
    • metal stamping supplies
  • recipes
    • cocktail recipes
    • appetizers
    • main and side dishes
    • sweets and treats
  • by season
    • birthdays
    • new year
    • valentine’s day
    • st. patrick’s day
    • easter and spring
    • mother’s day
    • patriotic
    • fall
    • halloween
    • christmas
    • thanksgiving
  • privacy

Happy Hour Projects logo

09/04/2012

Thrift Lamp Re-Vamp with Martha Stewart Glass Paints

Well good morning, and I hope everyone enjoyed the holiday weekend!  I love freebie days off work – I get an extra day to see my family, and I’m always able to squeeze in a little bit of bonus craft time. ;) Plaid Crafts recently sent me a box of Martha Stewart’s new glass paint to try out and see what I thought.  I just LOVE getting new craft supplies, and I got to play with them all weekend.  Today I’m going to show you the desk lamp I painted!

Quite the improvement over the original… take a look – this is what my $4 find looked like when it came home with me. (For an extra $1, I picked up a different glass shade that was in better condition, and swapped it out. )

Some brown spray paint on the base was step 1 toward updating the 80’s look, but the real fun was designing the shade.

The glass paint sprayer in this line is awesome.  Seriously.  I haven’t used anything like it before, personally.  You mix up the shade you want to spray 50/50 with either a gloss or satin spray medium.  (If you’re trying it out for the first time, I used about 1/2 ounce of each – 1 ounce mixed.  It’s hard to guess how far it will go if it’s the first time you’re using it).  Let me also warn you, don’t be tempted to shake the sprayer once the paint reservoir is attached.  I have a tendency to shake my spray paint quite a bit, but it won’t spray if you shake it – just keep it nice and level and you’ll get a fantastic coat of paint.

So I sprayed the shade all over with a light, frosty aqua blue base coat (the colors in my office are shades of brown and aqua).

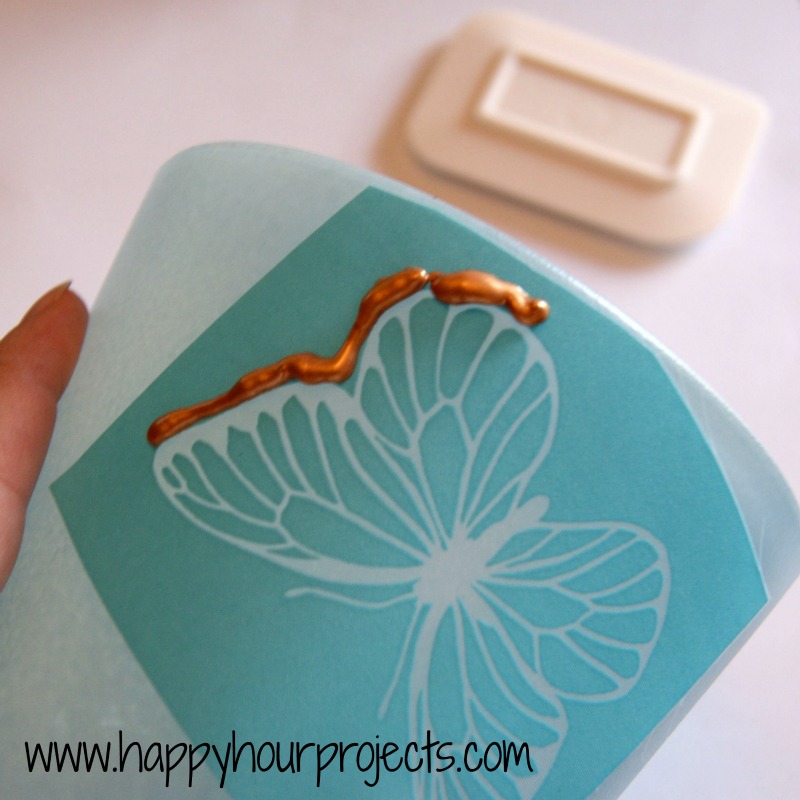
When that was fully dry, I used some of the new silkscreens to stencil some butterflies on it in a metallic bronze.  The silkscreens are awesome in that you can create these intricate designs.  I love the veining in the butterfly wings – something you wouldn’t be able to get from a traditional stencil.  You just cut out the silkscreen you want to use, and place it on your glass where you want it.  Add a line of paint across the top of the design – you’ll be spreading it down over all the tiny holes in the silkscreen.

Now, use the paint spreader (it’s just like a rubber spatula) to kind of squeegee the paint downward, to fill in the silkscreen design.  All this is doing is getting a thin, even coat of paint over the whole design.  (I scraped the edges, too after I took this photo.)

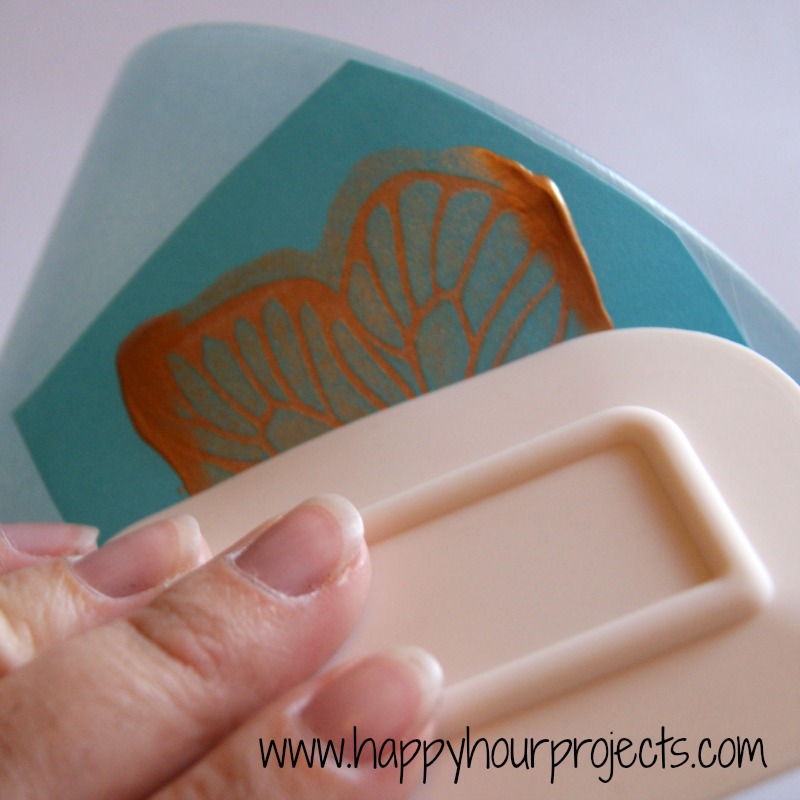
You want to spread it fairly quickly – because a really thin coat of paint like this dries within a few minutes, and if it dries in the silkscreen, it will pull off instead of sticking to the glass.  But squeegee-ing it on is a snap, and only takes just a few seconds.  It’s pretty slick!

As soon as your paint is spread, peel off the silkscreen.  You will want to rinse it out while it’s still wet.

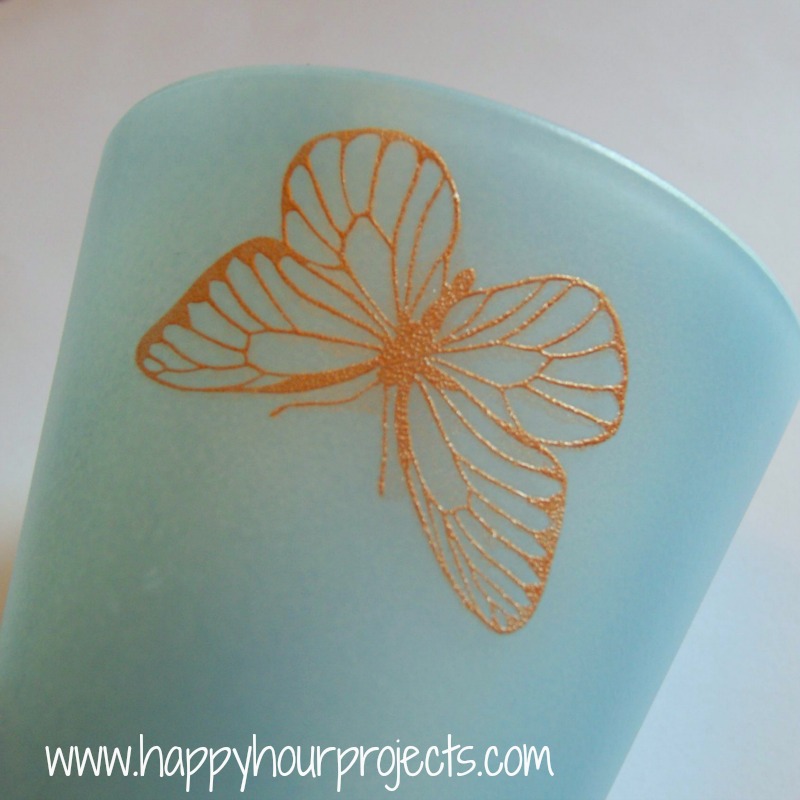
I used three different sizes of butterflies on my lampshade.  By the time I got through with each one once, the first one was dry enough to be able to use it again.  I stenciled the whole shade in less than 10 minutes.

All that was left after I gave it about 30 minutes to dry was to re-assemble it, and give it a new home!  I have to admit, these photos just don’t do it justice.  The metallic bronze has a beautiful shimmer to it, which is of course really difficult to capture on a curved surface. ;)

As much as I love the blue, my favorite is how it looks lit up in the evening. :)

So – what thrifty finds have you given new life to lately?


I wrote this post as part of a paid campaign with Plaid Crafts and Blueprint Social, but the ideas and opinions in this post are all my own.  

Want to know what’s new at Plaid? Stay in touch!!
Facebook // Twitter // Pinterest

Take a look at what some other great bloggers are creating with Plaid’s new Martha Stewart glass paints!

Filed Under: Tutorials Tagged With: glass paint, lamps

copyright policy and terms of use

I love it when you love my work! All tutorials and photos published at Happy Hour Projects are copyrighted. If you would like to feature my tutorial on your website or share it on your social media you may use one photo to feature, as long as you provide a link back to the original post.

If you feature a photo, it may not be accompanied by the project tutorial or recipe, whether in my own words as it originally appears or paraphrased by you. This also includes personal sharing on social media and Pinterest. Publishing multiple photos from a project, or including instructions with an accompanying photo are not permitted and you will be asked to remove them.

I love to share my projects, and my tutorials, recipes, and e-books are ALL free for your personal use. However, photos and ideas that are published to this site are my protected intellectual property. You may print them at home, but please do not copy or distribute them. I also allow all designs to be made and sold at fundraisers, craft fairs, etc. If you are selling a piece made from one or more of my free tutorials in your online shop, I require that you use your own, original photography, and include a link back to my website to credit me as the designer.

I hope you enjoy what you read here, and please be fair when you share!

Reader Interactions

Comments

  1. Carrie says

    09/18/2012 at 3:01 pm

    That is SO lovely! It looks great while turned on, too. Great job!

    Reply
  2. Carmella says

    09/13/2012 at 1:23 pm

    love, love, love this!! I was thinking it was a vinyl stick on before I started reading…this is simply beautiful!

    Reply
  3. Alilily says

    09/11/2012 at 10:33 pm

    I LOVE what you did with the butterflies. Your new lamp is gorgeous! :)

    Reply
  4. Meredith says

    09/08/2012 at 8:59 pm

    Thanks for linking up with us @ Keep Calm & Link Up this week. We're thrilled you chose to join our party! Can't wait to see what you link up next week friend :o)

    Reply
  5. Kathryn Ferguson Griffin says

    09/07/2012 at 3:37 pm

    Oh, Wow! That turned out so pretty! Thank you for sharing. Visiting from One Creative Weekend. Would love it if you would share this at my Make it Pretty Monday party at The Dedicated House. http://thededicatedhouse.blogspot.com/2012/09/make-it-pretty-monday-week-13.html Hope to see you at the bash! Toodles, Kathryn @TheDedicatedHouse

    Reply
  6. Shannon at Fox Hollow Cottage says

    09/06/2012 at 2:36 pm

    What a cute makeover. Love the color combo and that pretty butterfly!!

    Reply
  7. Carlee Rose says

    09/05/2012 at 11:41 pm

    Adrianne, this turned out BEAUTIFUL, it looks like you bought it at a high end boutique! I love the color, and I have two little girls who would go wild for the butterflies!

    Carlee
    http://www.ladybirdln.com

    Reply
  8. Julia says

    09/05/2012 at 8:00 pm

    i really like your blog xxx
    Can i PLEASE ask u to follow my blog. I am dreaming of having more than 19 followers. I wold really appreciate it xxx

    http://babyemilycloset.blogspot.co.uk/

    Reply
  9. Jessi says

    09/05/2012 at 7:55 pm

    That paint is the coolest! And that lamp looks fabulous, great job! Thanks for sharing at The Fun In Functional!

    Reply
  10. Kimberly says

    09/05/2012 at 4:59 am

    Wow Adrianne! That turned out just so beautiful! My mother would love that lamp, her favorite color and she loves butterflies! What a great use of those Martha Stewart paints! xo, Kimberly

    Reply
  11. Angie Ramirez says

    09/04/2012 at 6:36 pm

    that is pretty neat! Love it.. specially re-vamping with Martha Stewart! ;)

    XO
    Angie

    Reply
  12. Melissa says

    09/04/2012 at 5:46 pm

    Gorgeous! I really love the make over!

    Reply
  13. Amanda says

    09/04/2012 at 5:38 pm

    Adrianne, I love your *new* lamp. You did a fabulous job with the transformation!

    Reply
  14. Maribel Reyes says

    09/04/2012 at 5:37 pm

    That lamp is so cute! I don't know how to thrift shop, but we did manage to make a little craft with some stamps :)

    Reply
  15. Kelley says

    09/04/2012 at 5:17 pm

    Ohhh.. how stinkin cute! I love the colors that you used. I took one of Ryley's old sippy cups, wrapped twin around it and made it a 'vase'. Does that count as thrifty? lol.

    Reply
  16. babsy (Barbara) says

    09/04/2012 at 4:54 pm

    Wow.. I love it.. And it looks kinda easy to do.. Great Job…

    Reply
  17. Melanie says

    09/04/2012 at 2:42 pm

    The butterflies are so cute!!

    Reply
  18. Morena Hockley says

    09/04/2012 at 1:59 pm

    Beautiful, especially the night shot. I love that color combo, too!

    Reply
  19. Felicia Kramer says

    09/04/2012 at 1:37 pm

    This is beautiful! I have tried the Martha Stewart paint sprayer and love the effect. But what bothers me is for the price of the kit it doesn't last very long. You can't think you're going to get the same amount as from a can of spray paint (which is a lot cheaper, of course.) Great job.

    Reply
  20. Kara says

    09/04/2012 at 12:29 pm

    I love the butterflies! Beautiful :)

    Reply
  21. Kadie says

    09/04/2012 at 12:27 pm

    Great Job!! I LOVE the butterflies and the colors. The lamp looks much better than when you started!

    Reply
  22. Kelly says

    09/04/2012 at 11:40 am

    nice job1!!! I would have never thought of painting glass…definitely going to check this out! thanks for the hip tips!

    Reply
  23. Meredith says

    09/04/2012 at 10:41 am

    This turned out beautiful! I LOVE how it looks all lit up too :)

    Reply

Trackbacks

  1. how to spray paint glass lamp shades – Ascharters says:
    05/05/2022 at 9:27 pm

    […] happyhourprojects.com size: 800px x928px […]

    Reply
  2. how to spray paint a glass lamp shade – Ascharters says:
    04/30/2022 at 4:45 pm

    […] happyhourprojects.com size: 800px x928px […]

    Reply
  3. Frosted Vine Glass Jar says:
    09/23/2013 at 2:30 pm

    […] painting since I got to try out Plaid’s new Martha Stewart Glass Paint line (did you see the glass lamp thrift find I fixed up?) and I want to show you all a quick project I made.  Anything glass just lying around my house […]

    Reply

Leave a Reply Cancel reply

Your email address will not be published. Required fields are marked *

Primary Sidebar

Hello, and welcome! I'm Adrianne, an artist, author, designer, and blogger in mid Michigan. I work from home, chase my two kids, and this once-city-girl is learning how to care for chickens and adjusting to life out in the country. I have a compulsion for daily creativity... sometimes it's jewelry-making, paper crafting, metal stamping, mixing and baking, or giving new life to recycled items. But with 2 young kids, time is short! My goal here at Happy Hour Projects is to share projects and tips that you can do in an hour or less. The ideas you find here are designed to add a little creativity in your day, no matter how much (or how little) time you have!

BUY MY BOOKS!

Copyright © 2023 Happy Hour Projects on the Brunch Pro Theme