
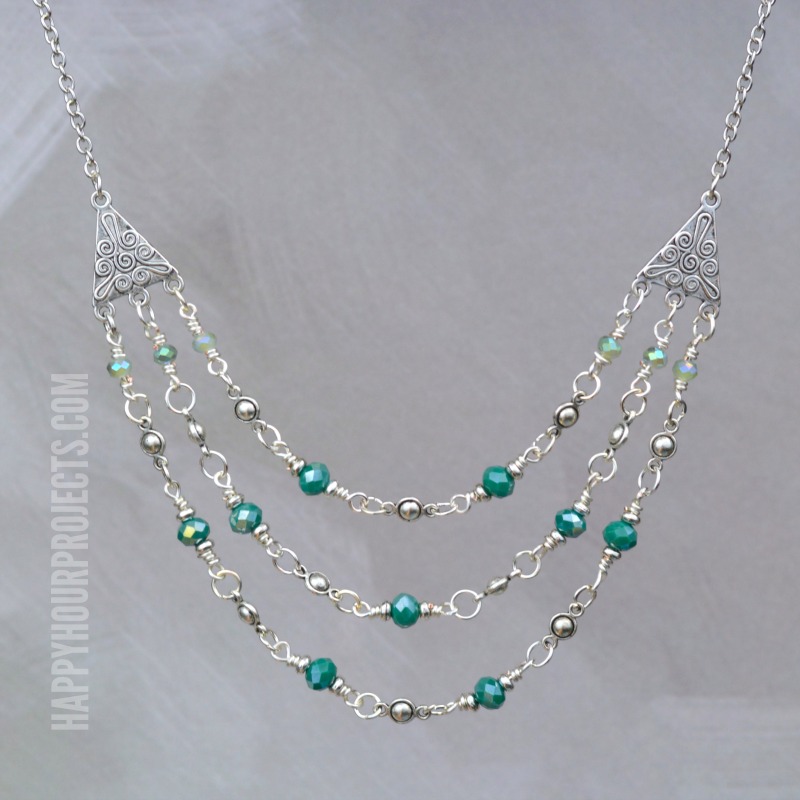
Hello my jewelry lovers! I’ve got a DIY necklace design that I’m excited to share with you today. This triple strand necklace features crystal and pewter elements for a look that can go with both casual and dressy styles. The bib-style coverage will get your jewelry noticed without the bulkiness of a traditional bib design, and of course, as with any DIY necklace, you can customize it with your favorite colors for a look that’s all you!

Today’s post is sponsored by Happy Mango Beads, a fair-trade and eco-conscious bead retailer with many unusual, natural, and ethnic selections. As with every piece I share here though, the design and opinions are all my own; Happy Mango Beads just make my creativity possible by providing the primary components you’ll find in this DIY necklace.
I will leave links to the products that you can shop for at Happy Mango Beads if you’re inspired to try this project for yourself below! This piece takes less than an hour to make, and is suitable for any jewelry maker who has basic wire wrapping skills, or would like to learn and practice making beaded connectors.
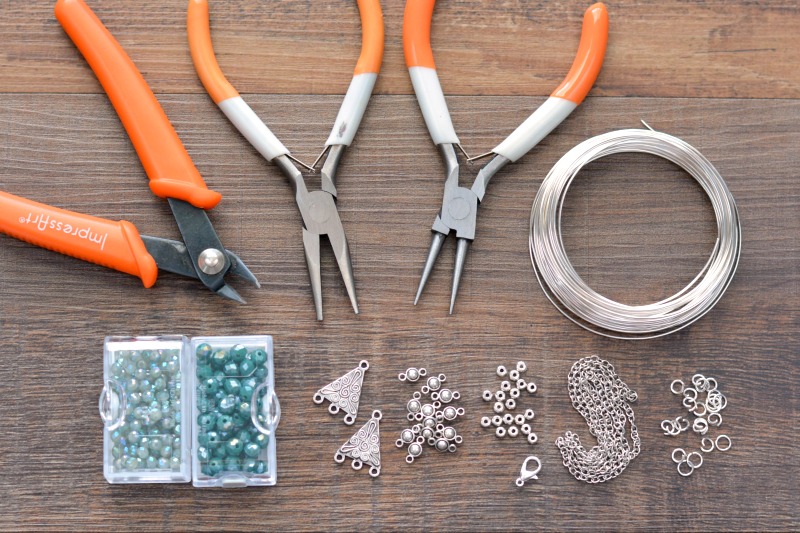
Supplies available from Happy Mango Beads:
- 2 – Pewter 3-strand Connectors
- 12 – 9mm Pewter Round Ball Connectors
- 9 – 6mm crystal beads (pictured here: Dark Turquoise Crystal Rondelle Beads)
- 18 – 5mm Pewter Spacer Beads
- 6 – 4mm crystal beads (pictured here: Gray with Teal AB Finish Crystal Rondelle Beads)
- 2-3 Feet 20-Gauge Silver Plated Wire
- 14 inches 2mm Chain (cut to two 7-inch lengths)
- 12mm Lobster Clasp
- 34 – 5mm Jump Rings
- Round Nose Pliers
- Chain Nose Pliers
- Flush Cutters
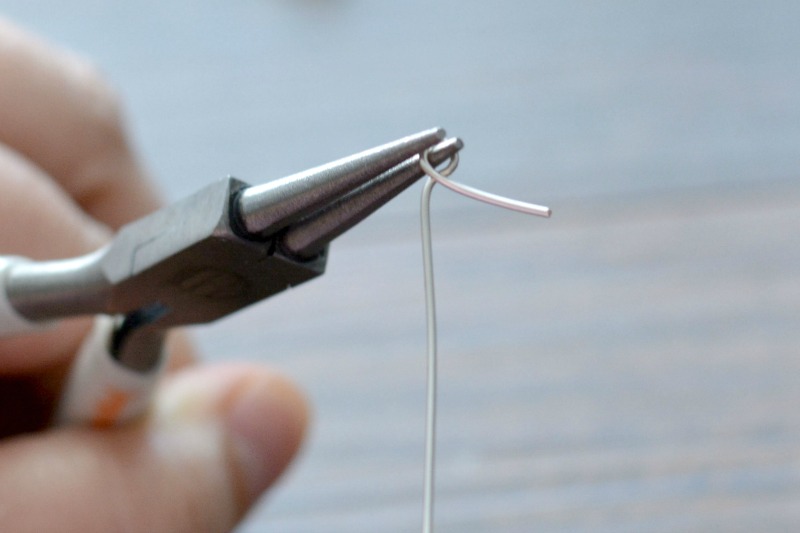
Now, to begin, create the beaded connectors that will give your DIY necklace some subtle color and sparkle. For this design, we will be making six small beaded connectors and nine larger beaded connectors. To create a beaded connector, cut a 2-3 inch piece of 20-gauge wire, and about 1/2 inch to 1 inch from the end, form a loop around one of the sides of your round nose pliers.

Then, take the small tail and wrap it around the wire just under the loop you created. Wrap it 1-2 times, and cut any excess wire away with flush cutters.
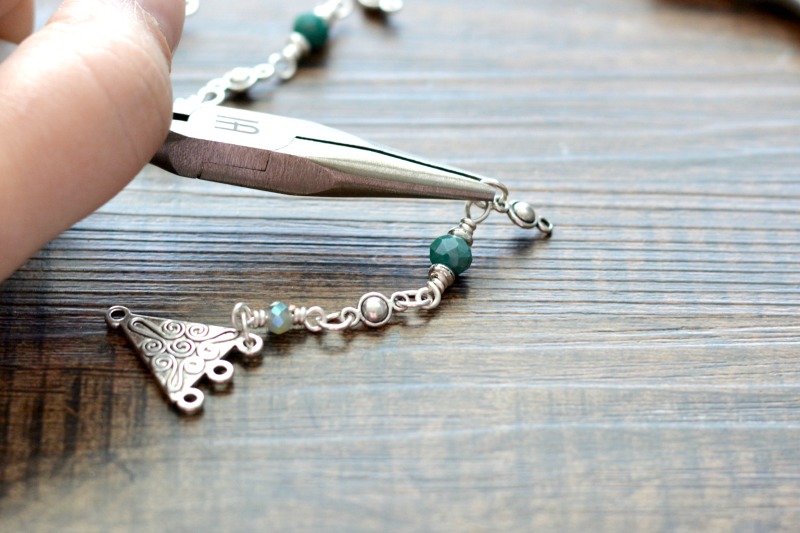
Add your bead or beads onto the open end of the wire. For the smaller beaded connector, simple add one 4mm bead. For the larger connectors, add a 5mm spacer, a 6mm crystal bead, and a second 5mm spacer (for clarification, you may refer to the photo below). After stacking the bead or beads onto the wire, grip the other end of the wire just above the bead. Form a loop and wrap neat wire coils around the wire between the loop and the beads, just as you did for the first side. Cut away any excess wire to complete each connector.

Make 6 small connectors and 9 larger connectors, repeating the above steps until you have enough. (And don’t forget, if you’d like a larger necklace or you want to see more color or more sparkle, you can make as many beaded connectors as you like for this design!)
Begin connecting the individual elements (the beaded connectors you created and the pewter ball connectors) together with 5mm jump rings. Attach the small beaded connector directly to the 3-strand side of the triangular element, and then alternate beaded connectors and pewter connectors, until finally you finish with a second small beaded connector, and attach it to the other triangular element. Each of the three strans will be slightly longer than the strand above it for a beautiful draped effect. Read on to see the exact pattern used here.

The shortest strand is arranged as follows:
- small beaded connector
- pewter connector
- large beaded connector
- pewter connector
- large beaded connector
- pewter connector
- small beaded connector
The middle strand consists of:
- small beaded connector
- pewter connector
- large beaded connector
- pewter connector
- large beaded connector
- pewter connector
- large beaded connector
- pewter connector
- small beaded connector
And the longest strand contains the rest of your connectors, arranged as follows:
- small beaded connector
- pewter connector
- large beaded connector
- pewter connector
- large beaded connector
- pewter connector
- large beaded connector
- pewter connector
- large beaded connector
- pewter connector
- small beaded connector
You may refer to the photo above as well when you are assembling each strand to the three holes on each triangular element.
Finally, attach a 7-inch length of chain to the single hole at the top of each triangular element. To the ends of your chain, connect a lobster clasp and ring to complete the piece.

Thank you for joining me for this DIY necklace project, and I hope you’re inspired to make your own! Until next time, happy beading!

nice post
wow looking good
This is a lovely design. Thank you for sharing it.