• Skip to primary navigation
  • Skip to main content
  • Skip to primary sidebar

  • home
  • about adrianne
  • buy the books
    • DIY T-Shirt Crafts (2015)
    • DIY Stamped Metal Jewelry (2016)
    • Rock Painting for Beginners (2019)
  • videos
  • crafts
    • diy beauty projects
    • kids’ crafts
    • paper craft projects
    • polymer clay
    • sewing projects
  • jewelry
    • bracelet projects
    • earring projects
    • necklace projects
    • jewelry tools & supplies
  • metal stamping
    • beginners’ tutorial
    • video tutorial
    • project ideas
    • metal stamping supplies
  • recipes
    • cocktail recipes
    • appetizers
    • main and side dishes
    • sweets and treats
  • by season
    • birthdays
    • new year
    • valentine’s day
    • st. patrick’s day
    • easter and spring
    • mother’s day
    • patriotic
    • fall
    • halloween
    • christmas
    • thanksgiving
  • privacy

Happy Hour Projects logo

08/02/2012

Unconventional Quilting, and The Dandelion Block

I hope you’ve been giving some thought to getting involved in the Quilt Block Challenge!  I’ve had a lot of people say, “but I don’t quilt.”  That’s okay – in fact, that’s who I most want to be a part of this challenge.  Try something new!
Today I want to talk about unconventional quilts.  Some of my favorite ideas are the unexpected, creative, and many times sentimental.
I love this quilt that Petals To Picots just posted that she made out of her son’s baby clothes.  Not only is it cost-effective to upcycle old material, but how sweet of an idea is this?  I’m not sure I’ll be able to part with the tiny clothes from my daughter’s early months, this is the perfect solution.
Petals to Picots’ Baby Keepsake Quilt
Lil blue boo also has a great tutorial for making a t-shirt quilt – I am a sucker for “I came, I saw, I bought the T-Shirt”.  It’s a great way to remember family vacations or recap your kids’ sports careers.
T-Shirt Quilt at lil blue boo

Some quilters are pretty amazing artists.  Check out this quilt at Cedar Canyon Textiles – it was quilted and then painted, so that the stitching lines show.

One of Cedar Canyon Textiles’ Painted Quilts

I also love this idea – to use blocks of hand-painted fabric and incorporate them into your quilt.

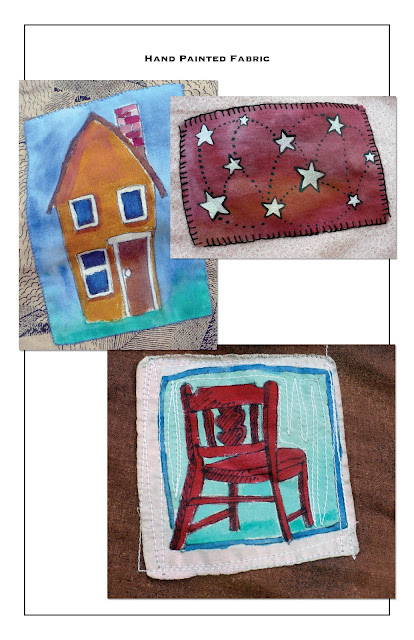
Hand-painted blocks at A Discordant Piece of Cheese
Personally – I’ve recently tried some fabric painting – and I’m loving it!  I have nowhere near the skill as these talented crafters.  Admittedly… I’m a terrible freehand painter.  (If I were to show you, you would all marvel at my daughter’ skills, because clearly, it’s preschool caliber.) :P  That doesn’t mean that I can’t execute a few great ideas that are within my limited abilities, though…
Enter: the stencil.
I. Am. Hooked.
I won a giveaway from Cutting Edge Stencils as part of my prize in the craft contest over at One Artsy Mama, and this is the stencil I picked out – the Dandelion.  So I tried my hand at designing my own printed quilt block.

What do you think?  It’s simple, whimsical, fast and easy.  Totally perfect for the one-hour rebel quilter in me. :)

If you are interested in more posts on stenciling fabric, I reviewed Cutting Edge Stencils here at Happy Hour – I LOVE them.  You could also cut your own design with freezer paper and a utility knife, if you are just doing a single block like this.  If you haven’t done that before, I made a Halloween short for Raya last fall, you can take a look at that technique here.

I used acrylic paint mixed with textile medium.  It says to use 2 parts paint to one part medium, but this fabric is pretty thin, so I went a little heavier on the medium.  The medium makes the paint permanent for washing and more flexible.

The key to using a re-usable stencil is to get your fabric nice and flat.  So I taped mine to the table.  (I put a paper bag underneath to catch the bleed-through.)
Then, I taped my stencil on.
And then just dabbed it in really lightly.  I ended up putting on 2 coats, because I had thinned it out with my medium so much.  Cutting Edge has a great fabric stencil tutorial on their blog, too – be sure to check it out if my photos aren’t doing it for you.

I did get a little bit of bleed on the stem portion after having thinned my paint.  But I think it was worth it, because once it was dry, the painted portion isn’t stiff or rough at all – and I LOVE the dandelion.   The drying time was about 15 minutes between my two coats, plus another 30 minutes at the end – and I STILL finished this block (including clean up) in less than an hour.

I hope if you’re sew-phobic, you consider a no-sew idea like this, and get involved in the challenge!  I know you may wonder why you should bother to make a quilt block if you don’t want to pursue a whole quilt.

Well, for one, I think that if you try it, you might like it (that’s such a mom response, isn’t it?  LOL).  But also – if you don’t have plans for your block at the end of the challenge – I’d love to take it off your hands!  When I have enough blocks, this quilt is going to be my blog quilt – and I’d love to incorporate other bloggers’ blocks into it!  Just drop me an email or leave me a comment if you’d like to send yours along. :)

You’ll be able to link up your finished squares starting this coming Monday, August 6.  It’s not anonymous or anything, so be sure to spread the word!  If you don’t have a blog, you can email me photos of
your finished blocks at happyhourprojectsblog@gmail.com.

See you tonight for Happy Hour Friday!  I link up to these great parties!

Filed Under: Quilt Block Challenge

copyright policy and terms of use

I love it when you love my work! All tutorials and photos published at Happy Hour Projects are copyrighted. If you would like to feature my tutorial on your website or share it on your social media you may use one photo to feature, as long as you provide a link back to the original post.

If you feature a photo, it may not be accompanied by the project tutorial or recipe, whether in my own words as it originally appears or paraphrased by you. This also includes personal sharing on social media and Pinterest. Publishing multiple photos from a project, or including instructions with an accompanying photo are not permitted and you will be asked to remove them.

I love to share my projects, and my tutorials, recipes, and e-books are ALL free for your personal use. However, photos and ideas that are published to this site are my protected intellectual property. You may print them at home, but please do not copy or distribute them. I also allow all designs to be made and sold at fundraisers, craft fairs, etc. If you are selling a piece made from one or more of my free tutorials in your online shop, I require that you use your own, original photography, and include a link back to my website to credit me as the designer.

I hope you enjoy what you read here, and please be fair when you share!

Reader Interactions

Comments

  1. Melanie says

    08/03/2012 at 4:52 pm

    I like this! I have to admit, though, I'm a traditional quilt square kind of gal, but for someone who is scared half to death of their sewing machine, this is a good alternative to still be able to make something lovely for their family!!

    Reply
  2. Meredith says

    08/02/2012 at 8:37 pm

    Love this! I was nervous to try to paint fabric, but after seeing this I'm not. I might just have to try this method too!

    Reply
  3. Lydia Criss Mays says

    08/02/2012 at 7:22 pm

    Oh, oh, oh, I love it! Have you read the children's book The Patchwork Quilt. It's beautiful! I made a quilt with my students when teaching kindergarten. I got the paper that could be ironed on to fabric and they each drew a square. It was spectacular!

    Sending see beautiful thoughts your way!

    Reply
  4. Kara says

    08/02/2012 at 4:38 pm

    How cool, Adrianne! Thanks for including my quilt :)

    Reply
  5. Shannon says

    08/02/2012 at 2:41 pm

    Very pretty! I love it.

    Reply
  6. Lawana says

    08/02/2012 at 2:33 pm

    What a cute idea… have a dear friend who has a 'vendetta' against dandelions… sew of course, I buy her everything I can with a dandelion on it… I have some really cute fabric that has dandy-lions (lions in the flowers) that would make a great border for a pillow cover with this as the center block (if I can find it LOL) I think that in addition to the paint idea, I might do the bleach pen thing on a dark fabric and just see what develops…. thanks for sharing this with us..as always you inspire me!

    Reply
  7. Lawana says

    08/02/2012 at 2:31 pm

    This comment has been removed by the author.

    Reply
  8. Melissa says

    08/02/2012 at 2:18 pm

    Wow! I love this block! The dandelion looks so delicate and it would be stunning in a quilt. Or even as a quilted pillow. Love it!

    Reply

Leave a Reply Cancel reply

Your email address will not be published. Required fields are marked *

Primary Sidebar

Hello, and welcome! I'm Adrianne, an artist, author, designer, and blogger in mid Michigan. I work from home, chase my two kids, and this once-city-girl is learning how to care for chickens and adjusting to life out in the country. I have a compulsion for daily creativity... sometimes it's jewelry-making, paper crafting, metal stamping, mixing and baking, or giving new life to recycled items. But with 2 young kids, time is short! My goal here at Happy Hour Projects is to share projects and tips that you can do in an hour or less. The ideas you find here are designed to add a little creativity in your day, no matter how much (or how little) time you have!

BUY MY BOOKS!

Copyright © 2026 Happy Hour Projects on the Brunch Pro Theme