
I don’t know what it is about Valentine’s Day. I’m not even all that romantic… I think I just really like making heart-shaped projects, haha. I made up this delicate-looking heart necklace over the weekend and I just LOVE how it turned out. If you’re brand new to wire-wrapping, you may need to practice this design a time or two before you’ve got it down, but if you’ve completed a couple wire projects before, you should find that this design makes up in about 10 minutes – giving you plenty of time and opportunity to make gifts or matched sets (like earrings or charm bracelets). It makes a great handmade Valentine gift for a girlfriend or child!

What you will need:

- 18-gauge silver plated copper wire (if you have 20-gauge on-hand but not 18, you can probably make this work anyway, it’s small enough it should still hold its shape quite well)
- Round-nosed pliers
- Flat jewelry pliers
- Wire cutters
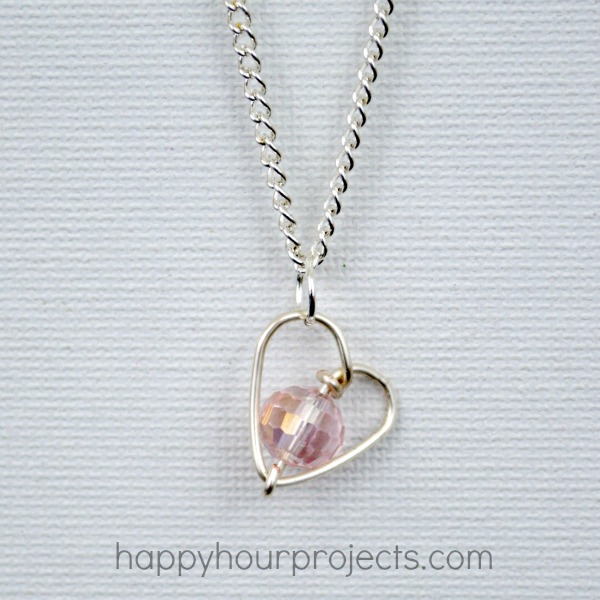
- One bead for each piece – I used a 10mm size round crystal bead. This part is where you give it your own unique style though – use whatever you like!
- 6mm Jump ring and 18″ chain (not pictured)
First, cut off about a 5-inch length of wire. More is fine, especially if you are using a larger bead size. It’s always better to have too much than not enough! You can nip off the excess as you work.
Next, see the photos below to check the formation of the heart frame. About 1 inch from the end of your wire, wrap it around the largest part of your round pliers. Then, estimate the space needed for your bead, and crimp the bottom peak of the heart with your flat pliers. Finally, wrap the opposite side of your wire over the pliers for the second top “hump”.

Now, add your bead, and wrap your wires. Feed the bead onto the wire pointing straight down. The next part is the trickiest part of the whole project – to feed that wire at an angle around the center post just above the bead. You will need to use your pliers to bend it and feed it through the heart frame. Once you’ve managed this wrap, you’ve mastered this project. If your first try doesn’t work quite how you like – that’s OK! Wire is plentiful and this form makes up quickly. Just practice it a few more times until you find what works for you!
Once you’ve gotten the top wrap, bend the bottom wire up, and wrap it around the bottom of the frame. I only wrapped mine once and it’s holding just fine, so you can certainly trim off all the excess wire here. Now all you need to do is add on a jump ring and a chain to make the necklace.

If you find your heart isn’t exactly “even” (you can see above that the hum on the left is taller than on the right) – you can easily camouflage that fact by hanging the heart from whichever side is a bit longer. It makes it look quirky and whimsical – like it was meant to hang exactly that way. ;)
I had a lot of fun designing this – and I hope you like it too! What kinds of hearts have you been crafting lately?

Thank you for this project! Can’t wait to try it.
I love it… so simple and elegant! Thank you for sharing. ?
It’s a beautiful, fun idea! I’ve been looking for new ideas for heart projects. You have really inspired me to get better at wire wrapping. I like the idea of a necklace with a matching pair of earrings. Happy New Year!
Thank you for making the instructions easily avaiable. I am going to make several for Chrisymas resents
OMG Adrianne, this is absolutely stunning! I MUST make one of these necklaces!
I love the delicate colour you chose but with a different bead this could look completely different, very versatile!
Hi, just wanted to let you know I pinned this and I’m getting a lot of repins and likes on your project. Pat
Check that out! I love it, Adrianne – it’s so beautiful!
Thank you so much for sharing this lovely pendant. It is so pretty. I am definitely going to make one. Thank you for being so generous … and, Happy Valentine’s Day to you.
So pretty! I love it! You are so creative!! Love the jewelry you make!!
This is darling- I love it!!
This is a great tutorial, as I would have had no idea how to make a heart. I think I’m up to trying it out now. Pinned for later. Thanks for the incredible inspriation!
This is so sweet and pretty and I have everything to make one!! YAY! Great design, thanks for sharing.
if you simply set aside part of your vacation fund for playing games, you do&278n1#;t have to stress saving money. you can simply schedule your stay around the remaining money.
Oh that is so pretty, you do make it look easy! I love the delicate colour you chose but with a different bead this could look completely different, very versatile!
You are so creative.
I run in VFF and 4mm shoes. I have achilles tendonitis and have been resting (no running) for about 2-3 weeks. I have some good days and some bad days as far as pain/aches go. My question is, should I be wearing my VF12&8#F7;s and other 4mm drop shoes throughout the day, or should I wear regular traditional running shoes during my recovery?
I just love this!!! so pretty!!
Natasha
These would also be cute as a pair of earrings! Thanks for sharing :)
Thank you for the beautiful idea, I think this would be AWESOME as a mother/grandmother necklace/bracelet for Mother’s Day or even Christmas so I am already planning my Christmas for the moms in my family next year.
Thank you and may you have a blessed day