
Hey friends! I have a fun DIY jewelry project for you today, combining design stamps together to create a festive holiday wreath. Even if you’re a beginner at metal stamping, design stamps can be used in lots of ways! Take a look and get a little inspiration for yourself!

I’m using metal stamps from today’s post sponsor, ImpressArt, and I’ll share with you how to get the look. Those of you who read here often know I’ve been stamping with ImpressArt for years, and I love sharing the new designs and products they’re rolling out! Some of my favorite shapes are now available in ImpressArt’s special alloy, Alkeme, which takes an impression as well as pewter, but shines like silver.
I spotted these scalloped discs and knew right away they could be used for SO many designs! For your convenience, I’ll leave affiliate links and links to ImpressArt in the list below if you’d like to click through for any info on the products I’m using today.

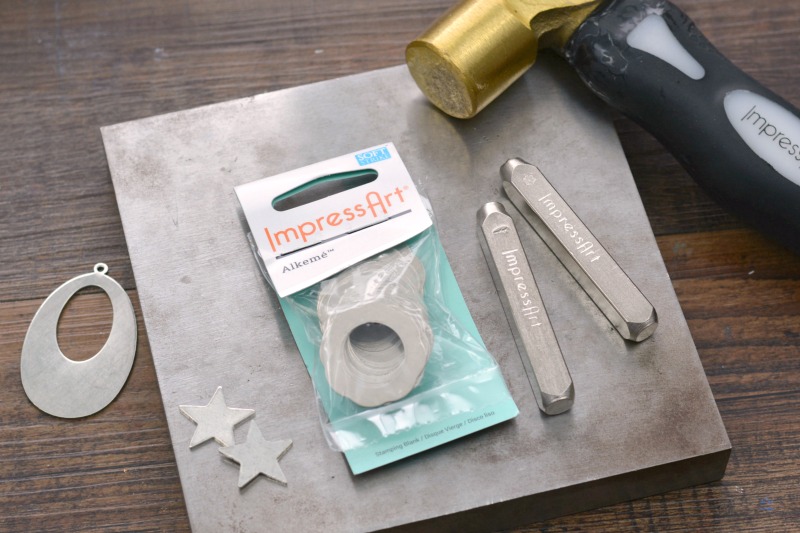
- Steel Bench Block
- ImpressArt 1 lb Brass Stamping Hammer
- ImpressArt Gift Box 6mm Design Stamp
- ImpressArt Curved Branch 6mm Border Design Stamp
- ImpressArt Large Flower 6mm Design Stamp (from series 1 Mandala Set)
- 1/2 inch Alkeme Circle Tag
- ImpressArt 1-1/8 inch Alkeme Scalloped Washer Blank
- ImpressArt Stamp Straight Tape
- ImpressArt Stamp Enamel
- Ornate Jewelry Head Pin
- 4mm Red Faceted Czech Glass Bead
- 1 – 15mm Jump Ring
- 3 – 4mm Jump Rings
- ImpressArt Chain Nose Pliers
- ImpressArt Round Nose Pliers
- ImpressArt Flush Cutters
- 18? Necklace Chain

Begin by stamping a few flowers onto the scalloped disc. Alternately, you can use small circles to create berries, or create a wreath that’s all branches! If you want to add floral accents, be sure to stamp them first so that they stand out. Then, use the curved branch around the flowers to fill in all the empty spaces.

To add a little more cheer, I also stamped a tiny tag with the gift box stamp. Any holiday icon would work here as well, including a snowflake or a Christmas tree!
Next, darken impressions with Stamp Enamel. Just apply it to the stamped area, wait ten seconds, and wipe the excess away. It’s virtually permanent, and so easy to apply.
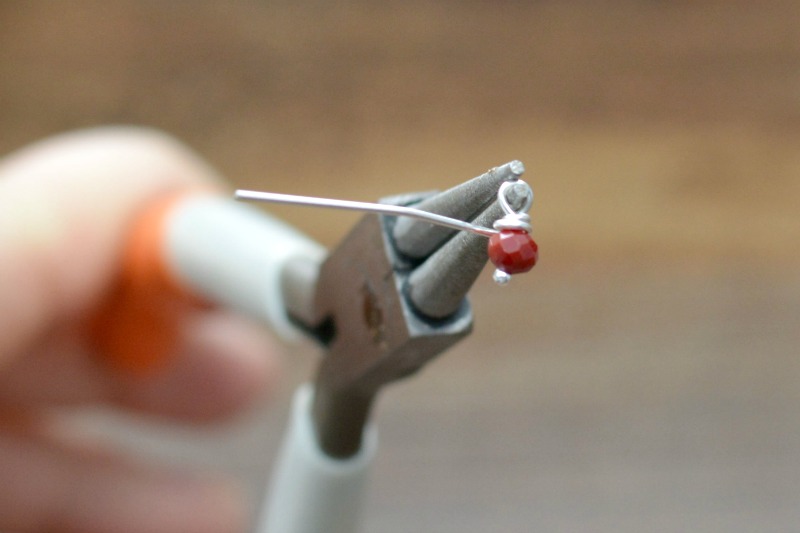
Now that the metal is stamped, I still wanted to add a little sparkle and a pop of holiday color. I threaded a red 4mm bead onto a jewelry head pin, wrapped the pin around my round nose pliers, and wrapped the wire end in coils between the loop I created and the top of the beads. This is a basic wire wrapped charm and I use the technique in many (maybe most!) of my favorite designs. (If you’d like to see wire wrapped charms in-action, check out my YouTube video on how to make jewelry charms.)

Finally, assemble the pieces! Use 4mm jump rings for the charms, and attach all three pieces to a 15mm jump ring so that the charms hang in the center. (Note: you’ll need to use 2 rings on the gift tag charm so that it faces forward when worn.) String the pieces onto a necklace chain through the large jump ring at the top.
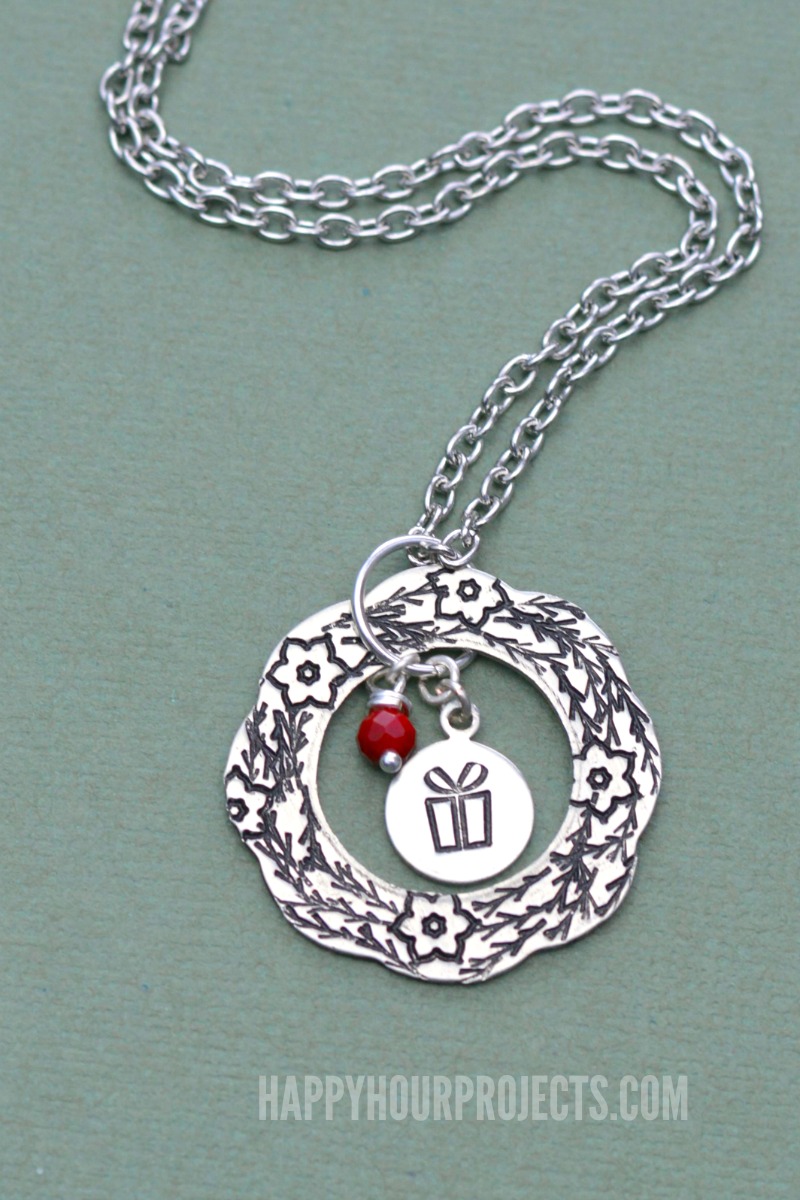
So without any words at all, you can create a fun and festive piece of hand stamped jewelry! Design stamps are a great way to make works of wearable metal art!

I hope you enjoyed today’s project, and I hope you’re enjoying the month of December! (If I get my Christmas wish, I’ll have lots of time in my studio with my hammers!) See you all again soon ~

impressive
I admire the way you engage readers with both facts and storytelling.
Crafted Geometry Dash: Design Stamps Wreath Necklace brings a unique rhythm to hand-stamped jewelry, echoing precision and creativity in every beat.
I am grateful for the information and the suggestions that you have provided. I will make an effort to understand it better for more.
nice post
wow looking good