• Skip to primary navigation
  • Skip to main content
  • Skip to primary sidebar

  • home
  • about adrianne
  • buy the books
    • DIY T-Shirt Crafts (2015)
    • DIY Stamped Metal Jewelry (2016)
    • Rock Painting for Beginners (2019)
  • videos
  • crafts
    • diy beauty projects
    • kids’ crafts
    • paper craft projects
    • polymer clay
    • sewing projects
  • jewelry
    • bracelet projects
    • earring projects
    • necklace projects
    • jewelry tools & supplies
  • metal stamping
    • beginners’ tutorial
    • video tutorial
    • project ideas
    • metal stamping supplies
  • recipes
    • cocktail recipes
    • appetizers
    • main and side dishes
    • sweets and treats
  • by season
    • birthdays
    • new year
    • valentine’s day
    • st. patrick’s day
    • easter and spring
    • mother’s day
    • patriotic
    • fall
    • halloween
    • christmas
    • thanksgiving
  • privacy

Happy Hour Projects logo

08/19/2014

Stamped Butterfly Necklace

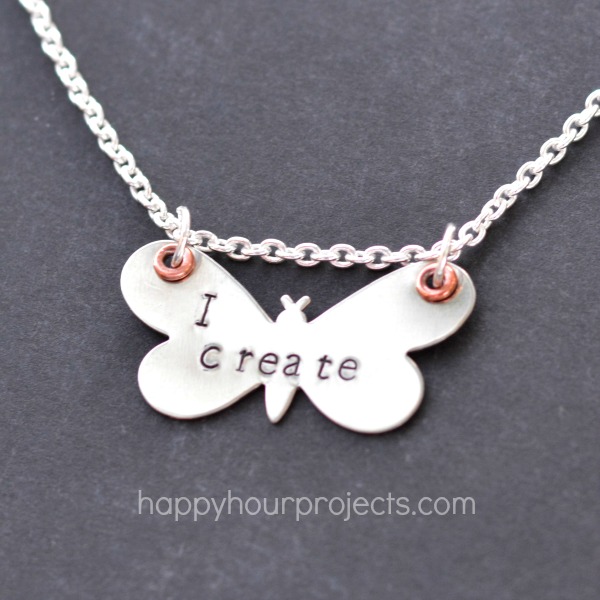
So you may have seen last week that I got into setting eyelets.  And yeah, I am hooked.  I thought it would be a great addition to this necklace idea that I have had in mind for a little while.  I wanted a wide charm, but attaching the chain directly the blank doesn’t allow it to move well when you wear it.  Threading it through jump rings lets it lay perfectly.  So I took a moment to stamp up a butterfly blank (the stamping is optional, this would still be a pretty piece without any stamping!) and I’ve gotten several compliments on this piece.  It’s small… almost dainty.  It’s definitely in the “minimalist” category.  But I’m going to show you today how to finish even basic pieces more professionally by adding contrasting (or coordinating – it’s up to you) eyelets.

Butterfly Stamped Necklace at www.happyhourprojects.com

First of all, please don’t judge that my stamping isn’t precisely spaced, haha.  I can tell every time I take a break from stamping that I get a little rusty!  You will probably notice the same thing if you’re just getting into stamping.  I haven’t done it for a couple of months, and I’ve lost my touch a little.  The only thing for it is more practice. Darn… ;)

I got the supplies for today’s project from Goody Beads, which is one of my favorite sources for my metal stamping projects. Because these are specialty supplies, I’m going to leave links below to the exact products I used. They are affiliate links, which means that if you decide to make a purchase, it does support my blog at no cost to you. (Relationships like this keep me in supplies to keep bringing you new project ideas – but feel free to shop your own favorite sources, instead.) ;) Anway, if you’re going to get started in metal stamping, Goody Beads has a dedicated category to stamping essentials for beginners.  It’s actually a list that I hand-picked.  You can also learn more at my jewelry stamping for beginners post from a few years back.  I’m not going to get into how to stamp today, but I really do have lots of projects on the topic that you’re welcome to check out, including a video tutorial.

Butterfly Stamped Necklace at www.happyhourprojects.com

  • Metal stamping supplies (optio-al)
  • Wide blank (think hearts, rectangles, feathers, angel wings, butterflies, etc)
  • Bench block and hammer
  • Eyelet Setting Tool
  • 3.7mm eyelets – I used a copper finish here, but you can choose any color you like
  • Small 2-hole punch for a 3/32? hole
  • 18″ chain (get something around 2mm)

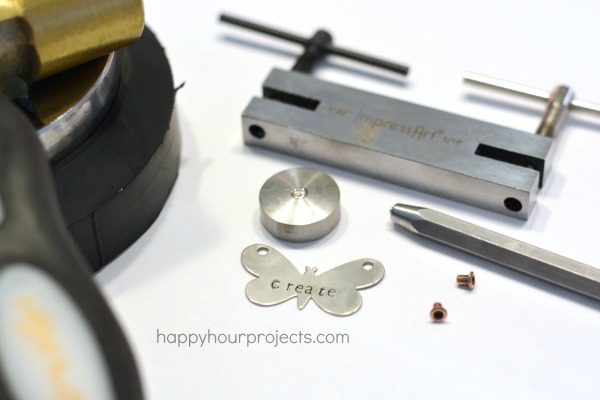
As you can see, I did stamp my blank.  I’m a stamper, I can’t help it! ;)

Butterfly Stamped Necklace at www.happyhourprojects.com

Next, I punched holes in the top corners of my blank.  Rivet setting is actually really easy.  I love this Tierracast set, all you have to do is place a rivet into the groove on the setting base (do this on your bench block or another hard surface – you don’t want to do it on your table or anything, because you’ll end up marring the surface).  Add your blank onto the base with the rivet coming through (it can be face up or face down, I tried both ways and they look equally good).  Then, place the groove of the setting tool into the rivet hole, and tap the end with your hammer until it’s flat.  For me that was 6-8 taps with my hammer.

Butterfly Stamped Necklace at www.happyhourprojects.com

So now you have lovely finished holes.  So all you need to to is add a jump ring to each, and string your chain through!  You can make your own chain if you want, or use a pre-made one, but 18″ is a nice short length.  For larger blanks, you can get away with longer chains. :)

Butterfly Stamped Necklace at www.happyhourprojects.com

That’s it!  If you’re pretty well-versed in stamping, or if you’re skipping that part, you can definitely make this is under 10 minutes.  If you need stamping practice, allow a little longer.  It took me longer to get my supplies out than it did to make this!

Butterfly Stamped Necklace at www.happyhourprojects.com

I hope you enjoyed this idea!  It’s something you can personalize any way you like!

Adrianne Signature

Filed Under: Fashion, Jewelry, Metal Stamping, Necklaces, Tutorials Tagged With: 10-minute project, accessories, butterfly, eyelets, jewelry, metal, metal stamping, necklace, stamped

copyright policy and terms of use

I love it when you love my work! All tutorials and photos published at Happy Hour Projects are copyrighted. If you would like to feature my tutorial on your website or share it on your social media you may use one photo to feature, as long as you provide a link back to the original post.

If you feature a photo, it may not be accompanied by the project tutorial or recipe, whether in my own words as it originally appears or paraphrased by you. This also includes personal sharing on social media and Pinterest. Publishing multiple photos from a project, or including instructions with an accompanying photo are not permitted and you will be asked to remove them.

I love to share my projects, and my tutorials, recipes, and e-books are ALL free for your personal use. However, photos and ideas that are published to this site are my protected intellectual property. You may print them at home, but please do not copy or distribute them. I also allow all designs to be made and sold at fundraisers, craft fairs, etc. If you are selling a piece made from one or more of my free tutorials in your online shop, I require that you use your own, original photography, and include a link back to my website to credit me as the designer.

I hope you enjoy what you read here, and please be fair when you share!

Reader Interactions

Comments

  1. Marilyn says

    08/26/2014 at 12:23 pm

    WOW, this is gorgeous? I think this would make a gorgeous key chain!

    Reply
  2. Tara says

    08/20/2014 at 2:53 am

    Adrianne – you make it seem so easy! I love the copper rivets on the butterfly. I’m going to try that – once my life settles down and I can pull out my stamping gear again… I’m going to conquer it!

    Reply

Trackbacks

  1. DIY Stamped Butterfly Necklace | Craftsology says:
    08/26/2014 at 3:27 am

    […] you have got everything you need, please view Step by Step Tutorials of DIY Stamped Butterfly Necklace […]

    Reply

Leave a Reply Cancel reply

Your email address will not be published. Required fields are marked *

Primary Sidebar

Hello, and welcome! I'm Adrianne, an artist, author, designer, and blogger in mid Michigan. I work from home, chase my two kids, and this once-city-girl is learning how to care for chickens and adjusting to life out in the country. I have a compulsion for daily creativity... sometimes it's jewelry-making, paper crafting, metal stamping, mixing and baking, or giving new life to recycled items. But with 2 young kids, time is short! My goal here at Happy Hour Projects is to share projects and tips that you can do in an hour or less. The ideas you find here are designed to add a little creativity in your day, no matter how much (or how little) time you have!

BUY MY BOOKS!

Copyright © 2026 Happy Hour Projects on the Brunch Pro Theme