• Skip to primary navigation
  • Skip to main content
  • Skip to primary sidebar

  • home
  • about adrianne
  • buy the books
    • DIY T-Shirt Crafts (2015)
    • DIY Stamped Metal Jewelry (2016)
    • Rock Painting for Beginners (2019)
  • videos
  • crafts
    • diy beauty projects
    • kids’ crafts
    • paper craft projects
    • polymer clay
    • sewing projects
  • jewelry
    • bracelet projects
    • earring projects
    • necklace projects
    • jewelry tools & supplies
  • metal stamping
    • beginners’ tutorial
    • video tutorial
    • project ideas
    • metal stamping supplies
  • recipes
    • cocktail recipes
    • appetizers
    • main and side dishes
    • sweets and treats
  • by season
    • birthdays
    • new year
    • valentine’s day
    • st. patrick’s day
    • easter and spring
    • mother’s day
    • patriotic
    • fall
    • halloween
    • christmas
    • thanksgiving
  • privacy

Happy Hour Projects logo

03/23/2017

Craft Lightning Mother’s Day Crafts | DIY Photo Charm Necklace

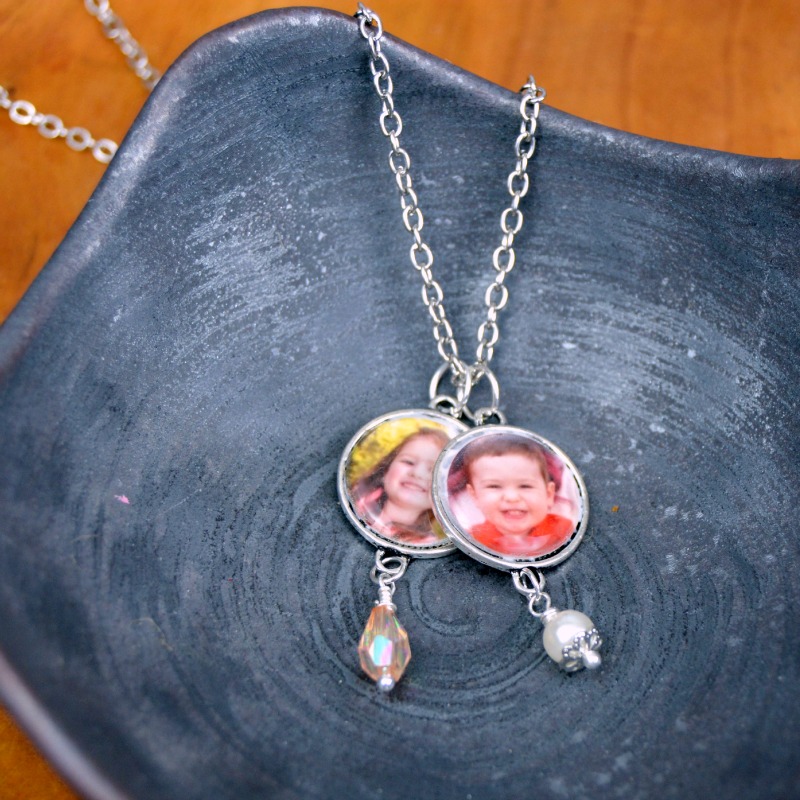
Hey friends!  I have a great little DIY necklace to show you  today that’s an easy way to bring your special photos with you everywhere you go.  I have these sweet photo charms of my kiddos on a long chain, and it’s gotten so many compliments.  This Mother’s Day gift is not too difficult, and the personal touch goes a long way!

Craft Lightning Mother's Day Crafts | DIY Photo Charm Necklace at happyhourprojects.com

This project is part of this month’s Craft Lightning Mother’s Day crafts, and you can make it in 15 minutes or less!  I’ll leave affiliate links in the list below in case you need to shop for supplies to make this project.  Just click through to locate items on Amazon.

This project is part of this month's Craft Lightning Mother's Day crafts, and you can make it in 15 minutes or less!  

  • Bezel Connectors with Domes (Adhesive Resin domes are easiest but glass works fine too!)
  • 2mm Cable Chain – 24-28 inches
  • Craft Glue
  • Jewelry head pins – one for each charm you’re adding
  • Beads you love
  • Jump rings – 2 for each charm you make
  • Chain Nose Pliers, Round Nose Pliers, and Wire Cutters
  • Optional: Round hole punch, sized to match your bezel (mine are 5/8″)
This project is part of this month's Craft Lightning Mother's Day crafts, and you can make it in 15 minutes or less!  

Depending on which bezel kit you buy, you’ll either be gluing the photo onto the bezel and adding a self-adhesive dome, or adhering the image to the glass dome first and then gluing that to the bezel.  The self-adhesive domes work best if you can find them, but the glass will give you a heavier, more professional look.  My photos demonstrate how to use the self-adhesive domes, and glossy photos will work best!  Trace and cut out the image, or you can take a shortcut by using a round hole punch! Glue the images into the bezels. You can use your favorite paper-safe adhesive for this (I used Aleene’s Tacky Glue). Allow it to dry while you work on the next steps.

I had some leftover cards from the summer with a matte finish that I used here, and while the necklace still looks lovely, you’ll get a clearer finished piece by using a smooth or glossy paper.  For glass domes, you’ll want to use a matte-finish paper.  I demonstrate how to adhere images to round bezels in my Glass Map Necklace project from a few years back, so check that tutorial out as well if you’re working with a glass set and want some pointers!

If your bezels didn’t come with domes at all, you can alternately mix up some jewelry resin to seal your piece.  I share how to use jewelry resin in my tutorial for a coffee-lovers’ necklace, so there are tips for that style here at Happy Hour Projects as well.

This project is part of this month's Craft Lightning Mother's Day crafts, and you can make it in 15 minutes or less!  
Next, create your charms. If you haven’t made beaded charms before, now is the time to learn. I use them in lots of my favorite jewelry projects to add a bit of color or sparkle to a piece. It’s a two-step process. First, add a bead to a jewelry head pin. I’m also using a bead cap in this example, which just makes a bead look slightly more fancy when you’re finished. Grip the pin with your round nose pliers, and wrap it around one side, forming a loop.

Between the loop you created and the bead, wrap the end of the pin around the base, filling the space with coils of wire. You only need one wrap to secure your charm, but if you like the looks of more coils, then try leaving a bit more space between the bead and the loop. The goal is to fill the space so that the bead won’t slide around on the pin. If there’s any excess wire, trim it off with your wire cutters.

This project is part of this month's Craft Lightning Mother's Day crafts, and you can make it in 15 minutes or less!  

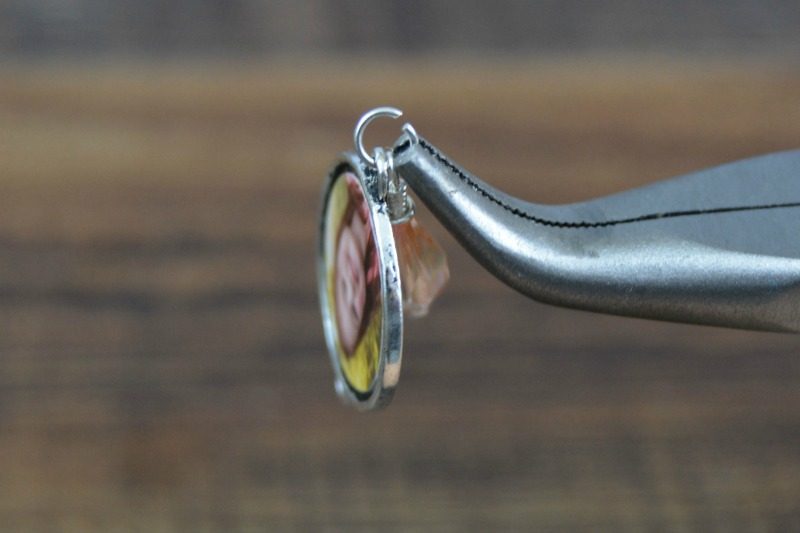
While I was still waiting for my photos to dry, I worked on assembling the rest of the necklace. To attach the beaded charm(s) you make to the photo charms, twist open a jump ring with your jewelry pliers, and add both pieces. Twist the ring closed again. Add a second jump ring to the top of the photo charm so that you can string it on a necklace.

This project is part of this month's Craft Lightning Mother's Day crafts, and you can make it in 15 minutes or less!  

When your photo charms have dried, you can add the self-adhesive domes (which is what I used), add your resin, or add your glass dome to the bezel, depending on what type of bezel you’re using.

This project is part of this month's Craft Lightning Mother's Day crafts, and you can make it in 15 minutes or less!  
String the charms onto a long chain (I like a 28 inch length, which hits mid-chest on most women). If you’re making your own chain and plan to just slip the necklace over your head, you don’t even need a clasp, just connect the two ends of your chain together with a small jump ring.

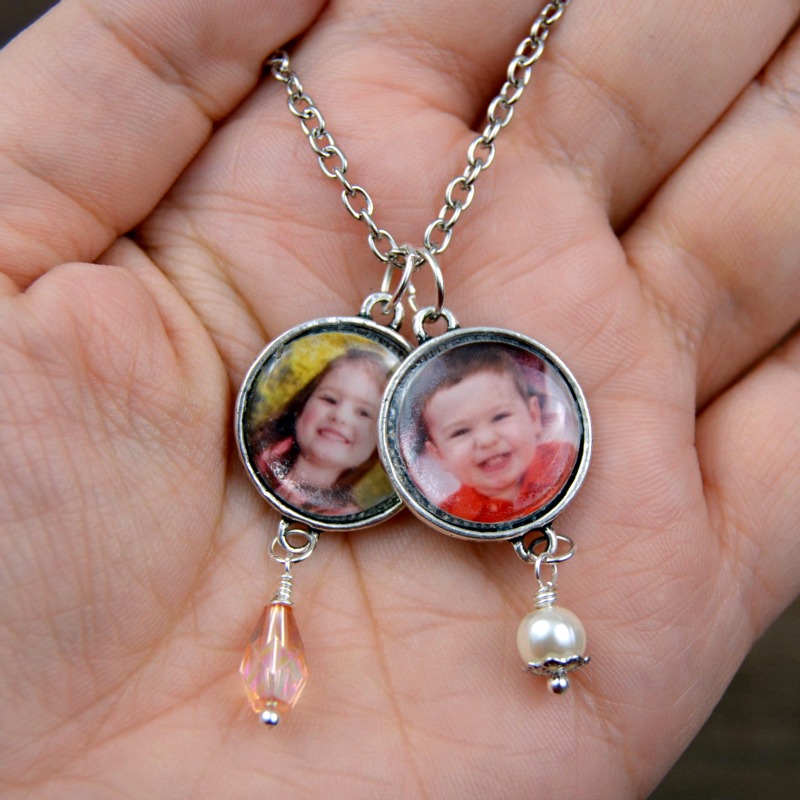
This keeps my kids close to my heart every time I wear it, so it makes for a lovely Mother’s Day gift!

This project is part of this month's Craft Lightning Mother's Day crafts, and you can make it in 15 minutes or less!  

Check out  these other great Mother’s Day crafts from Here Comes The Sun, 100 Directions, Me and my Inklings, Creative Cynchronicity, Storypiece, My Mom Made That, The Country Chic Cottage, and 30 Minute Crafts.  You can click the image to visit the post and learn more!

    http://www.storypiece.net/2017/03/22/how-to-make-beautiful-adult-coloring-page-seed-packets/    

Filed Under: Fashion, Jewelry, Mother's Day, Necklaces, Tutorials Tagged With: beads, birthday, charms, Craft Lightning, gift, jewelry, Mother's Day, necklace, personalized, photo

copyright policy and terms of use

I love it when you love my work! All tutorials and photos published at Happy Hour Projects are copyrighted. If you would like to feature my tutorial on your website or share it on your social media you may use one photo to feature, as long as you provide a link back to the original post.

If you feature a photo, it may not be accompanied by the project tutorial or recipe, whether in my own words as it originally appears or paraphrased by you. This also includes personal sharing on social media and Pinterest. Publishing multiple photos from a project, or including instructions with an accompanying photo are not permitted and you will be asked to remove them.

I love to share my projects, and my tutorials, recipes, and e-books are ALL free for your personal use. However, photos and ideas that are published to this site are my protected intellectual property. You may print them at home, but please do not copy or distribute them. I also allow all designs to be made and sold at fundraisers, craft fairs, etc. If you are selling a piece made from one or more of my free tutorials in your online shop, I require that you use your own, original photography, and include a link back to my website to credit me as the designer.

I hope you enjoy what you read here, and please be fair when you share!

Reader Interactions

Comments

  1. narratif.borda.ru says

    11/10/2019 at 4:59 am

    How do you connect my HP printer to my wi-fi network?
    obtain directions from the HP internet site for your unique model.

    probably in the owner’s manual or another setup page

    Reply
  2. happy wheels says

    09/10/2018 at 2:37 am

    The pendant you make is very beautiful. I like so much

    Reply
  3. kanchipuram sarees says

    08/16/2018 at 8:01 am

    nice post

    Reply
  4. golu dolls says

    08/16/2018 at 7:57 am

    looking good

    Reply
  5. Barbara Cameron says

    06/26/2017 at 3:04 pm

    You can use your kids birthstones for the charms.

    Reply

Trackbacks

  1. DIY Mother’s Day Silhouette Necklaces | Organized Classroom says:
    12/26/2021 at 4:00 pm

    […] DIY Photo Charm Necklace: Another way to use up those extra student photos you have from throughout the school year. […]

    Reply
  2. 10 DIY Necklace Tutorials For Teenagers says:
    08/28/2021 at 2:52 am

    […] Clay Necklaces – Projects with Kids DIY Copper Ring Necklace – Pretty Handy Girl DIY Photo Charm Necklace – Happy Hour Projects Pixie Dust Jar Necklace – Sugar Spice and Glitter Gold Nugget […]

    Reply
  3. 20+ Homemade Gift Ideas for Mother's Day - My Mom Made That says:
    04/20/2017 at 11:34 am

    […] love the beads on this version of the Photo Charm Necklace by Happy Hour Projects.  In fact, I think I might have to make it for myself– and it only […]

    Reply
  4. CraftCrave | DigiFree | CraftCrave says:
    04/01/2017 at 12:05 am

    […] Craft Lightning Mother’s Day Crafts | DIY Photo Charm Necklace – 1 freebie(s)? […]

    Reply

Leave a Reply Cancel reply

Your email address will not be published. Required fields are marked *

Primary Sidebar

Hello, and welcome! I'm Adrianne, an artist, author, designer, and blogger in mid Michigan. I work from home, chase my two kids, and this once-city-girl is learning how to care for chickens and adjusting to life out in the country. I have a compulsion for daily creativity... sometimes it's jewelry-making, paper crafting, metal stamping, mixing and baking, or giving new life to recycled items. But with 2 young kids, time is short! My goal here at Happy Hour Projects is to share projects and tips that you can do in an hour or less. The ideas you find here are designed to add a little creativity in your day, no matter how much (or how little) time you have!

BUY MY BOOKS!

Copyright © 2026 Happy Hour Projects on the Brunch Pro Theme