
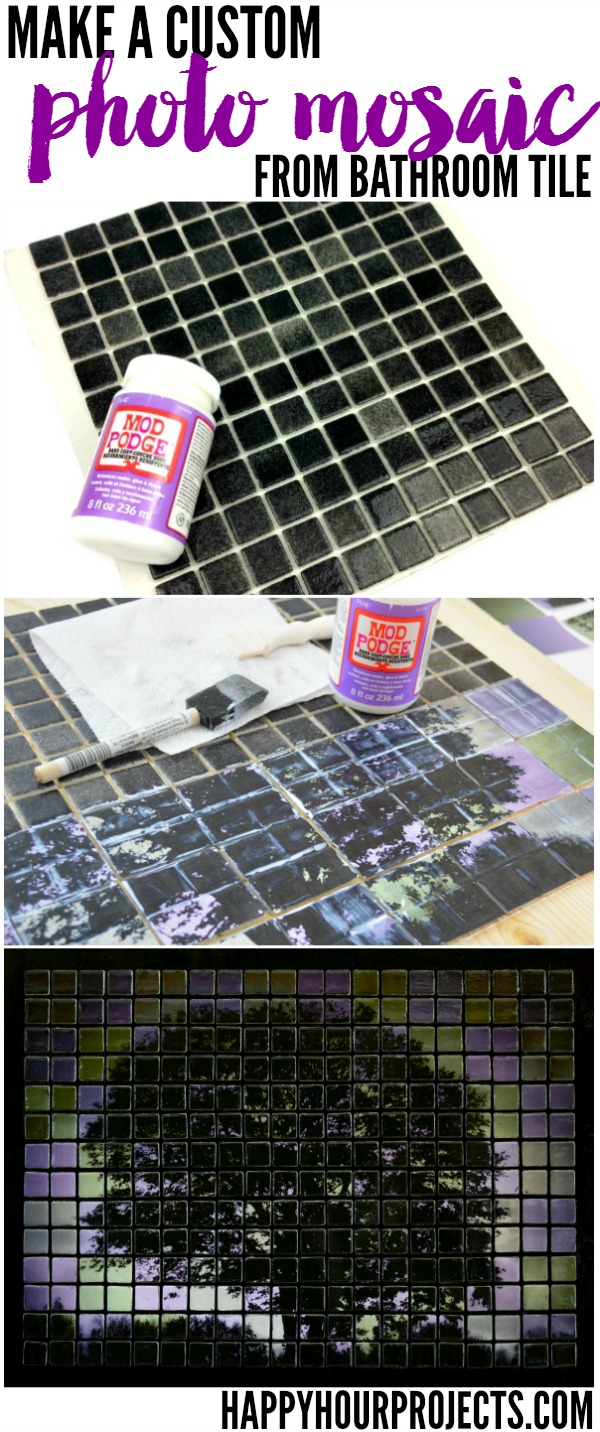
Happy Earth Day! Want to celebrate with me on my tree-themed project? I’m all kinds of excited this week, because yesterday I registered for ArtPrize 2014! [Insert the sensation of 1,000 butterflies in my stomach that may or may not make me throw up a little bit.] My creative side has always leaned more toward “craft” than “art”, but I’ve been working on it. The “art” side of me has been dying to get out for a long time now, and I’m finally finding where I’m strong. See, if you met some of the people in my family, you might think I had paint and ink and charcoal running through my veins. My family is home to some amazing artists. But I’m kind of stuck on stick figures, digital media, and gluing bits to bobs, haha. The thing is – that’s really not all that bad. Because it means I dream up things like this:

If you read here regularly, you may remember what I had to say about art earlier this year – I chose “art” as my one-word for 2014. And I am embracing it, and entering in this year’s competition for the world’s largest cash art prize – it’s over a half million dollars awarded to winning artists from around the world.
I’m not going to win. Crap, I don’t even know if I’ll make it into the competition. It’s nerve-wracking just sharing this part of the journey with you all; I’m putting myself out there not even knowing if someone will take my art. Those butterflies in my belly are a nervous wreck, too. ;)
I can start talking to venues to try to get accepted beginning next week. ArtPrize is cool; it’s all over the city in businesses, parks, and museums. The different venues curate their collections for the public to check out from the pool of entrants. Last year there were over 1500 entries, and this year I am hoping to be one of them! Fortunately I can do this one step at a time, starting with registering. I’ll tackle turning on the charm to get accepted next week, haha.
This was obviously not a one-hour project, like I’m known for. I worked on this piece for a lot of hours after the kids were in bed. I estimate that I have between 25-30 hours into it. You may remember a similar, smaller project I shared before – I have made a tile mosaic with a tree silhouette before. But I learned a lot from (and since) that project, and I upped my game this time around. I went about 3 times bigger, and made adjustments that should make this piece more durable for the long-term.
The inspiration this time around all started with a photo I snapped on my iphone one morning. Really. This is it, unedited:

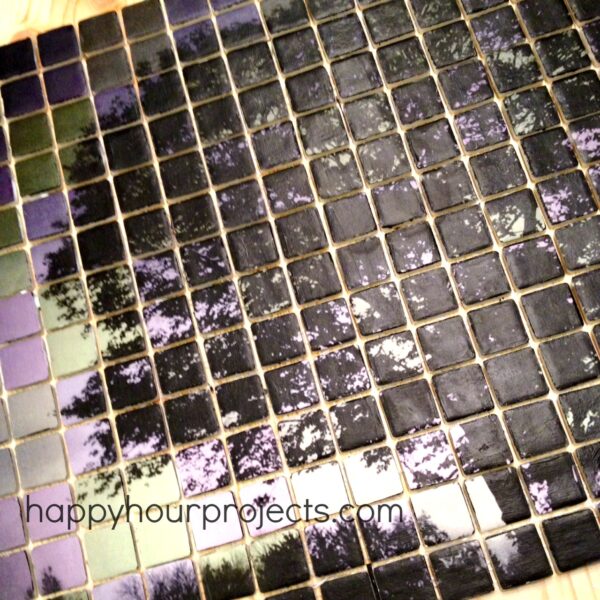
It’s just a cool tree that I drive by on my way to work. I made it “mine” for this project in a graphic editing program (I use PicMonkey), because, obviously, the for sale sign had to go, and I envisioned a high-contrast look. So I settled on a two-tone color scheme of purple and green, and printed the same image in a few different shades on my printer at home.

I got smart this time, and I used ceramic tile (just the stuff for kitchens and bathrooms!) to mount my image on. The advantage is, most of it is still connected together. Because the intended use is to put grout over it, underneath each sheet of tile is a sort of netting that holds sheets of tile together. That meant that I didn’t have to cry if any of my 280(!!) tiles got out of order as I worked with them to make all those tiny works of art. Not all of the tile was connected, I had to do some custom trimming to create 20 x 14 rows. But I was able to work in big enough segments it wasn’t in any sort of spillage danger, because this thing got moved several times over the course or a couple of months.
I did apply my artwork in groups of 4, to group the colors together for greater impact. And this is where my craft side shows: Mod Podge. Haha. I LOVE the hard coat formula for heavy duty work. It’s not water-based like the original formula so I didn’t have any ink bleed on this project. (Still, you always want to test for color-fastness on a small sample.)

Once it dried, I went over every square with an exacto knife to trim every edge, and then I added 2 more coats of sealant.
Then, I sprayed it with a few coats of a spray finishing glaze. Each coat had to dry for 24 hours in between – it’s got a gorgeous gloss on it in-person (though photographing something so reflective has been a challenge, haha!) But finally, the tiles were ready. 280 tiny little works of art. I removed each one from the connecting net underneath, and mounted them with heavy duty adhesive onto a board that I had painted black.
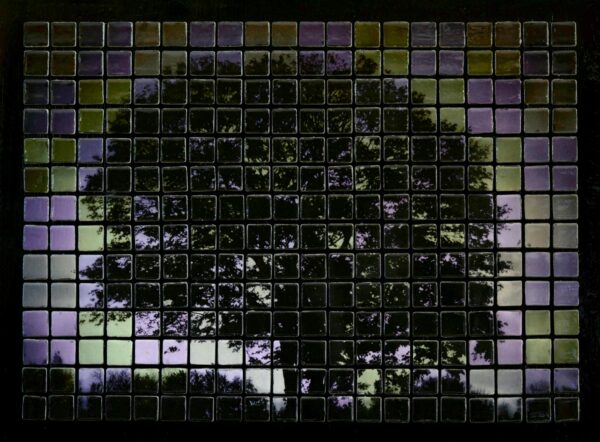
Finding a frame was a huge challenge for me, too. Every color I tried either didn’t “pop” enough, or the colors didn’t match. So finally, I just found a design I liked, painted the whole thing black, and used silver Rub N Buff on it to finish the color.

Right now it’s in my office area, (AKA the only place that’s not a wifi blank hole in the house, ugh!) until it hopefully finds a venue to be displayed this fall.

I can’t even explain how proud I am that I’m pursuing this. And no matter how I write that sentence, it sounds so cheesy! But it’s true – being a “real” artist is one of those bucket-list things I’ve always wanted to do someday. Feeling artistic isn’t quite the same as pursuing art in a tangible way like this.
Follow up: I did get accepted into the competition! Want to know more about my piece and my inspiration? I made a quick video sharing my thoughts here:

Just stunning. I was wondering if it would be an option to glue the entire photo to the tile bed, and then use an Exacto knife to cut the individual tiles. Do you actually cut each square individually? Thanks for sharing?
If you are using just one photo, that is certainly possible. I printed the same photo in multiple hues and then mixed and matched the different photos back together to re-create the image. In this case, they obviously must be cut first. I did use a pair of small scissors to trim any excess away from the gaps, because I found that it gave me much more precise control for trimming than an exacto knife, but if you are quite good with the knife you may find it to be much faster for you. It was more important to me to get it right than to do it quickly. :)
Am thinking of doing something like this–but so far here in La Paz BCS Mexico there is no Mod Podge. Any other suggestions?
Really any kind of craft glue should work, ideally, something not water-based, so that ink bleed isn’t an issue. I’m not sure what other options you have there but just check the ingredient list on your white craft glues!
What an excellent work of art! You are truly gifted. It is great that you are pursuing something you have always wanted to do. Thank you for the ideas you share with us. Blessings
Absolutely gorgeous Adrianne. You do have the art gene. Just love your blog. Thanks for all the inspiration.
Adrianne,
I am blown away with the ideas that you constantly come up with, especially being a mother and working full time!!
This project is the most amazing looking items! I just have to try this. The colors you used are truly spot on for this image.
I paint, do stained glass, make and sell jewelry on ebay and etsy. I have also done a few years of custom wedding cakes till I could not stand the smell of buttercream and vanilla any longer. I have also sewn most of my husbands shirts that he has worn for the past 20 years. I am now wanting to start working with art clay.
Now you came along with this project and this is all I can think of at this minute!! You have rocked my boat!!
I have a question about this project……I noticed that you took the tiles off of the backing to glue them onto a black painted background. Do you think it would work for me if I kept the tiles on the net backing and used a black grout? Your tiles are so perfectly lined up but my hands have started shaking a lot as I get older and am not sure that I could get them even. Just wondering if the grout would ruin the picture.
I admire your work and look forward to your emails every evening.
Thank you
Carole
Carole, I really considered trying grout, but I had WAY too much work into my tiles and not enough time to start over to experiment. By using the spray glaze, though, especially if you’re very careful to get all around the edges of the tiles too (and spray the cracks, not just the tops), I don’t see why it wouldn’t work. So I’m not confident saying, “go right ahead!” but I really think that with the hard finish, a layer of grout should be okay. Experiment on something small first! I may try it too on a smaller project, to see how it goes!
Another thing to note, this technique really works best for high-contrast, silhouette-style images. When you cut up photos (like people), you have to make the dimensions really large, so that the gaps between tiles are very small by comparison. Otherwise you end up missing eyes, teeth, parts of a smile, etc – and that ends up detracting from the overall look unless the face is really large.
Thanks for the tips, Adrianne!! Will let you know how it turns out!!!
Adrianne, this is an absolutely stunning work of art! Well Done, you CAN be very very proud of what you’ve created! Wow, I think it’s awesome.
Thanks for a wonderful blog, I always look forward to your posts, keep them coming :)
Kind Regards all the way from Zambia
Leigh Ann
Thanks so much for sharing!! I believe I have just found a Christmas present to make.
Oh my goodness, Adrianne! Your art work is gorgeous! Certainly don’t count yourself out of the competition by any means. So glad that you shared this. Very inspiring to all. Keep us posted! :)
Adrianne, this is absolutely gorgeous! I wish I could see in person.
Adrianne, this is an absolutely stunning work of art! I am totally blown away by it. Also, I just may have to stop by and see it in person this September (depending on my son’s marching band schedule!) :)
Adrianne, this is really so amazing! I mean, the amount of creativity it took to come up with an idea like this, and to find and edit the perfect image, and put it all together…wow! It looks incredible, and I’m sure it’s even more beautiful in person. Congratulations on achieving such a work of art – the first of many, I’m sure!