
We are going old school today, friends, using one of my favorite older fonts by ImpressArt, the Script font. I wear this DIY stamped leather bracelet a lot, because it pairs and stacks with so many other jewelry types! And, it’s awesome… literally.

This post isn’t sponsored, I just busted out some classic stamps to make a bracelet that I love – and I hope you love it too! I’ll leave affiliate links to where you can find these supplies in the list below, in case you love this look and need to do some shopping!
What you’ll need to make this AWESOME DIY stamped leather bracelet:
- ImpressArt 4mm Script font, or your favorite similar font
- The Flower from ImpressArt’s Mandala Pack #1
- 33mm Pewter oval tag
- Stamp Enamel
- 14-16 inches of 2mm round leather cord
- Glue-on End clasp
- Super New Glue, or other suitable jewelry glue
- Scissors
- Optional: Stamp Straight tape

If you haven’t done jewelry stamping before, I recommend you check out my beginner’s tutorial, one of my YouTube videos on stamping, or (shameless plug) buy my book, DIY Stamped Metal Jewelry! I’m not going to go into great detail today – but that’s ok! Jewelry stamping is actually not that hard! If you can use a hammer, you got this.

If you tape your blank to your steel bench block, it not only secures it, but it also serves as a guide to keep your letters level. One of the things I really like about the script font is that you can kind of “squish” the letters together and stamp them closer to each other. It helps you fit more letters – but it also helps the script letters look like they’re attached to each other. More scripty!

Once you’ve stamped your “awesome” text, I decided the blank needed a little more embellishment. I happened to choose the 6mm flower from the Mandala Pack 1. I used just the edge of it to create a scalloped edge along the top and bottom. You can try other shapes, too! Any kind of flower, the top of a heart, anything! Just get creative! Once you’re done, darken the impression. I used stamp enamel and a paper towel to wipe away the excess.
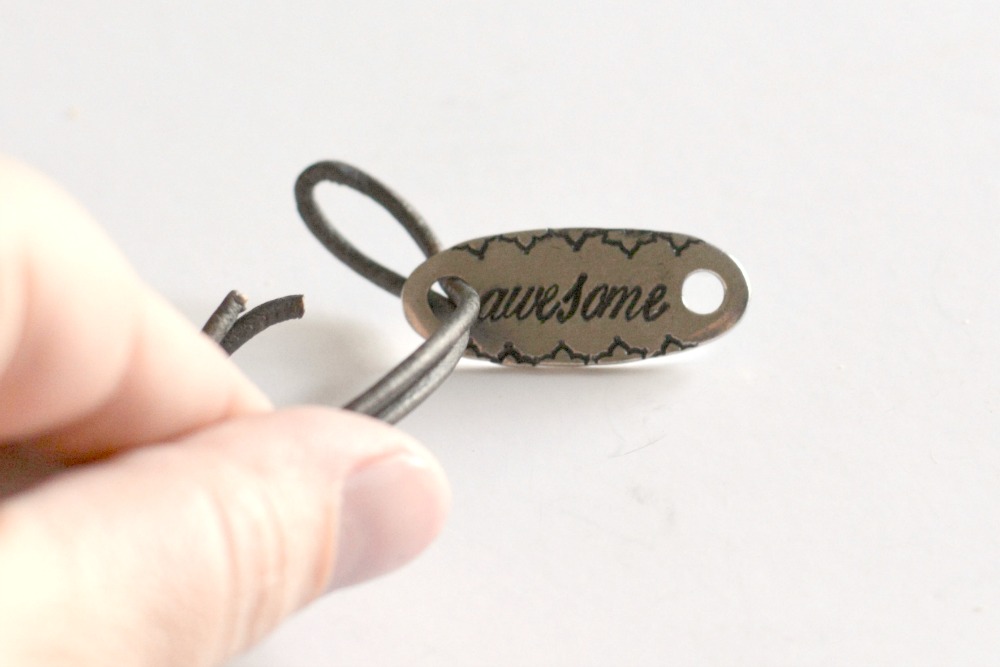
Next, you’ll need two 7-8 inch lengths of leather cord. It’s actually a great idea to cut them a little longer, and trim the excess away at the end. That ensures that your ends are trimmed to identical lengths, and that you can measure it end-to-end for a perfect fit to *your* wrist. Bend the cord in half, and feed the loop through the hole one one side of your stamped blank. Tuck the “tails” through the loop, and pull it snug – creating a lark’s head knot. Repeat on the other side.

Trim up your “tails” so that they’re even. My end clasp adds a half inch to the total length of the bracelet, so I cut my cords to a 6.75″ total length, giving me a 7.25″ bracelet. That’s what fits my wrist best – but this is a great place to customize your piece for yourself.

Add a few drops of glue to the inside of your end caps, and secure the cords inside. It will take about a minute to dry enough to be secure – and after about 15 minutes, it will be dry enough to wear.

Hope you guys enjoyed this versatile DIY stamped leather bracelet – it’s one of my favorite pieces, and it goes with almost everything! Hope your week is off you a good start and I’ll see you all again soon!

This article is outstanding; I commend your efforts in its composition and look forward to your future work.
I love that this isn’t sponsored and you just shared a project you actually wear all the time! That tip about squishing the script font stamps closer together is genius, I’ve always struggled to make my stamped script look natural and connected like that. This bracelet is such a perfect beginner-friendly project too, I’ve got a pack of ImpressArt stamps sitting unused that I’m now pulling out to try this. It looks so good stacked with other jewelry, I need one in my collection too!
Traffic Rider offers a career mode with over many levels to explore
Thank you for this inspiring DIY project! The stamped leather bracelet looks fantastic. I wonder how different tools might change the design outcome—have you explored using varying stamp sizes?
thank you
All wonderful, but this one hit the spot.
Online games are really enjoyable and entertaining to play. If you desire to engage in highly enjoyable online games, you may visit our website.
Your blog help me so much!
looks so beautiful
superb
looking good
amazing
nice
Really a Good and informative Article, I like it and bookmarked it!
Love your tutorials. Can’t wait to see more.
I’ve been trying to sign up for your newsletter to my inbox but there is no submit button.
Hi! What’s better, charlotte or the script font?
Thanks for your sharing. Hope you can contribute more quality posts to this page
Where can I find your videos? I’ve looked in YouTube for beginner tutorial
Just wanted to let you know how awesome your Happyhourprojects is!!!! I thoroughly enjoy looking for your next creation!! Havent tried one yet..Waiting to get all my materials first. You are very creative. Thank you!!!
Thank you so much for the inspiration. Love the bracelet. These would make great Christmas presents.
Paula-Michigan