
Hey friends! I have a fun to personalize hand stamped bar necklace to share with you today. By using a script font, you can fit a surprising amount of text onto a stamping blank. It can take a little practice to get the hang of lining up your letters and joining them together, but once you’re familiar with the spacing, you’re going to LOVE how much message the Charlotte font I’m using today can fit onto a simple bar.

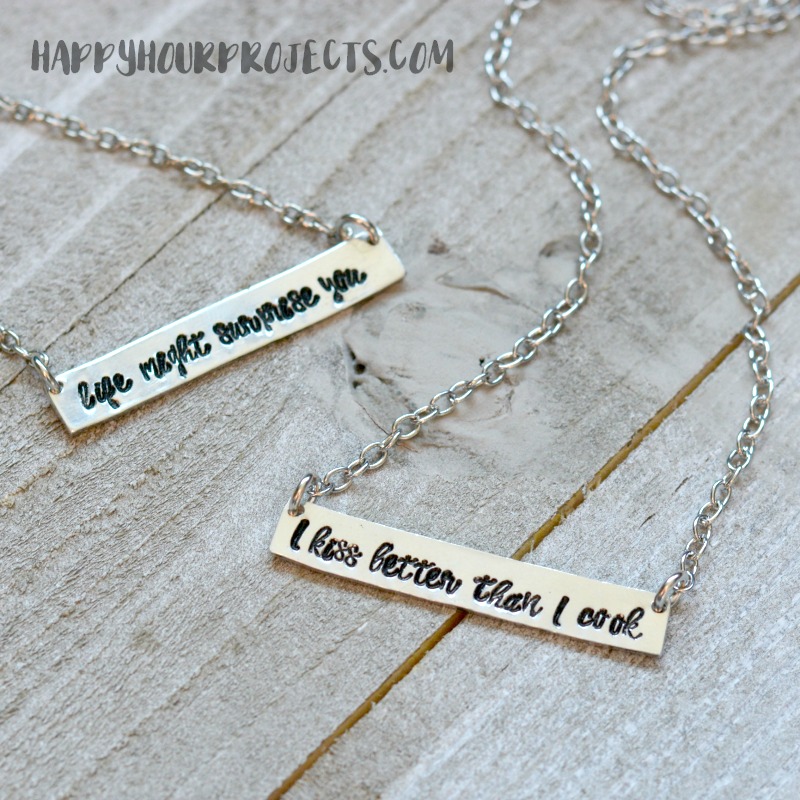
I made up both a sweet and a sassy necklace today for this post sponsored by ImpressArt. One reads “life might surprise you” and the other says “I kiss better than I cook” – both 20 (TWENTY!) letters, plus spaces, on a 1.5 inch bar.
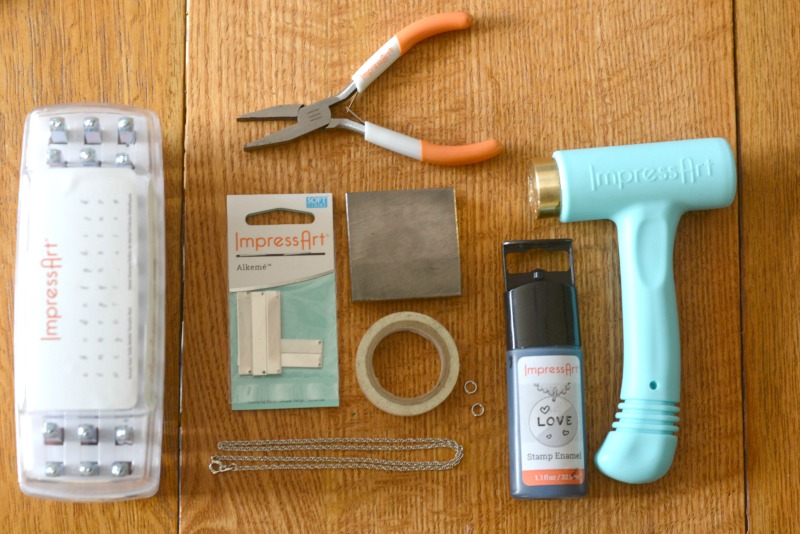
Here’s what you will need to make this DIY Hand Stamped Bar Necklace:
- Steel Block
- Ergo Angle Brass Stamping Hammer
- Charlotte Lowercase Letter Stamp Set
- 1/4″ x 1 1/2″ Premium Rectangle Stamping Blanks
- Stamp Straight Tape
- 16-18″ coordinating chain
- 2 – 5mm jump rings
- ImpressArt Stamp Enamel
- Paper Towel
- Chain Nose Pliers
- Flush Cutters

Because we are trying to connect the letters together to look authentically script style, you’ll be placing them much closer together. You will want to practice first! Or, if you have previously stamped with another script font, you’ll find it to be very much the same. I found that I covered a little more than half the letter to the left as I stamped each new letter in its proper place.

One thing that you may find (and you’ll see it here if you look closely) is that when you stamp on a slim rectangle, the bar will curve slightly upward – particularly if you don’t have the short letters centered vertically on the blank. This is ok though! If you find this is hammening to you, you can hammer it with a nylon hammer to straighten it before continuing. (Don’t use your brass hammer, that will leave marks.)

Decide what length you want your necklace to be. Bar necklaces are usually a good length at 16-18 inches – and that will include the bar. So for an 18-inch necklace, you’ll have 1.5 inches as the stamped bar, another approximate half inch for the clasp (give or take), and you’ll need 16 inches of chain, cut into 2 equal lengths of 8 inches.
Connect each piece of chain to the bar using small jump rings.
Honestly, my favorite is the sassy one. And to be fair, I actually CAN cook, but I don’t enjoy it like some people do! It’s gotten a few laughs when I’ve worn it out, so consider some of your favorite funny expressions.

And yes… life might surprise you indeed. Thanks for joining me today, and if you’d like a more basic look at metal stamping, you can buy my book, DIY Metal Stamped Jewelry, or you can check out my beginners tutorial from when I first started stamping.
I’d love to hear what you’re making! Leave a comment and let me know!

The style of writing is very clear, brief, and expert.
You will play the part of a security guard who is on duty during the night shift in Freddy Fazbear’s house of horrors when you play the video game Five Nights at Freddy’s. There are five children who were murdered at this location many years ago, and the most horrifying element of this location is that it is haunted by the ghosts of those children.
A Hand Stamped Bar Necklace is a beautiful, personalized piece of jewelry where letters, numbers, or symbols are individually stamped by hand onto a metal bar—making each necklace unique.
you can hammer it with a nylon hammer
Wow, this necklace looks super cool!
Personalization adds such a special touch. I love how the Charlotte font maximizes the message space—it’s like crafting your own mini story! Speaking of crafting, it reminds me of Cookie Clicker, where you can create and upgrade endlessly.
Where do you get so much patience?)
I love how the script font, especially Charlotte, allows you to fit so much text on a small piece.
It’s a great way to test your reflexes. The quick movements required to prevent the egg from falling help keep your reflexes sharp, which can be useful in other areas of life.
I was befuddled, I should say. I generally go to a blog that is both instructive and appealing, and obviously you got it. This issue is an undeniable issue tended to by hindered people. Right now, I was eager to the point that I found it for my potential benefit for something about it.
I really appreciate the time and effort you put into this article. It’s both thorough and engaging.
The hand-engraved necklaces are truly stunning, just like the intricate details in the FNAF game. Each piece of jewelry has its own story, creating a personal touch and special value, just like the mysteries and unique elements in the game.
Very useful essay! This post has a lot of information about the that can help anyone start a successful social media campaign.
I’m interested in these kinds of things, so I’ll go to the place where they’re talked about
I will always be appreciative of your invaluable concern and insight. For me, you are the primary source of motivation, and I will forever be appreciative.
I want to extend my sincerest thanks for your thoughtfulness.
By providing clear guidelines on how others can share your content while respecting your copyright, you’re fostering a positive and collaborative community around your projects. It’s great to hear that you encourage the sharing of your projects for personal use and even allow for the sale of items made from your tutorials, with proper attribution.
This website allows you to see the visual component and encourages many people to explore and look into it.
These is such a classy necklace. thanks for the post
Thanks! Free snapchat views and followers are waiting you now!
exellent thanks
nice post
looking good
So it is a useful way that we had been looking for.
Where can I buy the stamping supplies?
Thanks
Thanks for the info on cursive stamping! I’ve just begun to stamp metal and thought about buying the cursive alphabet but was afraid. Now you’ve given me the confidence that I can do it.
Improve your social media pictures with Remini for a more professional look.