• Skip to primary navigation
  • Skip to main content
  • Skip to primary sidebar

  • home
  • about adrianne
  • buy the books
    • DIY T-Shirt Crafts (2015)
    • DIY Stamped Metal Jewelry (2016)
    • Rock Painting for Beginners (2019)
  • videos
  • crafts
    • diy beauty projects
    • kids’ crafts
    • paper craft projects
    • polymer clay
    • sewing projects
  • jewelry
    • bracelet projects
    • earring projects
    • necklace projects
    • jewelry tools & supplies
  • metal stamping
    • beginners’ tutorial
    • video tutorial
    • project ideas
    • metal stamping supplies
  • recipes
    • cocktail recipes
    • appetizers
    • main and side dishes
    • sweets and treats
  • by season
    • birthdays
    • new year
    • valentine’s day
    • st. patrick’s day
    • easter and spring
    • mother’s day
    • patriotic
    • fall
    • halloween
    • christmas
    • thanksgiving
  • privacy

Happy Hour Projects logo

07/14/2012

Hand-Stamped Gifts Tags with ImpressArt Metal Stamps

Let the festivities begin!
Today kicks off Christmas in July week here at Happy Hour.  I may have mentioned this, oh, a million times by now. I got a wonderful gift myself – ImpressArt Metal Stamps sent me a few products to try out, to let you know what I think!  I turn down a lot of review opportunities here, because I don’t love the idea of sneaking posts in just because someone has given me free product for it, but I LOVE metal stamping (which you already know if you read here often) so I think this is a really fitting review.  Full disclosure: I wrote this post using products I got for free.  I prefer to keep it real enough not to hide that fact in a footnote at the end of my post.
That being said… they are metal stamps.  Nice ones.  What’s not to love?
Now, of course, you can make some beautiful gifts if you get into metal stamping.  I have made some really fun things that I’ll be sharing in the coming weeks, but with this week’s Christmas theme, I want to share an inexpensive idea that’s perfect for beginners to practice their stamping skills: hand-stamped gift tags.

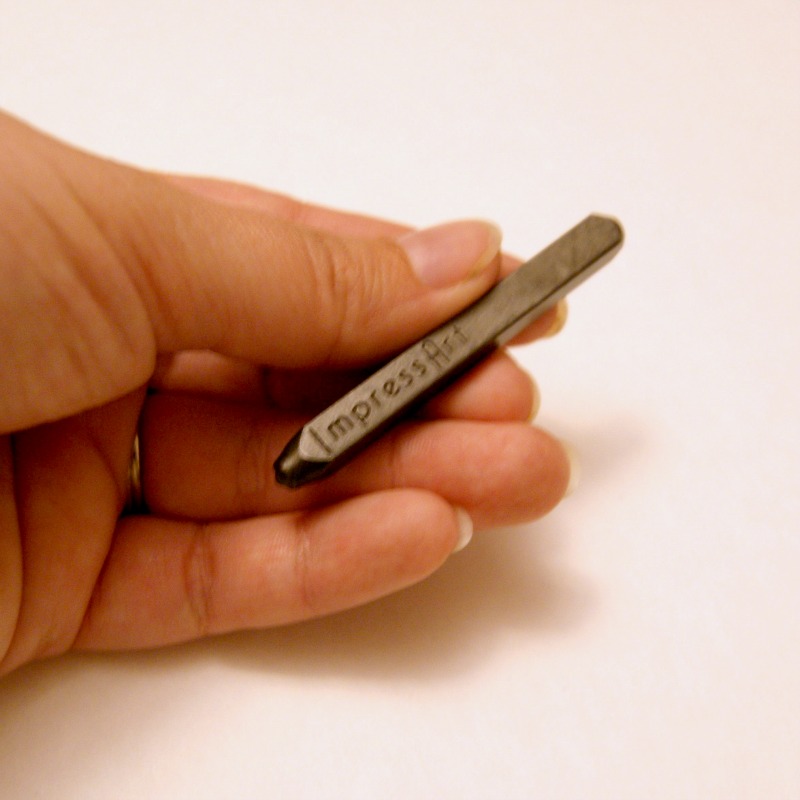
I promise, I will show you what I put in the box really soon! :)  I will also get to the full tag tutorial after I take just a minute to give you my thoughts on these metal stamps.

This is what ImpressArt sent me.  This font is a really fun one called Scarlett’s Signature.  They actually have a pretty amazing selection of fonts and design stamps… the horseshoe is perfect for the Colts fan that lives in my household. ;)

Now, you may recall my post a while back on metal stamping for beginners.  I advocated picking a basic font to make sure you enjoy stamping, before you invest a lot of money into extra fonts and frills.

Did you do that?  Did you love it??  

If you did – the next step is to play with new fonts and some designs!  They can be a little more tricky to work with – especially the more elaborate design stamps.  But it’s the next thing you want to do to take your stamping to the next level.

Here’s what I thought about the difference between my basic set and the Scarlett’s Signature font from ImpressArt, and the first is obvious – if you love the font, that’s what matters.  Your basic font is just that: basic.  There will be some projects you just want to dress up a little more.  The second thing I liked about ImpressArt’s letter stamps is this:  The side you hold toward you has their logo on it, so that when you’re switching from letter to letter, you don’t have to keep pausing to make sure you have your stamp right-side up.  You would think this wouldn’t make a huge difference, but getting in your groove is half the battle when you’re starting out and working to get a consistent impression.  The difference it made when I was using the design stamp was much bigger – I will never buy another round design stamp again after having used their square one.  It lines up so much better, and you know without checking and double-checking that you have your design straight.

I was also sent a basic bench block – which makes for a good starter piece.  It has rubber feet on it to cut down on the noise and give you more stability, but I like my heavy-duty rubber base bench block better.  There are some habits you just can’t break. :)
And last… that is one strange-looking hammer, right?  I have always used the hammer from my tool box and it has served me well.  I tried this new one out and it felt funny in my hand for about two strikes, at which point, I understood exactly why it was designed that way.  Of everything I was sent… I could rave about this hammer for paragraphs (I’ll spare you).  Suffice it to say that I stand corrected: you want this hammer in your starter set.  It takes away all the fear of hitting your finger and gives you more control.  Love, love, love it.
Bottom line:  Buy the hammer.  Do it.  You won’t regret it.  Get the letter stamps if you’re in love with any of their selection of fonts, and you’ve practiced enough to know that jewelry stamping is something you want to do.  Get one of their square-base design stamp over a round-base one when you’re ready to add some variety – but only when you feel ready for the next challenge.  
ImpressArt Metal Stamps is also sponsoring a prize package in Monday’s big giveaway, so be sure to come back and enter to win it!  (And yes, the hammer is part of the package, LOL!)
Now – who’s ready to make some gift tags??
You can use any font for these, so if you haven’t upgraded to a fancy font yet, that’s no problem!  If you’re just trying to get the hang of something different, this is a great project to do, because you’re using recycled metal for it.  My can would have been worth a whopping ten cents deposit, but instead, I cut the top off with my miscellaneous scissors (don’t use your fabric ones or your paper ones for this, LOL).  And a note about common sense – edges from cut up aluminum cans can be really sharp, so do be careful while you’re working, and be careful about whose gifts these tags will go onto.  Not a wise choice for a kiddo, for example.

I just cut into my can, and cut some strips.  I wasn’t terribly concerned about uniform size, and you can trim up the edges later, too.

You may want to use a jewelry file on those sharp edges.  Your call.

I didn’t photograph myself stamping here – but if you want a referesher – visit my beginners’ tutorial.  Stamping on thin aluminum like this is very different from other metals – it’s much softer.  You won’t need that same firm tap – try doing 2 or 3 very soft taps on the stamp to get your impression.

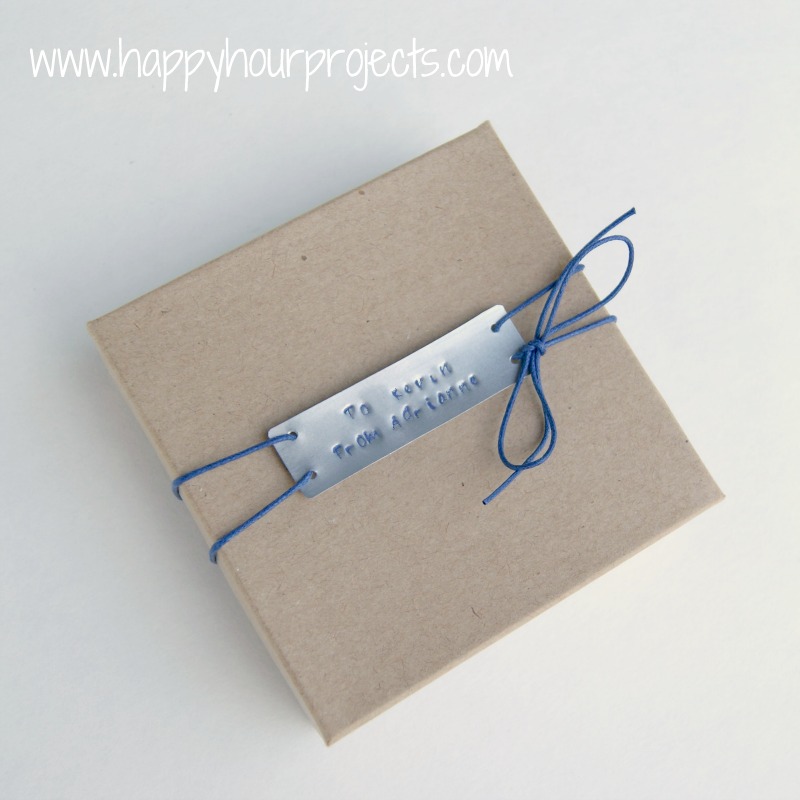
After I stamped my message, I trimmed up the tag and rounded the edges slightly.  I have a set of pliers that lets me pop a hole in most metal blanks, so I punched holes on the sides to tie my tag on.  Since the scissors didn’t struggle with the aluminum, my guess is that a very small diameter paper punch would probably also do the trick (though I can’t say with certainty, since I didn’t try it).

I had to try a couple methods of making the letters contrast here.  It turned out that you can NOT use a sharpie to darken your letters, unless it’s a super fine tip and you don’t get any ink outside the letter impression.  It stains the aluminum.  So what I did instead was to fill it in with acrylic paint, and wipe off the excess with a damp paper towel.  Which was actually pretty cool, because then I could make it any color I wanted!

Then, I filled the box with this… for my Colts fan. ;)  This is just an aluminum jewelry blank on a leather cuff.  I attached it by using my hole punch on the blank and on the cuff, and using tiny brads from the scrapbook department.  You’ll notice that I haven’t quite mastered the steady hand that design stamps require… the horseshoe has quite a bit of detail.  But the good news is that I can keep practicing!

But I liked the design so well, I made a similar one for myself!

A stamped gift tag is a really great way to finish off a stamped gift inside!

Thanks for dropping by today, and for sticking with me through this whole post. ;)  I’m going to introduce the fantastic sponsors for Monday’s giveaway tomorrow, so please show these great businesses and bloggers some love by coming back to comment and thank them.

Hope you all have a fabulous weekend!!

Disclosure – I received supplies from ImpressArt Metal Stamps for the purpose of this review.  The opinions in this post are my own.

I link up to these great parties!

Filed Under: Christmas, Tutorials

copyright policy and terms of use

I love it when you love my work! All tutorials and photos published at Happy Hour Projects are copyrighted. If you would like to feature my tutorial on your website or share it on your social media you may use one photo to feature, as long as you provide a link back to the original post.

If you feature a photo, it may not be accompanied by the project tutorial or recipe, whether in my own words as it originally appears or paraphrased by you. This also includes personal sharing on social media and Pinterest. Publishing multiple photos from a project, or including instructions with an accompanying photo are not permitted and you will be asked to remove them.

I love to share my projects, and my tutorials, recipes, and e-books are ALL free for your personal use. However, photos and ideas that are published to this site are my protected intellectual property. You may print them at home, but please do not copy or distribute them. I also allow all designs to be made and sold at fundraisers, craft fairs, etc. If you are selling a piece made from one or more of my free tutorials in your online shop, I require that you use your own, original photography, and include a link back to my website to credit me as the designer.

I hope you enjoy what you read here, and please be fair when you share!

Reader Interactions

Comments

  1. Digital Network says

    05/25/2020 at 6:55 pm

    These organizations offer automated renewal amenities that is
    decided from the area registrant as aspect from the service agreement that is signed during registration. Some of the considerations to
    watch out for, apart from the above features are, bandwidth, disk space,
    and also the number of domains that could be included in your hosting account, which may be important, in case you are pondering having multiple website.
    Site5: Not as big or well-known as Hostgator, however the support is as good
    along with their Cloud hosting can enhance your site rankings with better
    load speed.

    Reply
  2. Becky says

    01/25/2018 at 12:01 pm

    I’m new to metal stamping. Just bought the lettering kit. What is the purpose of the metal stamping block? Is it a necessity? TIA!

    Reply
  3. Christine says

    06/15/2017 at 9:23 pm

    Where did you find your triple strand leather bracelet for your bracelet that says “be yourself”? And did you use a popcan for that as well?

    Reply
  4. Timber says

    03/01/2014 at 4:31 pm

    How do you remove scratches after stamping? I seem to always have scratches on my metal and haven’t found a cheap way to remove them.

    Reply
    • Adrianne says

      03/02/2014 at 4:42 pm

      The only way to truly polish it would be to use something that would remove enough additional metal to smooth it out. Instead, you need to be careful when placing your stamps so as not to scratch the surface. I think a few scratches probably aren’t noticeable, though.

      Reply
  5. Susanne says

    01/02/2014 at 8:06 pm

    Awesome! You could be my best friend! ;)

    Reply
  6. DEBBIE SOUTHERLAND says

    11/07/2013 at 3:51 pm

    This came at a great time for me Thank U keep up the great work !!!!

    Reply
  7. Victoria Hepden says

    04/09/2013 at 7:54 pm

    Hiya.i found u on Pinterest just at the right time as I want to start metal stamping!yr projects &
    Web page is just so inspiring & as a busy mum of 4 I
    Love the way they can all be done in a short space of time.
    You are one super talented lady!keep up the good work!
    Victoria x

    Reply
  8. stephanie says

    03/31/2013 at 7:28 am

    I love your site, out of curiosity, is the acrylic permanent? I too used acryic paint for stamping but wanted to throw my pieces in a tumbler for polishing and was afraid of the outcome…any thoughts?

    Reply
  9. Julia says

    03/20/2013 at 3:39 pm

    What a cute project! I love it so much that I decided to feature it in our roundup of soda can crafts! Check it out here: http://www.favecraftsblog.com/recycled-soda-can-crafts/

    Have a great day!

    Reply
  10. Tonna says

    08/02/2012 at 2:46 pm

    So cool & creative!!!

    Reply
  11. Jill says

    08/02/2012 at 12:30 pm

    What a creative idea!! I love it! I am featuring this at todays link party!! WAHOO!

    http://twoyellowbirdsdecor.blogspot.com/2012/08/thursdays-temptation-27-fabulous.html
    Jill

    Reply
  12. Kadie says

    07/26/2012 at 4:20 am

    Hey girlie, you know how much I love these! I will be featuring it at our party tomorrow. Anything that has to do with DMD has to be good right?!

    Reply
  13. marissa says

    07/25/2012 at 2:30 am

    Thanks so much for linking up this is fantastic. It is such a fun idea. Just another reason why I need a stamp kit. Next time some one asks me what I want for a present I have to remember! I wanted to let you know that I'm featuring this today feel free to stop by and grab a button. I can't wait to see what you have to share this week.

    Marissa
    http://raegunwear.blogspot.com

    Reply
  14. Confessions of a Stay at Home Mommy says

    07/24/2012 at 1:21 am

    Thanks for linking up to last week's Tuesday Confessional! You've been featured and pinned. Head over and see for yourself!
    http://www.craftyconfessions.com/2012/07/features-from-last-weeks-tuesday.html
    ~Macy

    Reply
  15. Camille says

    07/23/2012 at 3:35 pm

    I've been wondering how people stamp metal! Awesome! Because, I NEED another craft… ha ha! :-)

    Reply
  16. Evelyn says

    07/22/2012 at 4:24 pm

    As usual I am amazing of what you come up with:) I love these small projects that I can do in a day. And this makes me wish to try the metal stamping (something I have never thought of before). Super great bracelets! Thank you for sharing at Freedom Fridays.

    Reply
  17. April says

    07/21/2012 at 3:58 pm

    That looks so fun! I have been wanting to try these!! Thanks for the inspiration!

    Reply
  18. Jen Temcio says

    07/21/2012 at 2:11 pm

    My Goodness you have A LOT of patience!! I would like to try this out – makes SUCH a BIG statement on a gift to personalize it this way. I love the idea so I am going to certainly check this out RIGHT NOW! Thanks so much.
    jenny at dapperhouse

    Reply
  19. Angie Ramirez says

    07/20/2012 at 5:30 pm

    OH i love it!! Impressart sounds fantastic… I have always wanted to try stamping jewelery!

    Great review & post!

    Reply
  20. Donna Wilkes says

    07/19/2012 at 10:57 pm

    I will have to restrain myself from running out to try this craft, but it really appeals to me! Love the bracelets and the gift tag. Came over from Peas.

    Distressed Donna Down Home

    Reply
  21. Jessi Wohlwend says

    07/19/2012 at 10:01 pm

    Super cute! I've seen some awesome metal stamped stuff out there and it's making me want to try it myself. Thanks so much for sharing this at The Fun In Functional!

    Reply
  22. Caitlin Schlamb says

    07/19/2012 at 7:32 pm

    RAD!! thankyou!

    Reply
  23. Sarah says

    07/18/2012 at 11:05 pm

    This is such a cute idea! Look at you being all clever and thrifty. I never would've thought about using the pop can. Brilliant!

    Reply
  24. Full Circle Creations says

    07/18/2012 at 7:45 pm

    I love this! Wonderful idea. Thanks for sharing at the All Star Block Party.

    Holly

    Reply
  25. Kadie says

    07/14/2012 at 8:37 pm

    How clever are you to use a pop can?! I love it!! I am so excited for the giveaway. The stamps and hammer sound fantastic!

    Reply
  26. Terry says

    07/14/2012 at 4:09 pm

    I am amazed at the versatility you have. Just with metal stamping alone, you seem to cover off every idea out there, lol.

    Reply
  27. Kim-A Creative Spirit says

    07/14/2012 at 3:59 pm

    This looks like so much fun. Good way to get out agressions using a hammer too I guess. :) Thanks for sharing.

    Reply
  28. Morena Hockley says

    07/14/2012 at 3:11 pm

    I made my first gift to give away last week and the recipient loved it. I still had to scrap my first effort though. I just need to keep practicing. Thanks for the tips!!

    Reply
  29. Kara at Petals to Picots says

    07/14/2012 at 1:14 pm

    I have always wanted to try hand stamping. Great info!

    Reply

Trackbacks

  1. Nifty 50: How to make a Chalkboard Quote and a Metal Tag says:
    01/27/2014 at 4:00 pm

    […] metal stamps letter a while back but never used them. Again I had a great tutorial that I found at Happy Hour Projects. She gives some good tips about stamping too, so check out her blog. I didn’t use the brand […]

    Reply
  2. 45 Christmas Gift Wrap Ideas - One Tough Mother says:
    12/06/2013 at 6:03 am

    […] – Washi Tape Tags  |  2 – Magazine Tags  |  3 – Metal Stamped Tags  |  4 – Polymer Clay  |  5 – Toothpick Trees  |  6 – Ornament Frame  |  7 […]

    Reply
  3. Stamped Polymer Clay Bracelet says:
    10/25/2013 at 8:10 pm

    […] horseshoe is from ImpressArt Metal Stamps.  (If you’d like to read more about ImpressArt, I reviewed some of their stamps earlier this month.)  If you’ve been struggling as a beginner with metal stamping, another […]

    Reply
  4. Stamped Leather Cuff says:
    09/23/2013 at 2:28 pm

    […] })(); I gave you a little preview of this bracelet a while back when I was talking about metal stamping.  I’ve worn it several times now, and gotten a few nice compliments (followed by every […]

    Reply
  5. How to Make Gift Tags – DIY Christmas Gift Tags says:
    08/14/2013 at 5:29 pm

    […] hand stamped gift tag idea from blogger Happy Hour Projects admittedly requires a full arsenal of specialty stamping […]

    Reply
  6. Link Love: Soda Can Crafts says:
    03/20/2013 at 2:13 pm

    […] Hand-Stamped Gift Tags from Happy Hour Projects […]

    Reply

Leave a Reply Cancel reply

Your email address will not be published. Required fields are marked *

Primary Sidebar

Hello, and welcome! I'm Adrianne, an artist, author, designer, and blogger in mid Michigan. I work from home, chase my two kids, and this once-city-girl is learning how to care for chickens and adjusting to life out in the country. I have a compulsion for daily creativity... sometimes it's jewelry-making, paper crafting, metal stamping, mixing and baking, or giving new life to recycled items. But with 2 young kids, time is short! My goal here at Happy Hour Projects is to share projects and tips that you can do in an hour or less. The ideas you find here are designed to add a little creativity in your day, no matter how much (or how little) time you have!

BUY MY BOOKS!

Copyright © 2023 Happy Hour Projects on the Brunch Pro Theme