
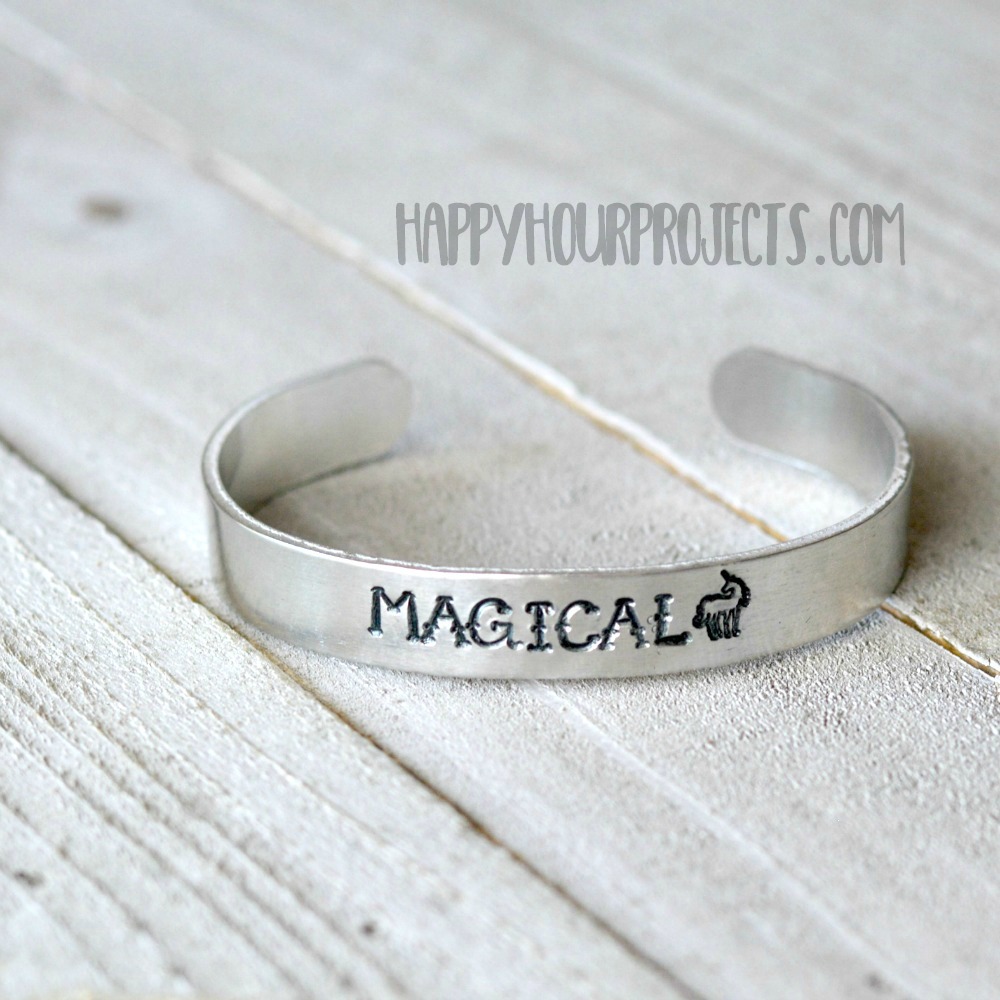
Hey friends! I’ve got a simple and sassy hand stamped cuff bracelet to share with you today. It makes up quickly and it features a brand new font from today’s post sponsor, ImpressArt. The Sailor font is a big, bold, whimsical style that’s perfect for adventure and magic! And, of course… unicorns. Because, do you even have to ask why?

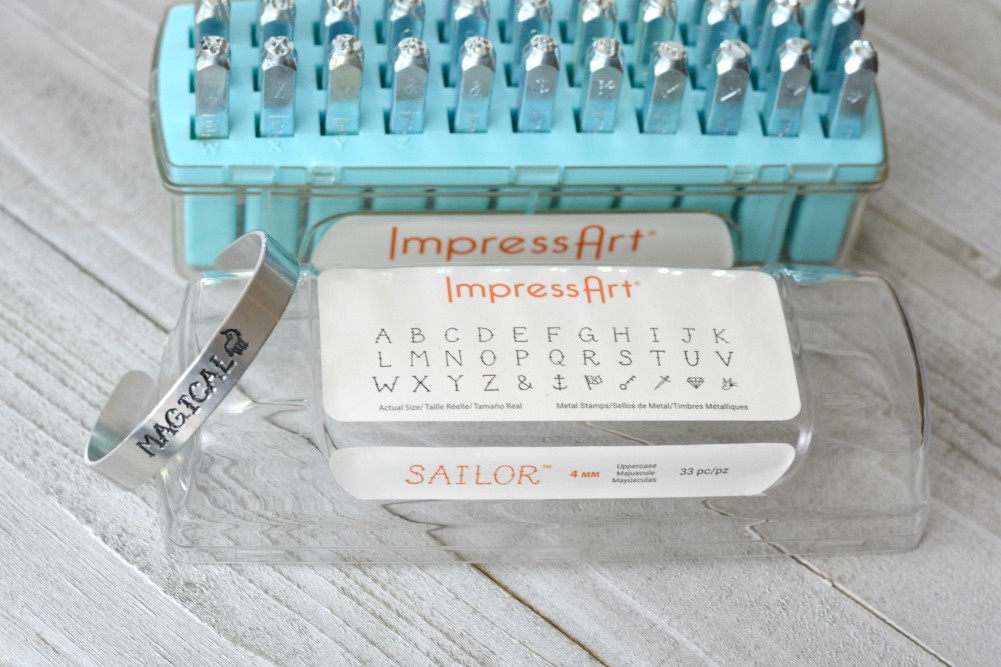
I have LOVED using my custom designed unicorn stamp from ImpressArt, and I use it often in my designs. While you can’t order this particular style on their website, you CAN design your own stamp in sizes between 3mm and 12mm (mine is 6mm). So if ever you can’t find *exactly* what you’re looking for – design it yourself, or add your logo to your designs!
I’ll show you what you need to know to make fabulous cuff bracelets, and if you need any supplies, you can find them in the list below – just click to be directed to learn more or begin shopping!
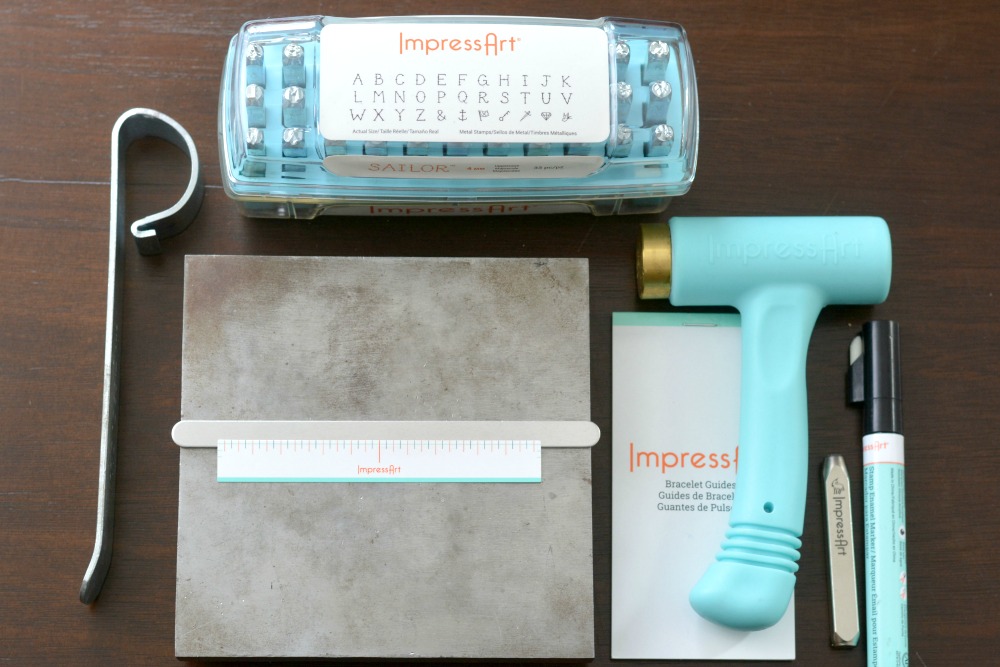
Here’s what you need to make this magical hand stamped cuff bracelet:
- Steel Block
- Ergo Angle Brass Stamping Hammer
- 4mm Sailor font
- Your favorite 6mm design stamp (like my custom Unicorn)
- 3/8″ Aluminum Bracelet Blank
- Bracelet Bending Bar
- Bracelet Stamping Guide
- ImpressArt Stamp Enamel
- Paper Towel

I used the new bracelet guides to help center my design on the front of the bracelet. They work really nicely! You will still need to get used to the font you’re using to get the spacing you’re looking for – the Sailor font is a 4mm font that’s also quite wide. It makes a great statement! But you will need to allow for more room than most of the other fonts. Stamp your word and your design along the center of the blank. (If you’re new to metal stamping, you can buy my book, DIY Metal Stamped Jewelry, or you can check out my beginners tutorial from when I first started stamping!)
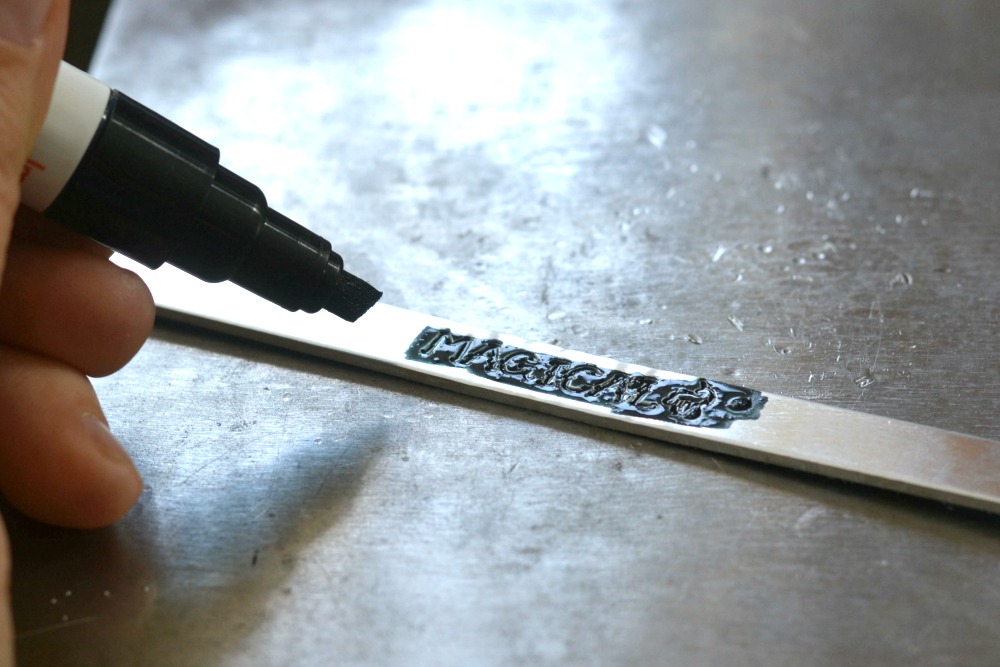
Next, darken your impressions. I’m using the super easy Stamp Enamel Marker today – just color over the words, and wipe off the excess ink with a paper towel before it dries fully.

Now, to get the bracelet from a flat blank to a rounded cuff, my favorite tool is the bracelet bending bar. Secure one end in the groove, and hold it in place. Then, bend firmly and steadily around the curve to shape one half of the bracelet. Repeat this on the other side until your cuff is formed.
I had a lot of fun with the Sailor font. It’s not a typical text font – it’s great for bold but short words and phrases. It stands out really well on the simple cuff, and it will be great for initials and some other fun designs with its playful look.
Thanks for joining me today, and I hope you enjoyed this hand stamped cuff bracelet project! Hope *your* day is filled with magic, and I’ll see you guys again soon!

Great! I want to extend my sincerest thanks for your thoughtfulness.
It makes me feel better that you were kind enough to tell me this. That post you wrote on your site is one that I really enjoy reading a lot. You gave people something interesting and useful in this blog post.
Your idea is very good
like it
looking good
What a great idea?!
I have a necklace and I want to engrave on it but do not know how to do it, thanks for your tutorial. But I do not know where to buy those support items