
Hey friends! I’ve teamed up with two of my favorite bloggers as a guest host for Craft Lightning. What does this mean? Well EVERY DAY THIS WEEK I’ll be sharing projects that are lightning fast – each one will take 15 minutes or less to make. They’re great Mother’s Day craft ideas. And in addition to that, I’ll be rounding up the best of the best Craft Lightning projects. If you come back every day, you’ll get almost 50 different ideas for DIY Mother’s Day Gifts.

So with all that said, let’s get to the good stuff! Today I’m sharing a colorful locket that leaves lots of options for personalizing. You may know that I love metal stamping, and if you do too, you can incorporate that! But today I’m targeting those of you out there who love the stamped look but don’t own the tools or have the patience.
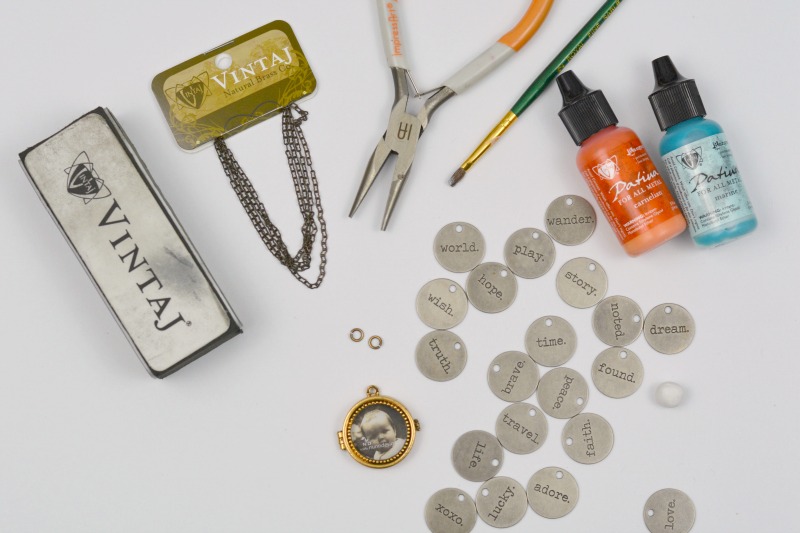
I used the following supplies when making my locket (side note, these are affiliate links. If you need to do some shopping to make today’s project and you buy through any links below, a small commission comes back to me. I always appreciate your support!)
- Debbie Nunn glass locket, antique gold finish (any locket with an interior of 25mm/1 inch will work)
- Tim Holtz Idea-Ology Typed Tokens
- Ranger Metal Patinas: Carnelian, Citrine, Verdigris, and Marine
- 24″ Vintaj brass chain
- 2 – 6mm brass jump rings
- Chain Nose Pliers
- Optional: a tiny amount of air-dry clay
- Buffing block or fine-grit sandpaper
- Paintbrush
- Paper towel (or other surface protectant)
First, I chose the token I liked best for this project. There are some great options in this TH collection! I picked xoxo. but you can also choose love, adore, story, wish – so many options.

Next, I filled the hole at the top of the charm with a tiny amount of air dry clay. This isn’t an essential step, but personally I enjoy the look much better when the hole doesn’t show, and it looks just like a small disc.
Now, the fun part. Drip and/or paint colors of your choice onto the word token. I picked a mix of orange and aqua because that’s what my mom is into these days. The patinas take approximately ten minutes to fully dry, but they set quickly enough that you can layer colors every minute or so if you wish to.

A quick note: do take care not to get any patina inside the grooves of the letters. If it’s just a small amount, you may be able to use a toothpick to remove it before it dries. The best way to do this is to hold your paintbrush flat and gently pat over those letters with patina. If you really mess up, it’s ok! The patinas are opaque, so you can blacken the letters with a black patina, acrylic paint, or even a sharpie marker, and start over. You have lots of options to “fix” anything you don’t like when it comes to patinas.

Buff the edges of your meal disc, if you like. You can do this to bring out a bit of the distressed look.

Finally, twist open a jump ring and add it to the bail of your locket, if your locket doesn’t include a finished bail. String the chain through the jump ring (or the bail) and close the two ends of the chain with a single jump ring. You can, of course, use a clasp closure, but for necklaces 24″ and longer, I simply slip them over my head for wear.

As I mentioned, those fans of jewelry stamping can create any type of disc they want! This is an idea I shared in the past. (If you click the photo, you’ll be taken to the tutorial.)

Now, be sure to take a look at some other great Craft Lightning Mother’s Day crafts I’m loving from Everyday Party Magazine, Practical and Pretty, Artsy-Fartsy Mama, bwdesignstudio,Tried & True, Yesterday on Tuesday, and Sisters, what!! You can click any image below to learn more about these 15-minute or less crafts!


i like it
wow looking good