
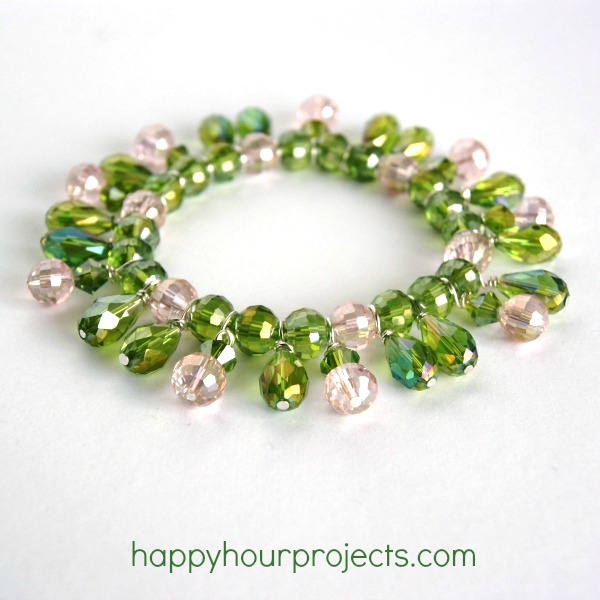
Spring is FINALLY HERE, and I couldn’t be happier to welcome it back! I’ve got an easy spring-themed charm bracelet tutorial for you today that you can make in about 30 minutes. This was a project I shared over at Crafts Unleashed last month – the inspiration blog for consumercrafts.com.
What you will need (I’ve linked to the Consumer Crafts products I used in this project in case you’d like to shop for them):
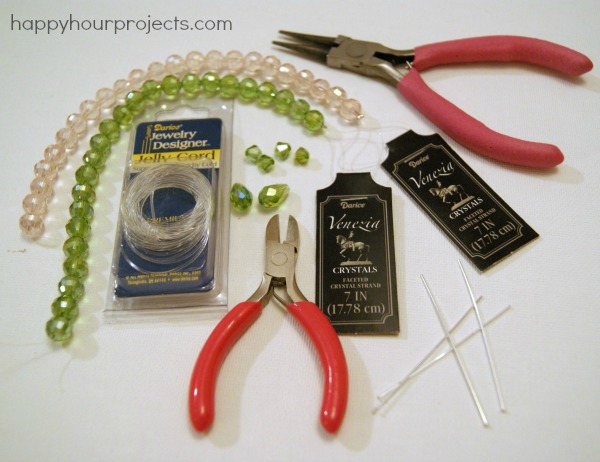
- Spring-themed beads you love! In this bracelet I used 8mm round Venezia Crystal beads, 8mm x 11mm teardrop Venezia Crystal beads, and 6mm bicone Venezia Crystal beads in Olivine Green, and 8mm round Venezia Crystal beads in Pink.
- Head Pins
- Jelly Cord or other stretch jewelry cord
- Round-nosed pliers (you can use normal jewelry pliers, but round-nosed will easily give your charms a nice finished look)
- Wire cutters
The exact number of beads and charms you will need for this bracelet will vary by the size of bead. For bracelets, you’re usually safe with any 7-inch strand. In my case, I needed 24 of the 8mm beads to achieve the length I like, so that meant I needed to make 24 charms. Part of the art of jewelry making is making your piece uniquely yours, so don’t feel like you have to stick to these exact counts, sizes, shapes or colors.
I made up 16 charms in the green teardrop shape, and 8 more where I used a combination of pink round beads and green bicones. Alternating these two kinds of charms creates a feel of leaves and buds – a perfect cheery springtime look.
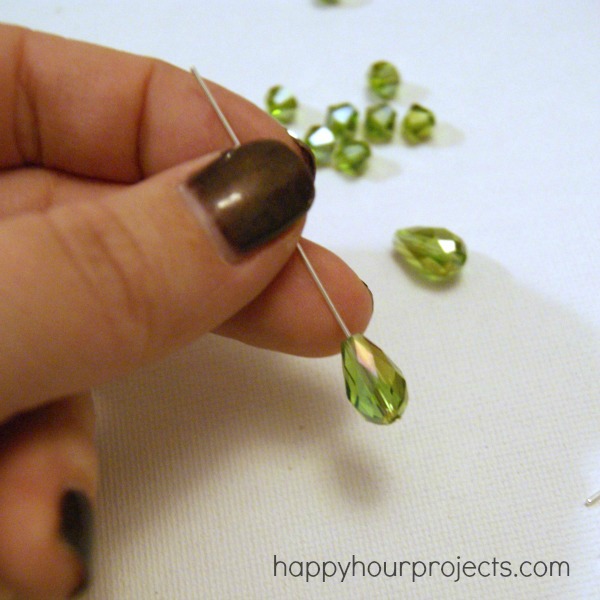
If you haven’t made charms before, they are not as difficult as they look! Let me show you. First, thread the bead onto the head pin. If you find that the head of the pin is not quite large enough, or your hole is too big, you can add a small seed bead or even a sequin to the end to help hold it in place (if you use the same beads and head pins I mentioned above, the pin will hold your bead just fine).
Slightly higher than the top of your bead, grasp the pin firmly with your round pliers. Wrap the pin around the pliers to create a round loop. Be sure to leave a small gap between the bead and the loop you are creating – just a millimeter or two is sufficient.

Next, wrap the top of the head pin around that gap you left – a sort of “neck” between your loop and bead. Wrap it 2 or 3 times, until the gap is filled.

There will probably be a small tail left that you won’t be able to keep wrapping – that’s fine. You’re just going to nip that off with your wire cutters. Do be careful when you do it – sometimes that small piece of the head pin can go flying in unexpected directions.

That’s all there is to creating charms! Now you need to repeat the process to make up an equal number of charms to match the number of beads you’re using. In my case – 24 beads, 24 charms.

Once your charms are made, you can begin threading your beads and charms onto the jelly cord, alternating bead, then charm. I alternated in a pattern for both the beads and the charms, but you can make them totally random if that’s more your style. As for the cord – you will only need about 7 inches by the time you are finished, but you will need a longer length than that to make sure you don’t lose beads off the end as you string them, and you’ll need a few inches extra for knotting it off. I like to just work off the coil, and only cut off what I need at the end when I’m finished beading.

To finish it off, you don’t need any special technique. I just use a square knot or a double knot to close it. It will hold well; the jelly cord is stronger than it looks. If you are nervous, you can always knot it again an extra knot or two – it won’t hurt!

Trim off the excess cord without cutting too close to the knot (and accidentally cutting it undone). The cord is clear – when you wear it, no one will see the short ends anyway.
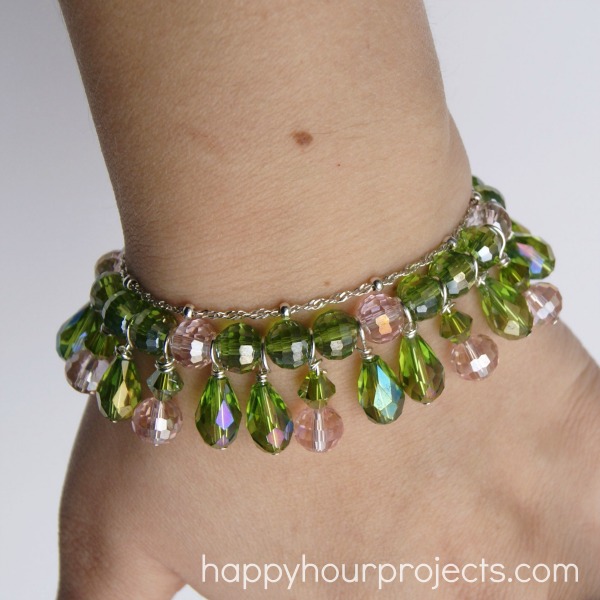
Now – you have a great springtime bracelet – and a technique you can adapt for so many looks! What are you making to celebrate spring?

Hi.i am just at my learning to do things with beads, i wanted to make earrings and had no idea as how to do it ….thank you so much ..you just taught me how to make 2 differents earrings along with making charms …wowwww..lots of thank you..Micky
Hi….just wanted to say that this is a beautiful bracelet you created….but wanted to know in the last picture you have the bracelet on a silver chain…..how did you do that? Please let me know….I love the way it looks in that picture!!!! Congrats on another great profuct!!!
The silver chain is another bracelet, it’s one I never take off (I actually kind of forget that it ends up in all the photos – it just seems like part of “me”!) Sorry to make it look confusing! :)
this bracelet looks like spring…like little spring flowers dangling! LOVE it, Adrianne!
This is really pretty, and I love the colours you chose too!
I’m sure it’s an eye-catcher bracelet! If only I could do something like this… I have to try, sometimes, you make it look simple :)
MammaNene
SergerPepper.blogspot.it
I LOVE this color green, great tutorial (all of them!) :) Michelle