
Hey guys! I know I’m behind for Teacher Appreciation week, but I looked at the calendar this week to discover that my daughter only has FIVE days left of preschool this year. What? How did that happen? Haha. Anyway, I want to put a little something together for her teachers before summer break, and thought if I share early enough, then you all have enough time to use this idea too, if you’d like!

And of course, while these are a great teacher appreciation theme, you can always use the idea to make a special personalized locket for any gift-giving occasion – they’d be lovely for bridesmaids, birthdays, summer holidays – you name it. The charms inside make the whole piece, and even better, they’re interchangeable, and your recipient can add her own charms to the locket to make it even more special. I have two lockets – one with my family’s birth stones and a few meaningful charms, and a second one that I change the charms out for the season to celebrate holidays. So you really can’t miss with this idea: even if it just so happens that they already have a locket, yours is still going to be different and special!
I’ll leave links to all the supplies I used for this project below, in case you need to do some quick shopping. They’re affiliate links, which means that if you decide to make a purchase from Goody Beads, then it benefits my blog at no extra cost to you (and thank you, by the way). The total cost on these lockets is well under $20 each if you’re already into metal stamping and have your basic supplies… and if you’re not, you can either omit the disc entirely, or you can get on the stamping bandwagon already with one of the several dozen metal stamping projects I have here at Happy Hour Projects. ;)
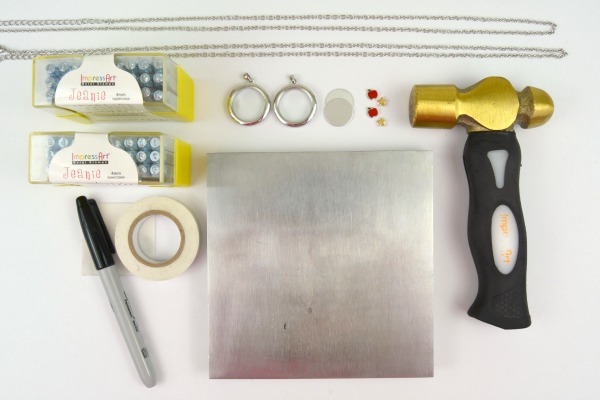
You will need:
- 30 mm silver plated glass locket
- ImpressArt SoftStrike 3/4 inch round aluminum blank
- Bench block and hammer
- Alphabet stamps (ImpressArt’s Jeanie font was perfect for this project)
- Permanent marker and polishing pad
- Stamp Straight Tape
- 28″ adjustable cable chain
- Apple floating charm
- Gold star floating charm
- Jewelry pliers
A quick note: I used the more economical hinged lockets, which are quite nice, especially to suit our purposes today. But if you’d like an even higher-quality locket, there’s a stainless steel version of the 30mm locket with a magnetic clasp. I’ve used that locket in other designs, and you’ll want to order 7/8 inch aluminum discs to fit, because the inside diameter is just slightly larger. The magnetic clasp lockets are about twice the cost, but if you’re putting a locket together for yourself that you know you’re going to wear for a long time to come, I’d recommend the nicer locket.

Now, if you’re new to stamping, you will want to check out my detailed beginner’s metal stamping tutorial, which includes a list of what to buy, how to get started, and even a video to see it live. Today I’ll just be sharing the basic overview and a few tips that help me get my best results. First of all, using a soft (and inexpensive) metal like aluminum is a great way to get started, because it takes an impression much more easily than copper and brass.
I tape mine securely to my steel bench block with Stamp Straight Tape, and I mark where my letters will go. VERY gently, drag the stamp down so that the edge of the letter butts up against the edge of the tape. You will get a feel for this quickly – but it’s the easiest way to line up your lettering. Level your stamp by holding it totally vertical, and give the end one firm tap with your hammer. Continue on until you’ve stamped all your letters without descenders (g, j, p, q, and y). You can see in the center photo above that I stamped “Trac” and stopped. Personally, I remove the tape, and line it up along the tops of my lowercase letters, and drag the stamp upward toward the tape to line up the “y”. Other stampers may have a different method, but I’m able to get a more consistent, even look by doing it this way, so I’ll share it with you.
Finally, darken your letters. Because aluminum won’t oxidize, you’ll have to darken the impressions with a permanent marker or acrylic paint. Just get into all the grooves, and then use the polish pad to remove the excess ink from the surface. The ink dries quickly and gets more difficult to buff off, so I darken one word at a time, then move on to the next.
You’ll find that for lockets, keeping the letters all in the upper half of the disc is ideal – the bottom will fill up with charms, after all, so it will be more legible if it stays at the top!

If you’re using the supplies that I listed above, you’ll find that you can’t fit the chain through the bail on the locket. That’s a good thing; that means it’s much harder to lose! But it also means you’ll have to twist open the jump ring that attaches the extender to the main part of the chain, add the locket, then re-attach the extender by twisting the ring closed again with your pliers.

Finally – I let my daughter loose making the lockets. Recently I allowed her to make one for herself, so she’s quite the pro now! She added the stamped disc, and then the charms on top. Then, just snap it closed!
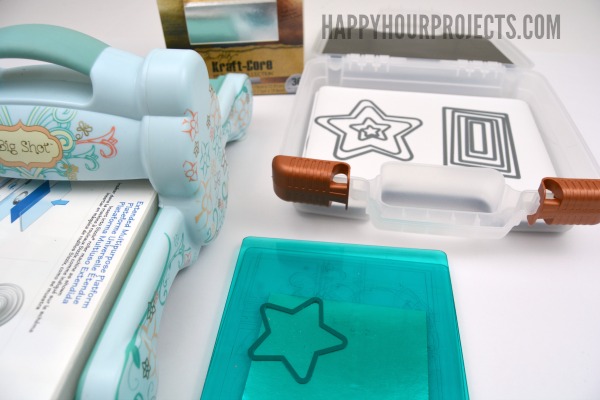
We packaged these up with a silver star theme, die-cutting tiny cards from metallic card stock to finish off the gift.

Raya signed her name while I whipped up a couple of envelopes to fit, and we’ve got a fully-handmade pair of gifts for her teachers to show them just how much they have meant to Raya this year, her first year at school!

And now, to figure out what on earth we’re going to do to keep that girl occupied come Memorial Day. Haha.
Thanks for joining me today, and happy stamping!

Hi,
These are super cute.! However, I have observed that many teachers do not use the stereotypical apple theme. A suggestion would be to observe the teacher (your child does this all the time) and personalize this wonderful gift with something other than an apple..
That’s a great point, Beth. At 4, that’s a bit of a challenge for my daughter, of course, but older kids should definitely be able to do that!
What’s cool about these lockets is that they can hold several charms – I keep 9 in my locket! So if you aren’t sure (or as it is in many cases, where the parent is organizing the gift, haha), including just one or two charms related to how you know that person is something they can add to over time – which works for everyone, not just teachers!
But encouraging kids to learn what interests other people is always a good skill to develop, so I’m glad you brought it up.
i would like this made with my grandkids name Grayson and Izzy