• Skip to primary navigation
  • Skip to main content
  • Skip to primary sidebar

  • home
  • about adrianne
  • buy the books
    • DIY T-Shirt Crafts (2015)
    • DIY Stamped Metal Jewelry (2016)
    • Rock Painting for Beginners (2019)
  • videos
  • crafts
    • diy beauty projects
    • kids’ crafts
    • paper craft projects
    • polymer clay
    • sewing projects
  • jewelry
    • bracelet projects
    • earring projects
    • necklace projects
    • jewelry tools & supplies
  • metal stamping
    • beginners’ tutorial
    • video tutorial
    • project ideas
    • metal stamping supplies
  • recipes
    • cocktail recipes
    • appetizers
    • main and side dishes
    • sweets and treats
  • by season
    • birthdays
    • new year
    • valentine’s day
    • st. patrick’s day
    • easter and spring
    • mother’s day
    • patriotic
    • fall
    • halloween
    • christmas
    • thanksgiving
  • privacy

Happy Hour Projects logo

08/08/2012

Bite-Sized Party Bark

I have a fun and simple recipe today, and a way to dress it to impress, as well!  You can have this party bark done from start to finish in an hour or less – about 15 minutes of prep, and the rest of the time for your bark to set.
Party Bark

With the help of a set of shaped ice cube trays or candy molds, a simple recipe like chocolate bark looks so much more festive.  I found these star-shaped ice cube trays at Wal-mart… for a buck!  The silicone ones are even easier to work with, though they tend to be a little more expensive.

What you will need:

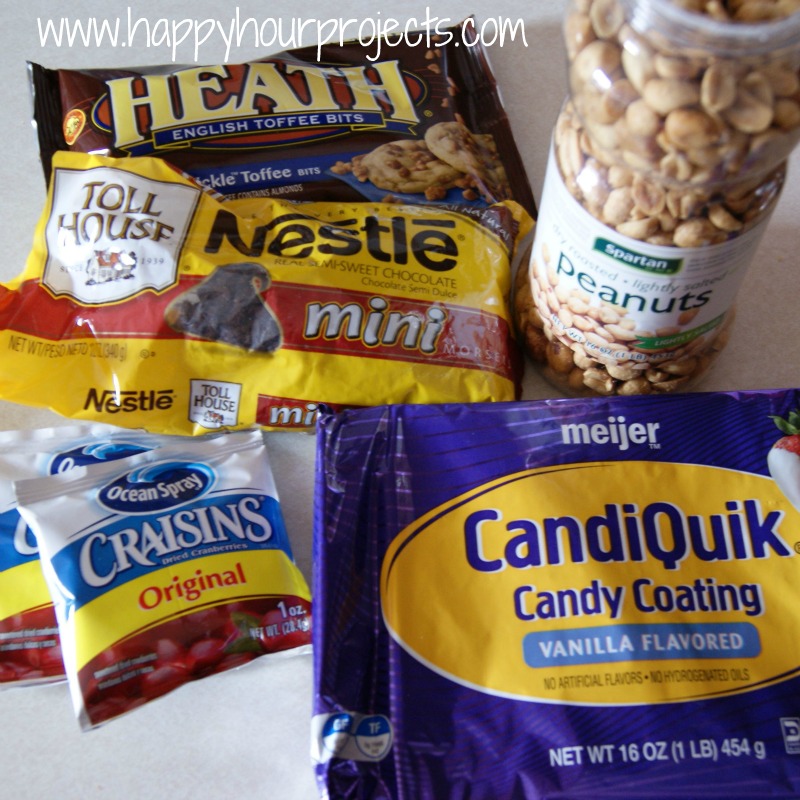
White Chocolate to melt – or go the really easy route, and use Candiquik.  You could also use milk chocolate just as easily.  If you do, make sure you are using something that’s designed to melt easily.  How do you know?  Check to see what the melting instructions on the package are.  Avoid anything that doesn’t have melting instructions.

You will also need something salty, something crunchy, something chewy, and something with nice color for a good recipe.  You don’t need to follow my recipe exactly – check your cupboards!  You probably have ingredients that will work.

What I used for 2 trays of candies (28 pieces):

1/2 package of Vanilla Candiquik
2 Tbsp. chopped peanuts
2 Tbsp. Heath toffee chips
2 Tbsp. mini chocolate chips
1 oz. Craisins  (sorry, I don’t know how many Tbsp. that would be, I just had the individual packages on-hand for lunches, and I used one of them)

If your peanuts are whole… chop them.

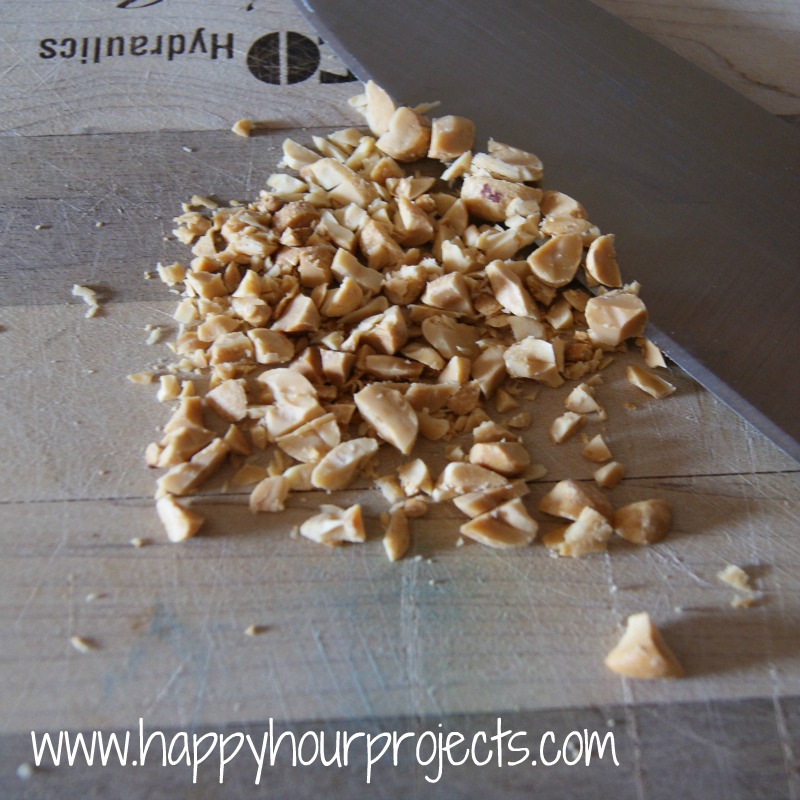
Stir all your mix-ins together.

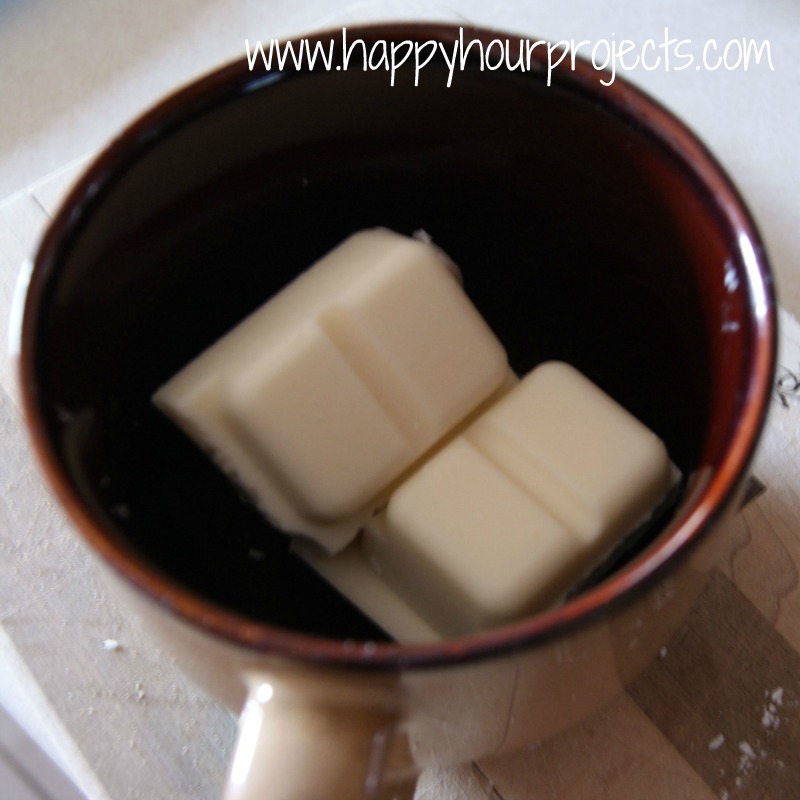
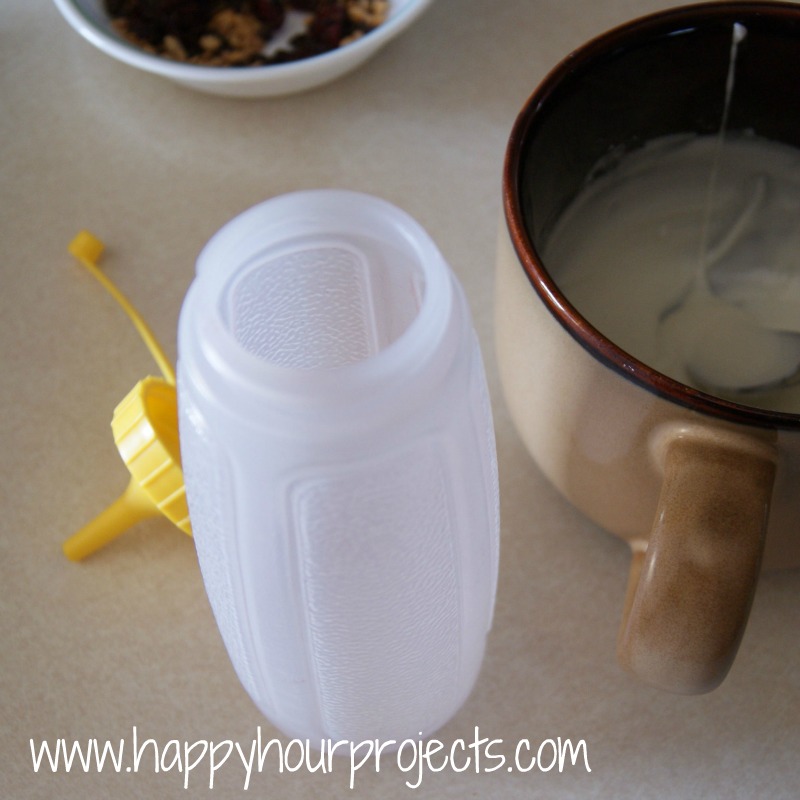
Now, melt your chocolate.  Pay close attention to the package directions.  I always melt mine in the microwave because it only takes like, a minute.

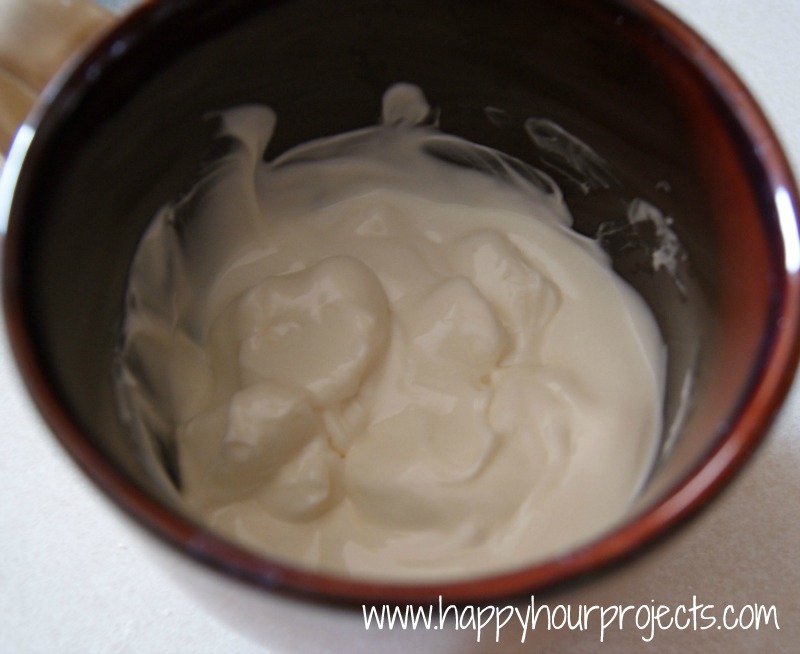
Stir it often.  Mine was actually done when it looked like this – because when you stir it really well, the hotter spots will melt the remaining chunks.  You can overheat it, and that will just make it harder – not smoother.  Don’t do that. :P

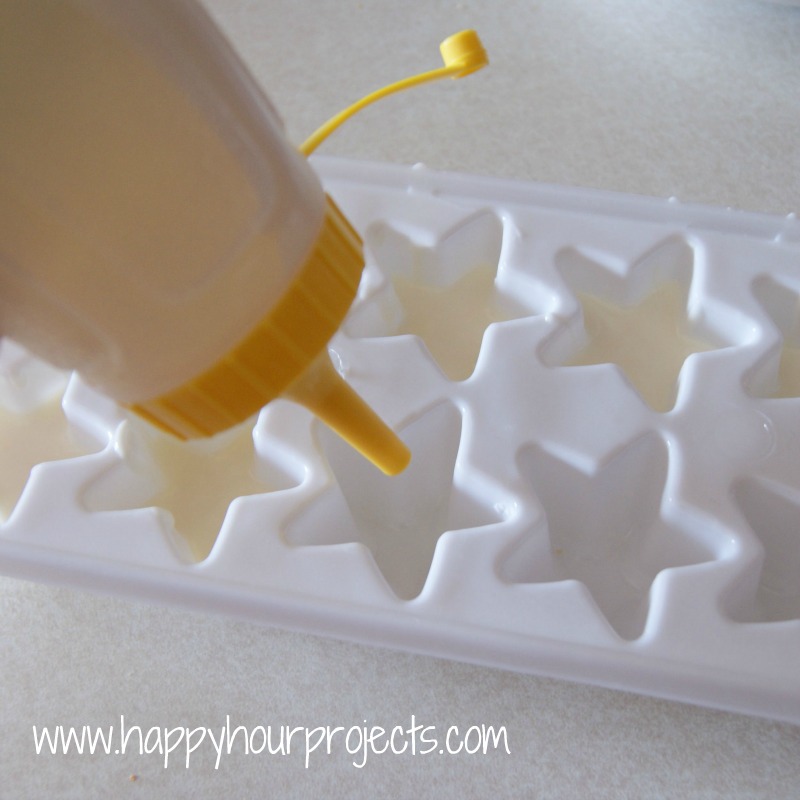
You can spoon your melted chocolate into the cube sections, but I find another method to be WAY easier and more controlled.  I have a set of ketchup/mustard bottles that I found at the dollar store.  Put your melted chocolate into the bottle.

And squirt it that way.  No little candy strings that way, and you can put in exactly how much you want.  Now, how much do you want?  I found I was a little heavy on the Candiquik when I filled these nearly halfway, so I’d recommend adding about 1/2 inch, maybe less.  It needs to be enough for all your toppings to stick into, but not much more than that.

If you think it’s a hassle to wash out when you’re done… for that price, you can throw it away if you want to.  (I just wash mine, I don’t mind.)

Sprinkle your toppings on.  Press them in just a little, to make sure that everything sticks.  You may wonder why we didn’t just stir the whole mixture together… I just find that this way is easier and prettier.  If you’d rather mix it and spoon it – feel free!

Now, just cool your bark until it’s solid.  If you’re in a rush, you can speed this process up by putting it in the frig, though it’s not necessary – it will harden just was well on the counter.

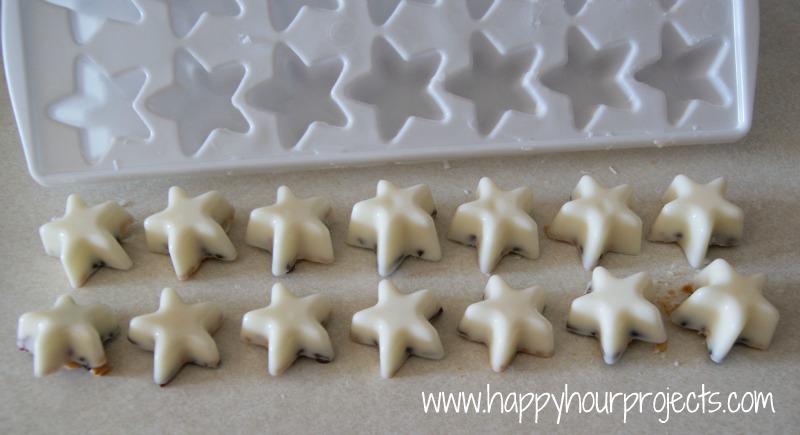
Then, just pop them out.  If your trays are pretty rigid (like mine) I found that by twisting them like you would for ice, then turning it upside-down and giving each cavity a decent press on the bottom with a spoon handle, I got all of them to pop out without too much of an issue.  If you’re using silicone trays – it will be really easy.  Just press up on the bottoms and your bark will pop right out.

Party Bark

Then, just toss them on a plate to serve!

I link up to these great parties!

Filed Under: Featured, Recipes, Sweet Treats Tagged With: bark, chocolate, Christmas, desserts, molds, stars

copyright policy and terms of use

I love it when you love my work! All tutorials and photos published at Happy Hour Projects are copyrighted. If you would like to feature my tutorial on your website or share it on your social media you may use one photo to feature, as long as you provide a link back to the original post.

If you feature a photo, it may not be accompanied by the project tutorial or recipe, whether in my own words as it originally appears or paraphrased by you. This also includes personal sharing on social media and Pinterest. Publishing multiple photos from a project, or including instructions with an accompanying photo are not permitted and you will be asked to remove them.

I love to share my projects, and my tutorials, recipes, and e-books are ALL free for your personal use. However, photos and ideas that are published to this site are my protected intellectual property. You may print them at home, but please do not copy or distribute them. I also allow all designs to be made and sold at fundraisers, craft fairs, etc. If you are selling a piece made from one or more of my free tutorials in your online shop, I require that you use your own, original photography, and include a link back to my website to credit me as the designer.

I hope you enjoy what you read here, and please be fair when you share!

Reader Interactions

Comments

  1. phyllis kramer says

    12/09/2023 at 12:20 pm

    I would love to try your candy bark stars but I cannot print the recipe and I don’t want to have to print 13 pages. Is there another way?

    Reply
  2. Keira says

    12/04/2022 at 9:22 pm

    This looks so tasty!

    Reply
  3. Tricia says

    12/13/2018 at 9:33 pm

    to this comment on your recipe …

    “You may wonder why we didn’t just stir the whole mixture together… I just find that this way is easier and prettier. If you’d rather mix it and spoon it – feel free!”

    I would suggest not ! I mixed it for expediency, big mistake !
    Although it might have been easier, the mini chocolate bits melted.
    I ended up with a light chocolate colour rather than white stars with the contrast mix.

    Reply
  4. www.gloucesterpainters.com says

    07/27/2018 at 7:33 pm

    This paragraph presents clear idea designed for the new users of blogging, that genuinely
    how to do blogging and site-building.

    Reply
  5. Nancy says

    11/17/2015 at 7:41 pm

    Pass those trays up all the time at yard sales! You can be sure I’ll grab them next time. This recipe is a keeper. Thanks!

    Reply
  6. julie rawat says

    10/21/2014 at 3:11 am

    Chocolate is one of the most enjoyable and effective ways to medicate.Full Melt chocolates are organic fair trade premier brand of medicated chocolate bars.

    Reply
  7. Christine Cubelo says

    07/05/2014 at 8:33 am

    any ideas for what to put in with the cranberries & choc chips for people with nut allergies??

    Reply
    • Christine Cubelo says

      07/05/2014 at 8:35 am

      oops I blazed by Amanda’s earlier post :) got it!

      Reply
    • Rebecca says

      11/16/2021 at 1:47 pm

      Pretzels?

      Reply
  8. Man Fritts says

    04/13/2014 at 6:42 am

    Oh yumm yumm, these are so pretty and look delicious! I’ll be looking for some fun trays. Thanks for sharing!

    Reply
  9. Gloria says

    12/20/2013 at 4:01 pm

    Pinned these weeks ago on my Christmas board. And by chance, I found silicone ice cube trays in the Target Dollar Spot just a few days ago. (only bought one, not sure why.)They worked wonderfully and they have snowflake patterns and Christmas trees.

    Reply
  10. Maria says

    12/14/2013 at 1:05 pm

    These are awesome! Thank you for sharing!

    – I did not see this question in the comments (but I raced through) … can you tell me, how far ahead can these be made? Can they store longer in the fridge… or freezer?

    Thanks!

    Reply
  11. joanne vitale says

    12/06/2013 at 12:02 am

    that is something i will try… where do get candyquic at ???

    Reply
    • Adrianne says

      12/06/2013 at 6:50 am

      My grocery store carries it, but if you can’t find it then Candy Melts (like what Wilton makes) are available at most craft stores in the cake aisle, or you can always use regular melting chocolate from your store’s baking aisle. If there are melting instructions on the package, then it will work! I just use Candiquik because I do a lot of dipping and some edible crafts, so that is what I had on-hand when I was making the recipe (which I never imagined would be such a hit when I first shared it!)

      Reply
  12. Melissa says

    12/05/2013 at 3:52 pm

    Making these tomorrow! I bought mixed, salted nuts that I’ll chop up, mixed dried fruit, semi-sweet chocolate chips that I might crush (didn’t realize these were mini), and Ghiardelli white chocolate disks to melt. Here’s hoping! This is my first time making candy for Christmas instead of cakes or cookies. Totally scared!

    Reply
  13. Sharon P says

    12/04/2013 at 12:57 pm

    Made these, but they didn’t really turn out. Couldn’t find Candiquik in Canada, used white chocolate instead.

    The first batch was ruined. I added clear vanilla extract to the white chocolate as it was melting on the stove and something chemically happened that made the melted chocolate turn solid instantly.

    The second batch was fine, but I found the taste way too sweet.

    Won’t be making again.

    Reply
  14. Amanda Mikker says

    11/26/2013 at 11:41 am

    any ideas for the peanut allergy family?

    Reply
    • Adrianne says

      11/26/2013 at 11:50 am

      Sure! In fact, I even answered the same question just a couple comments above.

      “Bark like this is really versatile. I find as long as you have something crunchy and salty in there with the sweet, it will turn out good. Some crushed pretzels might fit the bill… just try to think of something crunchy and salty that you already like and try it!”

      Reply
  15. Tammy says

    11/21/2013 at 5:13 pm

    I just love this idea….I just purchased these same ice trays not to long ago…can\\\’t wait to do this!! I would love to invite you to come by and share it at One More Time Events…. hope to see you there! TammyNew Follower

    Reply
  16. Whitney says

    10/26/2013 at 9:48 am

    I think these are so cute! I was wanting a few opinions though. Because of allergies and taste preferences, do you think it’s ok to leave nuts out? I was thinking about doing chocolate chips and dried blueberries. What else should I add? Thanks for the input!

    Reply
    • Adrianne says

      10/26/2013 at 9:53 am

      Oh for sure! Bark like this is really versatile. I find as long as you have something crunchy and salty in there with the sweet, it will turn out good. Some crushed pretzels might fit the bill… just try to think of something crunchy and salty that you already like and try it!

      Reply
  17. Ava says

    08/03/2013 at 10:27 am

    If you put your squeeze bottles in the freezer when done and let the chocolate freeze you can squeeze the bottles and the stuff will crumble off the plastic and you can shake it out and save it. Then wash the bottles. Lets keep everything out of the land fll we can.

    Reply
  18. Marilyn says

    05/23/2013 at 12:00 pm

    OH, I remember these….mmmmmmm

    Reply
  19. Marilyn says

    01/07/2013 at 12:25 pm

    I never thought to use an ice cube tray in this way….AWESOME!!

    Reply
  20. Quinoa says

    01/03/2013 at 9:31 am

    Beautiful sweets anda fantastic idea to use the bottle to file the ice cube trays!

    Reply
  21. ang says

    01/02/2013 at 2:27 pm

    Hello! I’m stopping by from the The Best of 2012 at 4 You with Love – these are too cute! Thanks for sharing :) Happy New Year!!

    Reply
  22. Andrea says

    12/23/2012 at 4:52 pm

    I LOVE this!!! Found it on Pinterest and it’s awesome. I might be able to do it but then I’d want to eat them all. :>

    Reply
  23. Beth says

    12/22/2012 at 4:45 pm

    Just made these in silicone snowflake ice cube trays they are ADORABLE! I’m so excited to show everyone at the Christmas Party I’m going to. And they were so easy!!

    Reply
  24. angela says

    12/19/2012 at 11:43 am

    how do you get the chocolate to come up on the sides of the mold like that? thx :)

    Reply
  25. Carole says

    12/12/2012 at 12:05 pm

    Thanks for sharing this – pinned it and just made a batch. We have a nut allergy with our grandson so used a chopped up nut free granola bar and added raisens. They look great.

    Reply
  26. Lisa says

    10/25/2012 at 6:47 pm

    LOVE these. What a great hostess gift idea! Thank you. :)

    Reply
  27. Susie Buetow says

    10/25/2012 at 11:52 am

    Love the idea! I'll have to do this for my Christmas Open House. I already make bark but this looks more fuN!

    Reply
  28. Kim says

    09/15/2012 at 4:55 pm

    super creative! I have so many silicone molds, too this would be perfect!

    hugs! Kim @ Party Frosting!

    Reply
  29. Jo and Sue says

    08/17/2012 at 11:56 am

    Saw your feature on My Turn (for us) and had to pop over to say “Wow!”. So cool. I pinned this so I can make this later. Thanks for sharing such a great idea!

    Reply
  30. The Better Baker says

    08/17/2012 at 3:47 am

    These are just adorable! Congrats on being featured at Freedom Fridays!

    Reply
  31. Andy David says

    08/16/2012 at 3:39 am

    Hello.
    Visiting from Kathe's blog hop.

    I'm a die-hard chocoholic. These look so good that's I'd probably have to sample a few. LOL
    Thanks for sharing.

    E is for: The Eyes Of Life

    Reply
  32. Joan says

    08/16/2012 at 2:48 am

    Love this! Perfect way to use up leftover chocolate when done dipping things like pretzels, cookies, Donuts… Love this idea! Pinned.

    Reply
  33. Lorie K says

    08/16/2012 at 1:48 am

    Oh my! I have those ice cube trays! Can't wait to try this!

    Reply
  34. Trish says

    08/15/2012 at 8:57 pm

    Adrianne these are so pretty! Pinning and featuring tonight! Thanks so much for sharing!

    Reply
  35. Jessi Wohlwend says

    08/15/2012 at 4:06 pm

    Just wanted to let you know I featured this on my blog today! Feel free to stop by, check it out, and grab a Featured button if you want: http://practicallyfunctional.net/2012/08/the-fun-in-functional-link-party-12/

    Reply
  36. Heidi Fowler says

    08/15/2012 at 3:53 pm

    Awesome idea! Pinned it.

    Reply
  37. Heather Kinnaird says

    08/14/2012 at 7:33 pm

    amazing idea

    Reply
  38. Full Circle Creations says

    08/14/2012 at 3:11 pm

    Just wanted to let you know that your party bark has been featured this week at the All Star Block Party features. Stop by and grab your button.

    Holly
    http://fullcirclecreations.blogspot.com/2012/08/its-feature-time_14.html

    Reply
  39. Full Circle Creations says

    08/13/2012 at 2:10 am

    So yummy and amazing looking! Thanks for sharing at the All Star Block Party.

    Holly

    Reply
  40. Britni says

    08/11/2012 at 6:03 am

    Ah! These are absolutely adorable! And I have those same ice trays that I used in a 4th of July post… these would of been fun to make then too! I would love if you shared this at my Throwback Thursday party. I hope to see you there! Thanks for sharing :) http://www.hubbymademe.com/throwback-thursday-no-5/

    Reply
  41. Candace Jedrowicz says

    08/10/2012 at 12:52 pm

    Two Tablespoons should be one oz. and those look about a zillion oz's of delicious!

    Reply
  42. Jessi Wohlwend says

    08/10/2012 at 2:29 am

    Yum! These look fantastic, and they'd be the perfect little holiday snack to have out when people come over. Thanks for sharing at The Fun In Functional!

    Reply
  43. Nicole {WonkyWonderful} says

    08/09/2012 at 4:53 pm

    Yum – these look awesome! I bet they taste better because they are shaped like stars too :)

    Reply
  44. Ang says

    08/09/2012 at 3:06 pm

    we love making bark, but i never thought to make it in molds – so cute! i'm pinning this now! :)

    Reply
  45. Terry says

    08/09/2012 at 1:49 pm

    I'm surprised at how easy these are. I don't think I've seen the Candiquik (maybe it's in with the freezer paper, lol), but as you mentioned the microwave makes quick work of any chocolate I've ever tried,…so this is super easy and super pretty.

    Reply
  46. hilljean says

    08/09/2012 at 6:47 am

    OMG! Are you kidding? These look absolutely wonderful! I cannot wait to try!

    Reply
  47. Barbara Hiatt says

    08/09/2012 at 5:37 am

    Holy smokes, these look soo tasty Adrianne! Pretty too!
    Wanted to stop by and thank you so much for linking up at the Creative Headquarters Blog Hop! I'm following you now on GFC! Hope to see you next week!

    Barbara @ Chase the Star
    http://chase-thestar.blogspot.com

    Reply
  48. Sarah says

    08/08/2012 at 10:11 pm

    What a genius idea to make these in ice cube trays! I love it!

    Thanks for linking up to our CHQ Blog Hop. I'm following you back now and am excited to read more. Hope to see you again next Tuesday, or join us for our linky party Thursday evening. :)

    Reply
  49. happy-little-feet says

    08/08/2012 at 7:17 pm

    Beautiful. I love them
    Happy Little Feet

    Reply
  50. Angela says

    08/08/2012 at 6:44 pm

    Yummy, these look amazing !

    Reply
  51. meet.make.laugh. says

    08/08/2012 at 4:53 pm

    These look awesome! I like the idea of using ice cube trays as candy molds :)

    Reply
  52. Kadie says

    08/08/2012 at 3:49 pm

    They look delish! They would be perfect for a goodie plate at Christmas!! I'm totally pinning this!:)

    Reply
  53. Brittany says

    08/08/2012 at 3:48 pm

    Love this! Thanks for sharing!!
    ~Brittany
    thedennybuzz.blogspot.com

    Reply
  54. Meredith says

    08/08/2012 at 1:37 pm

    These look so good. I like that you used that squirt bottle too…made the whole process a lot easier I bet! Thanks again for linking up to our Blog Hop! :o)

    Reply
  55. holli says

    08/08/2012 at 1:27 pm

    I'm going to a party this Friday and i need to bring something. This couldnt have been posted at a better time. Im so excited to try it.

    Reply
  56. Jill says

    08/08/2012 at 1:16 pm

    That looks delicious! Thank you so much for linking up to our Blog Hop my friend! =)

    Reply
  57. Sue Alexander says

    08/08/2012 at 12:53 pm

    I love doing this, I have like 20 silicone molds just for this, I really should do it more often. And yours look healthy they have nuts and stuff in them;p

    Reply
  58. Danni Baird says

    08/08/2012 at 12:19 pm

    Oh these are so pretty and look delicious! I'll be looking for some fun trays. Pinned it! Thanks for sharing!

    Reply

Trackbacks

  1. 33 White Chocolate Recipes - Catholic Sprouts says:
    07/25/2022 at 1:05 am

    […] from Living Better Together Berries and Cream White Chocolate Bark from Do Small Things with Love Bite-Sized Party Bark from Happy Hour Projects Biscoff Stuff White Chocolate Cookie Tart with Fresh Berries from Around […]

    Reply
  2. 50 Creative and Cool Ice Cube Tray Ideas - All Time List says:
    04/30/2018 at 6:40 pm

    […] many toppings like candy, dried fruits or nuts. Buying it can be expensive so why not make some? Click here to get the recipe and start making your own party bark with the toppings of your […]

    Reply
  3. Joy in December - Keri Lynn Snyder says:
    12/22/2017 at 5:01 am

    […] my sister. We always have so much fun. This year we made chocolate pretzels, peppermint bark, and this amazing candy. So, so, so […]

    Reply
  4. Handmade Holidays Nov. 20: BBQ Time | Sew Mama Sew says:
    02/05/2017 at 9:10 pm

    […] Sized Gluten-Free Holiday Bark You can’t go wrong with this Bite Sized Gluten-Free Holiday Bark from Happy Hour […]

    Reply
  5. 50+ Last Minute DIY Christmas Gifts says:
    12/13/2016 at 11:14 am

    […] Bite-Sized Party Bark @ Happy Hour Projects […]

    Reply
  6. Bronwyn’s Handmade Christmas 2016: 6 Months Away! – Bronwyn the Brave Designs says:
    06/25/2016 at 2:54 pm

    […] or silicone mold, you get a festive presentation as well as great portion control. After reading this post a couple of years ago, I found a set of three star-shaped ice cube trays on clearance at Wal-Mart […]

    Reply
  7. 26 Diy ideas to use ice cube tray for Great purpose says:
    11/27/2015 at 8:44 am

    […] Bite-Sized Party Bark […]

    Reply
  8. 20 Holiday Bark Recipes - Confessions of a Cooking Diva says:
    04/04/2015 at 3:37 pm

    […] Bite Sized Party Bark via Happy Hour Projects […]

    Reply
  9. Handmade Holidays Bonus: Star Light, Star Bright | Sew Mama Sew | Outstanding sewing, quilting, and needlework tutorials since 2005. says:
    12/01/2014 at 5:14 pm

    […] Bite-Sized Party Bark Let the star theme continue into your holiday baking! Try this Starry Bite-Sized Party Bark from Happy Hour […]

    Reply
  10. Handmade Holidays Nov. 20: BBQ Time | Sew Mama Sew | Outstanding sewing, quilting, and needlework tutorials since 2005. says:
    11/20/2014 at 10:29 am

    […] Sized Gluten-Free Holiday Bark You can’t go wrong with this Bite Sized Gluten-Free Holiday Bark from Happy Hour […]

    Reply
  11. 75 Homemade Edible Gifts | True Aim says:
    11/17/2014 at 4:17 am

    […] 28. Bite Sized Party Bark with Mini Chocolate Chips and Peanuts […]

    Reply
  12. Thanksgiving Dessert Recipes - StoneGirl says:
    11/13/2014 at 12:15 am

    […] Click Source: Bite Sized Party Bark […]

    Reply
  13. 40 Clever and Creative Ways to Use an Ice Cube Tray - DIY & Crafts says:
    08/25/2014 at 6:17 pm

    […] Silicone ice cube trays are perfect for making yummy and easy bite sized barks. You just have to add the melted white chocolate or almond bark and then drop in whatever you want like peanuts, dried cranberries or just whatever you prefer in your bark. These take only a few minutes to prepare and then you just have to wait until the bark hardens. Pop them out and you have the perfect party treat or just make a few for a yummy late night snack. Instructions and Project Credit – Happyhourprojects […]

    Reply
  14. 35 Red, White & Blue Treats - Songbirds and Buttons says:
    05/22/2014 at 12:05 am

    […] Bite Sized Party Bark / Happy Hour Projects […]

    Reply
  15. 50 Red, White, and Blue Recipes - Growing Up Gabel says:
    05/01/2014 at 12:38 pm

    […] Red, White and Blue Bite Sized Party Bark from Happy Hour Projects […]

    Reply
  16. Homemade Holiday Treats: Candy Bark Recipes - HotCouponWorld.comHotCouponWorld.com says:
    03/25/2014 at 9:58 am

    […] Bite-Sized Party Bark via Happy Hour Projects […]

    Reply
  17. 32 Ingenious Ways To Use An Ice Cube Tray says:
    02/16/2014 at 5:07 am

    […] happyhourprojects.com […]

    Reply
  18. Christmas Candy says:
    01/06/2014 at 10:49 am

    […] Mix Bark  adapted from Bite-Sized Party Bark by Happy Hour […]

    Reply
  19. Year In Review: Best of Happy Hour Projects says:
    12/31/2013 at 6:01 am

    […] number one holds the title of “top post” for two years running: Bite-sized Party Bark!  Who knew that just making up a sweet bark recipe in ice cube trays would be such a popular […]

    Reply
  20. 3 Tasty Gluten-free Christmas Cookie Recipes says:
    12/30/2013 at 11:09 am

    […] Party Bark from Happy Hour Projects seems adorable and […]

    Reply
  21. Christmas Recipes Snacks and Treats for Kids « Child Care Directory says:
    12/20/2013 at 1:55 am

    […] Party Bark via Happyhourprojects.com Ingredients 1/2 package of Vanilla Candiquik 2 Tbsp. chopped peanuts 2 Tbsp. Heath toffee chips 2 […]

    Reply
  22. Holiday Delights says:
    12/12/2013 at 12:02 pm

    […] Second Row, Left to Right: Dark Chocolate Bites , Pomegranate Lemonade , Ginger and Cranberry Quick Bread , Party Bark […]

    Reply
  23. A Different Bark Recipe for Every Tastebud says:
    12/09/2013 at 10:51 pm

    […] from Happy Hour Projects adds extra style to her bark by simply filling up inexpensive start ice cube trays with her white […]

    Reply
  24. Easy Snowflake Peppermint Bark says:
    09/23/2013 at 2:41 pm

    […] Sprinkle the candy cane on top of your chocolate mixture.  It’s true, you can mix it in instead and THEN spoon your mixture in, I just love the effect of having it set on top.  I did the same thing when I made my Star-Shaped Party Bark. […]

    Reply
  25. 100 Perfectly Patriotic Ideas: Recipes, Decor, Crafts + MORE says:
    05/30/2013 at 2:19 am

    […] Bite Sized Party Bark {Happy Hour Projects} […]

    Reply
  26. Chocolate Peanut Butter Oreo Bark says:
    05/20/2013 at 6:00 am

    […] read here often you probably remember last fall when I made up a white chocolate bark recipe and put it in star-shaped ice cube trays.  Well, today’s idea is much the same – just a totally different […]

    Reply
  27. Thema: romantiek en cadeautip says:
    02/12/2013 at 5:03 am

    […] Inspiratie: Bite sized party bark […]

    Reply
  28. If I Can Do It You Can! says:
    01/21/2013 at 9:50 pm

    […] SIZE PARTY BARK – http://happyhourprojects.com/2012/08/bite-sized-party-bark.html These are easy to make, pretty and don’t cause much of a mess. Sold! They also look […]

    Reply
  29. Looking Back on 2012, and Ahead to 2013 says:
    01/01/2013 at 6:01 am

    […] – Bite Sized Party Bark.  I posted this one in September, but it didn’t get really popular until Christmas […]

    Reply
  30. OMG!!! Now this is new!! …. :-) ….. ***Christmas Awesome Alert*** Bite-si says:
    12/25/2012 at 1:47 pm

    […] chips in ice cube trays or candy trays. More info: expensivelife™.PARTY appetizer!!! link: http://www.happyhourprojects.com/2012/08/bite-sized-party-bark.html, read here: this one. This entry was posted in Posts by admin. Dec 25 […]

    Reply
  31. Case of the Mondays? says:
    12/24/2012 at 10:11 am

    […] Bite Sized Party Bark I love this idea and it is perfect for a party or […]

    Reply
  32. PinLaVie... Make your pins come true – Bite-Sized Party Bark says:
    12/06/2012 at 2:27 pm

    […] Bite-Sized Party Bark […]

    Reply
  33. Family Christmas Baking {Edmonton Family Photographer} » Lisa Lacroix Photography says:
    11/27/2012 at 5:42 pm

    […] happyhourprojects.com via Lisa on […]

    Reply
  34. Christmas Party Bites says:
    11/27/2012 at 9:39 am

    […] from Happy Hour Projects… Bite Size Party Bark. What an incredibly cute and fun way to use candy […]

    Reply
  35. T.G.I.F. says:
    11/16/2012 at 6:17 pm

    […] Yummy holiday snacks […]

    Reply

Leave a Reply Cancel reply

Your email address will not be published. Required fields are marked *

Primary Sidebar

Hello, and welcome! I'm Adrianne, an artist, author, designer, and blogger in mid Michigan. I work from home, chase my two kids, and this once-city-girl is learning how to care for chickens and adjusting to life out in the country. I have a compulsion for daily creativity... sometimes it's jewelry-making, paper crafting, metal stamping, mixing and baking, or giving new life to recycled items. But with 2 young kids, time is short! My goal here at Happy Hour Projects is to share projects and tips that you can do in an hour or less. The ideas you find here are designed to add a little creativity in your day, no matter how much (or how little) time you have!

BUY MY BOOKS!

Copyright © 2025 Happy Hour Projects on the Brunch Pro Theme