

I didn’t invent this design or anything – I’m sure you’ve seen variations floating around on Craftgawker and Pinterest. But I finally made some – there’s hardly even a tutorial involved, they’re such a quick thing – and I will give you some hints for keeping it as simple as possible.
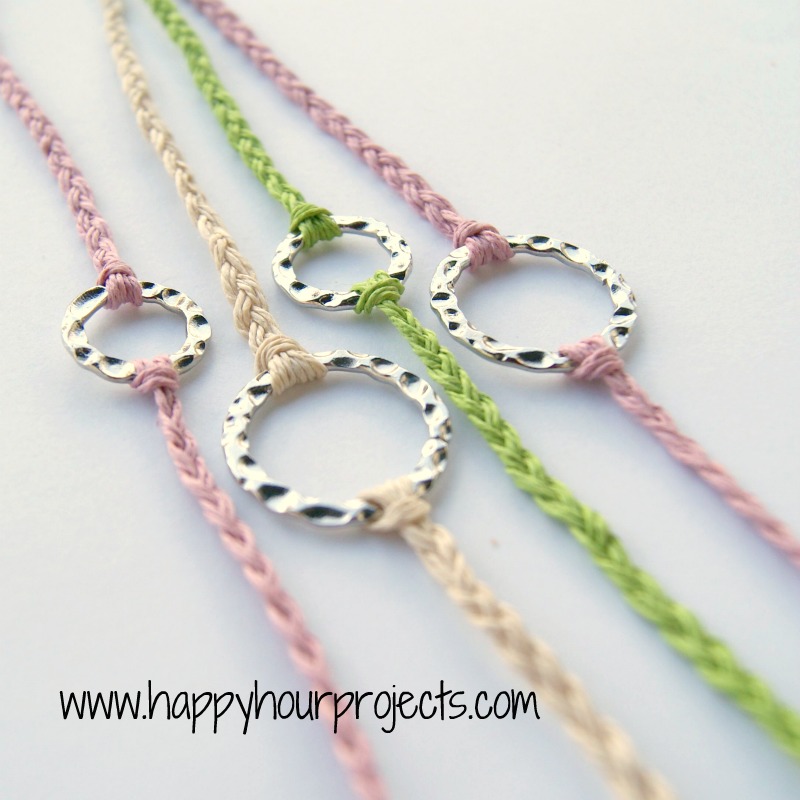
First of all, my focal pieces are links from a chain I picked up somewhere along the line. I just used a pair of wire cutters to remove a few links.
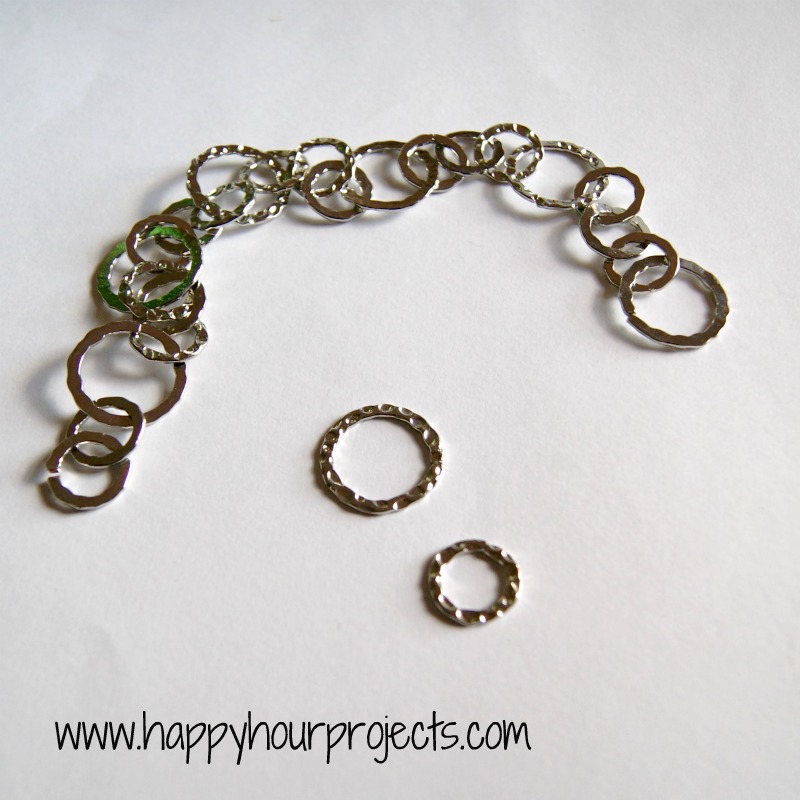
Think creatively here: you can use anything round, or anything that has two holes. Anything that you can tie two sets of twine to. Washers, connecting charms – just raid your box of things-you’ve-been-hanging-onto – you may surprise yourself at what you can find that will work!
Cut six lengths of 18″ (give or take an inch or two) twine. I have LOTS of hemp leftover from the wish bracelets and word bracelets I made, so that is what I used. If you’re low on twine you can make this with four strands, but braiding with four strands takes more time than a traditional braid for me, so to keep this *simple* I’m going to tell you to use six. You could also use embroidery floss here, cotton twine – really, anything you like the looks of!
Take three of your strands, and double them in half, so that you have six loose ends, and three loops in the center. Take the loops and thread them through your focal ring.
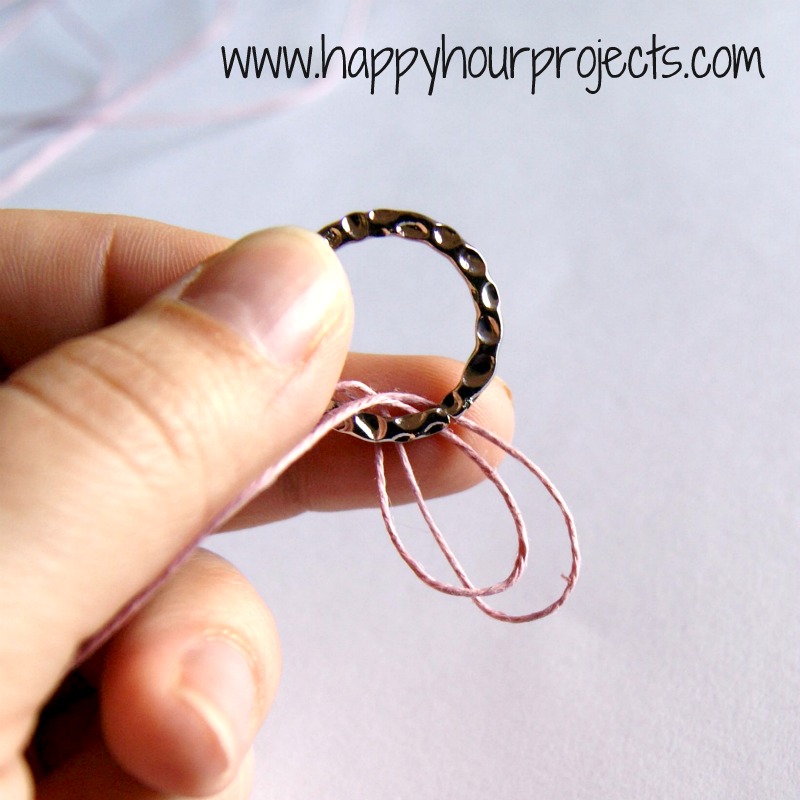
(You’ll notice there are only two in the photo – when I took my photo, I hadn’t yet discovered how much slower I would be at a four-strand braid. So yours will have three loops here.)
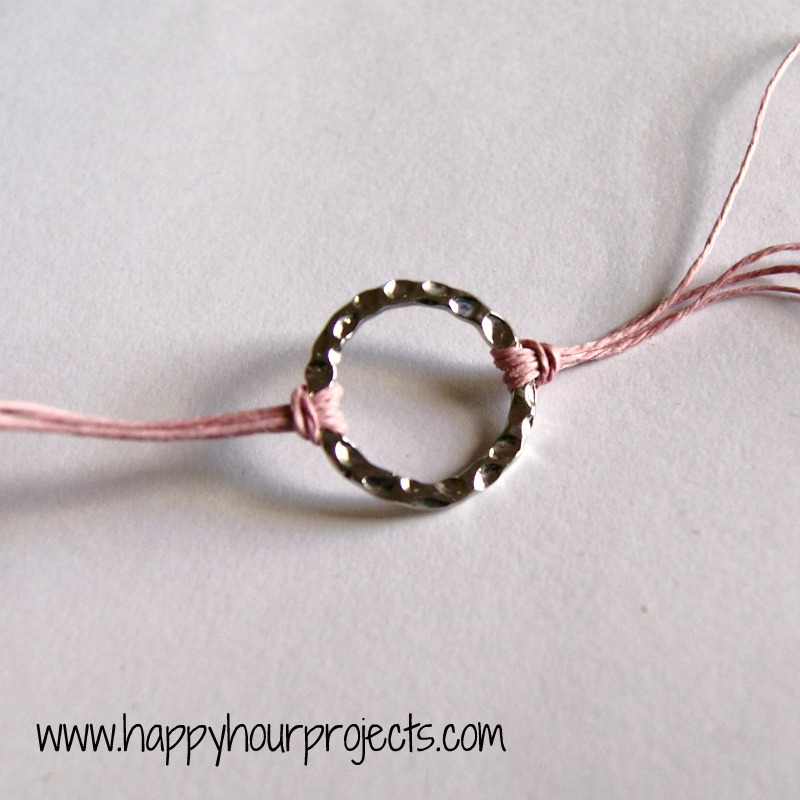
Thread the tails of your string through the loops of the string – making a knot. Knot people, help me out here – isn’t this a square knot? **Update** – many thanks to Salla for solving this mystery, it’s a lark’s head knot. A square knot would tie two loops together. I learned something today, thank you!!
Anyway, knot it with your lark’s head knot, and do the same on the other side of your focal ring. Like so.
Now, separate your strands for your braid. Remember, you will have six (I fixed that below). Just divide them up two, two, and two. I find that clamping it into my clipboard really works the best to secure it while I braid. And yes, my clipboard does have a giant pink flower on it. :P
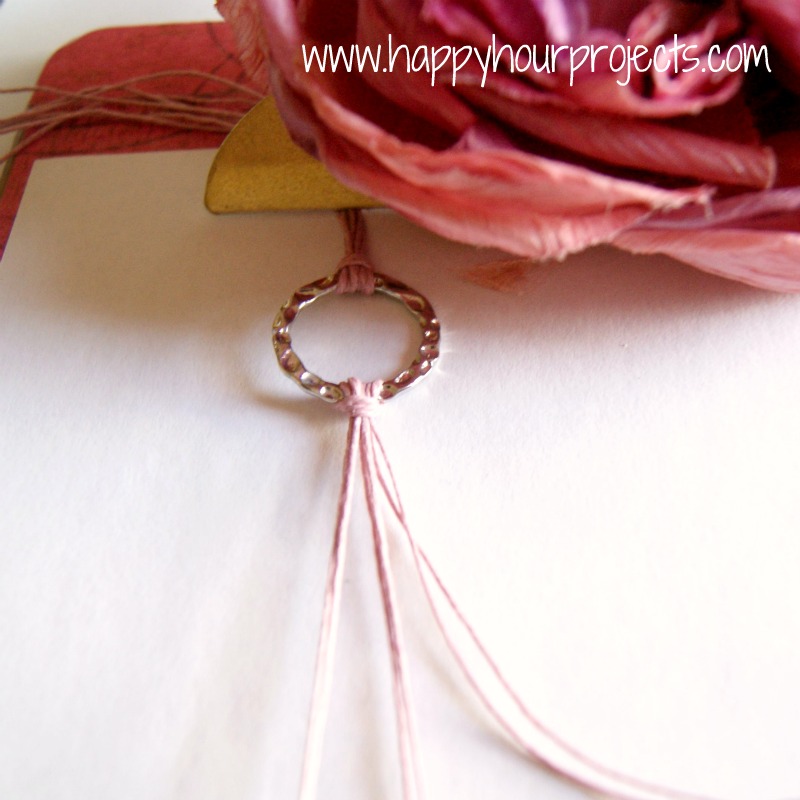
Now, just braid it like normal! If you have decided to use more or less twine, there are methods to braiding any number of strands out there. But to keep this fast, I used a traditional braid. It took me maybe a minute to do each side this way. Once you get to the end, tie an overhand knot to finish it off. That’s it. Super easy!
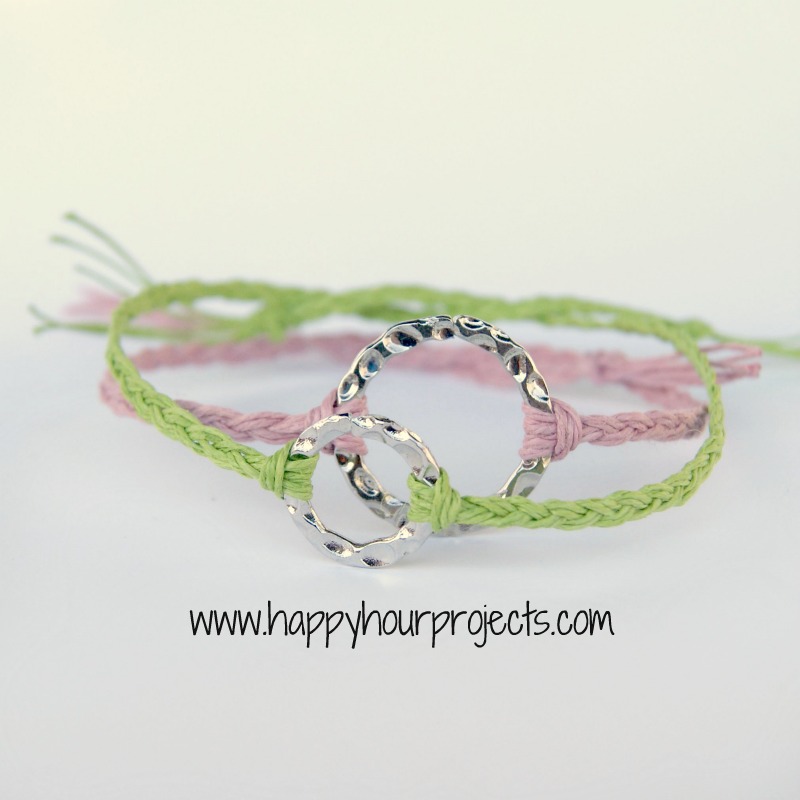
You could also fancy it up and attach end caps and a clasp, or even a button and loop end. But with the twine, just tying it like a friendship bracelet really seemed the most appropriate to me. :)
I found that using about 18″ strands like this made it long enough you could also tie this on an ankle instead, if you like!
It’s a great look for such a small investment of your time! Which gives me plenty of time to get back to work on my Round 4 project over at One Artsy Mama! Voting on the top 5 projects happens on Monday, so stay tuned… are you curious what I’m working on? ;)
I link up to these great parties!
~ Adrianne
Thanks for the auspicious writeup. It actually used to
be a amusement account it. Glance complex to far brought agreeable from
you! However, how could we keep up a correspondence?
You could also use washers instead of the chain links. Great bracelet super easy and chic!
How did you tie it at the very end? I want to be able to get it on and off of my wrist, so I’m wondering if there is a knot that slips….do you know what I mean?
There is a sliding knot, but it’s not going to work well if you braid the cords. So what you’re talking about will change the look, but it’s definitely do-able, and I actually made a bracelet like what you’re talking about. Here’s the link explaining how you can make the knot: http://happyhourprojects.com/basic-sliding-knot-bracelet/
Good luck!
I simply love these bracelets!
I’ve got some jute and twine so I definitely will be making some of these 10 minute bracelets along with your wish bracelets!
Hello! I’m stopping by from the The Best of 2012 at 4 You with Love – these are too cute! Thanks for sharing :) Happy New Year!!
that rules! i made like 1000 of it…my friends love it and its a great birthday present!
Love this idea, thanks for sharing! We'll be making these on a camping trip this summer for sure…two planned already!
Jamie :)
This is really cute! Thank you for sharing!
Just wanted to let you know, I am featuring this at today's link party! Wahoo!!
http://twoyellowbirdsdecor.blogspot.com/2012/06/thursdays-temptation-21-fabulous.html
Jill
So pretty Adrienne! I think I could even handle this :) Thanks so much for sharing at Mom On Timeout!
Hi Adrienne – just wanted to let you know that your project was featured on our All Star Block Party blog hop as one of the favourites of the week. I love these bracelets.
Great idea, those are really cute!
Ah these are great! They are so simple but so fun; thanks so much for linking them up to The Fun In Functional!
So cool! I need to show these to my niece. She is gonna love 'em! Thanks so much for linking up to the All Star Block Party!
Holly
This is the very first piece of jewelry I have every made!! It was so easy, and I really needed a present for my Mom for her birthday, THANK YOU!!! Have a wonderful weekend with your family!
They're so pretty and do look easy!
It's so pretty!
What a great idea! I have some silver links left over from when I used to do silver jewellery making classes – now I know what to do with them! I found you on Things I've done Thursday.
SUPER cute, Adrianne! As always. :) Now to raid my stash for focal points…
Cute!
and it's a lark's head knot.
What a great idea!! I am trying to think of things I can use to make this. I am so excited to see what you come up with for round 4. Of course it will be totally awesome!!
So cute! Hey, I'm hosting a “Shop Hop” today on my blog. I would love for you to link up your Etsy Shop, and help me spread the word:)
Love this blog and love the bracelet tutorials you've been posting. I got some of the same twine from Michaels and have been enjoying making the different variations.
Thanks for the inspiration!
I can't wait to do this… these are so cute I had to “pin” them…. my granddaughter is going to love me for making these…. Thanks so very much for linking up to the ALL STARS BLOCK PARTY… this really rocks!!! =)
I'm your newest follower… =)
Carri
simplydonewright.blogspot.com
I love the anklet idea for this. And yes, I am most definitely curious about what you're making. CAn't wait to see it.
Those are really cute, and a really cool idea. :)
Found you blog hopping.
Those are so cute!! I love the simplicity of them!!! Thanks so much for sharing with us at Thursday's Temptation.
Jill
Cute way to use spare jewelry, etc. that I've got lying around! Thanks!
Another super cute bracelet…I've got to find the time to sit down and make some!!
Hi Adrianne – I love this little project. Would love for you to link up with my first linky party – The All Stars Block Party. Linking up with my blog will automatically put you on four other blogs too!
http://newhousenewhomenewlife.blogspot.ca/2012/06/its-party-time.html
So simple and elegant! Another great project for my girls to do at the beach. Pinned!
LOVE this! I think even I can do it. Thanks for sharing. I'll be digging around in my stash today :)
This is such a pretty bracelet idea! I've tried braiding bracelets using multiple strands before and get frustrated. I think I'll stick to three just as you have reccomended. Thanks for sharing!