
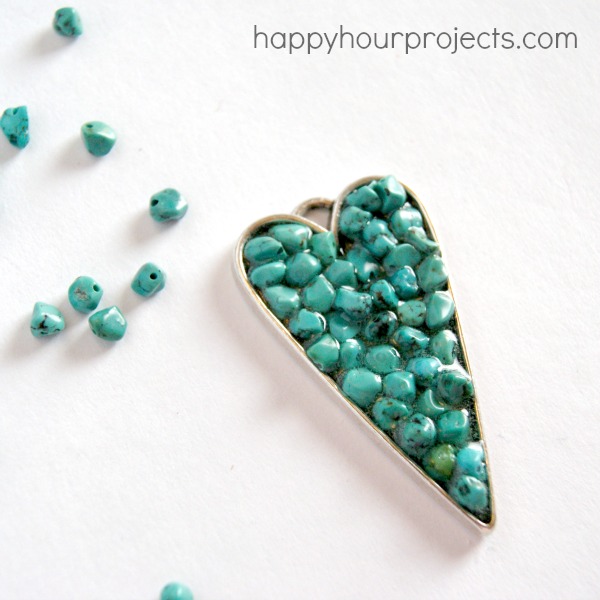
I really love natural elements like stone, and I’m a jewelry buff on top of that, so it makes total sense that I’m drawn to druzy jewelry, which is pretty popular right now. :) If you don’t know what druzy stone is already, it’s basically when one type of stone or mineral forms on another larger stone. Today’s project isn’t *really* nature-formed druzy, but you can get the look by going the DIY-route – I made this pendant that is inspired by the natural creation of druzy.

I have been showing you a few different styles and techniques this week for Spring Bling Week – Monday I showed you a woven ankle bracelet made from hemp and a cabochon, and yesterday I made a mixed media bracelet with turquoise chips). Today I want to talk to you about using resin in your jewelry creations.
Resin was really intimidating to me – until I finally tried it! It was so much easier than I expected it to be. (You can check out my first resin post here, if you want to know more!) As long as you are careful and follow directions well, I think you will LOVE what you can do with resin to give your jewelry a long-term, permanent finish.
What I used for today’s necklace:

- A heart-shaped bezel – I have a local supplier for these who also sells on Etsy if you really love this shape. Other shapes would work well, too.
- Jeweler’s Grade Resin – most craft supply stores carry this.
- Stone chips – they can be gemstones, or even pebbles from your yard! (My yard is under 3 inches of snow right now, though.) I used chips of real turquoise which is my daughter’s birth stone. Quartz in any color would be lovely for this project!
- A chain you like, mine is a ribbon and twine pre-made chain for a little and also a jump ring to attach your pendant.
First, mix your resin according to the package directions. I don’t want to advise you on specific instructions because it will vary from brand to brand, but here’s what you can expect: it’s generally odorless, requires equal parts resin & hardener, and you will need to stir it for 2-3 minutes for it to be ready to use. It hardens in 24 hours so you will need to find an out-of-the-way place to lay it flat to set.

Once you’ve prepared your resin, add some to your bezel – fill it about halfway to leave room for your stones. Then, add your stone chips. Mine were drilled to be beads – but just by turning them so that the holes are sideways, they worked wonderfully and you couldn’t even tell. You will probably find a toothpick to be helpful on this step, and be careful not to spill any resin. You can also overfill your pendant with stones just a little – the resin will hold them in permanently once it hardens, so you can feel comfortable filling to get good coverage.
Then, you’ll need to set your pendant aside to dry for about 24 hours. Once it’s dry, you’ll have a strong and permanent bond between your stones and the bezel. Just add a jump ring and a chain, and you’re ready to wear!

If resin is still more than you want to tackle, you may be able to use a dimensional glaze like Glossy Accents or Dimensional Magic. Those are not jeweler’s grade products, so I don’t know how they will hold up over time with wear, but they will give you a similar look and will have a similar drying time. (I recently saw a Seed Bead Necklace over at One Artsy Mama that used Dimensional Magic, you can pop over there and see her tips!) But since I was going with a semi-precious stone in my piece (and I already have jeweler’s resin in my supplies) it was an easy choice for me to go with resin for long-term wear, to make this a piece to keep.
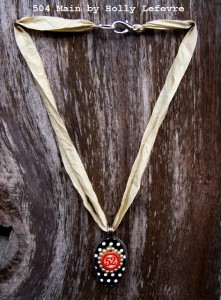
I hope you enjoyed today’s project, and don’t forget, there are 6 other blogs sharing their gorgeous creations this week as part of Spring Bling week! Holly at 504 Main has a tutorial today for this Bingo Marker Spoon Pendant (just click the image to visit the tutorial!)
Be sure to check out the other fabulous blogs participating in Spring Bling Week – I have another jewelry tutorial tomorrow, and don’t miss Friday’s giveaway!


Love your work!
I’ve been looking for a way to incorporate my daughter’s ashes into a pendant…I think I will try this.
Love it! Wondering if you used real or imitation turquoise ?
Wow Adrianne this is beautiful! Definitely one of my favs now – I really need to try resin, you cant get it so freely here, I have to order it online. But I really need to make an effort and get some, you have inspired me ! xxx
hey, I think it’s amazing!
I would wear it :)
You are a busy lady over here! I have some square and oval pendants and put sea glass in them using Dimensional Magic…but I love this heart and love how you did this with resin…so pretty! Pinned it!
Love this! I’ve been wanting to try creating wit resin…this would be a great first project!
So beautiful!!!! I have also made something with my resin, but where the time for writing the posts;-) thank you for your wonderful idea and have a great weekend!
LOVE this!! I need to find some time to sit with some beads!!
This is beautiful, Adrianne!
Adrianne, Love this. You might be pushing me back into jewelry. Thanks.
SO pretty! Love it!!