
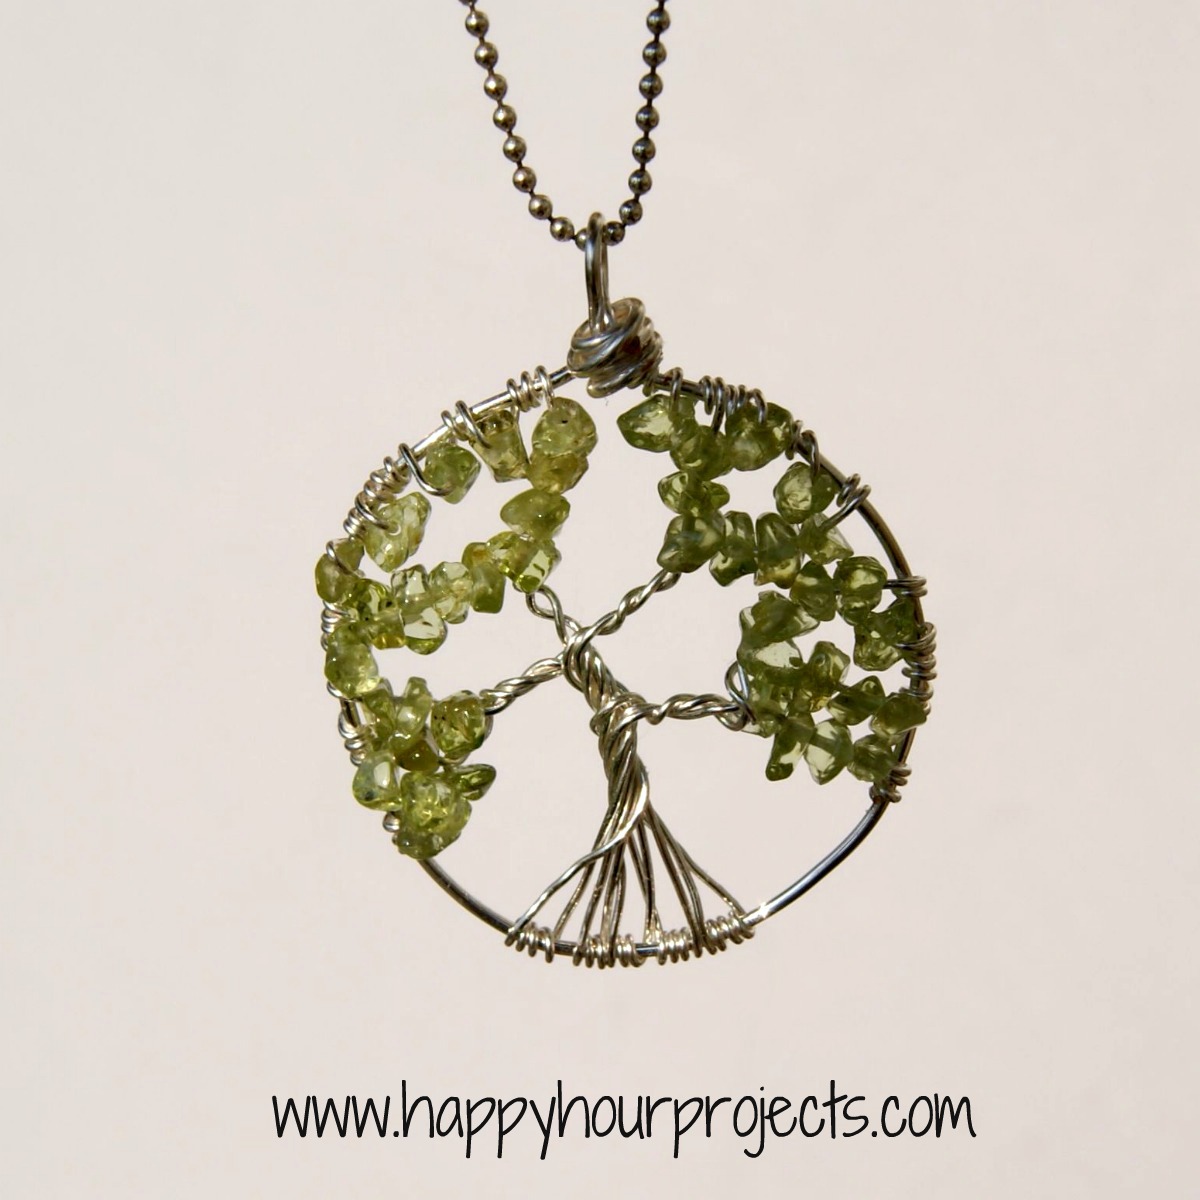
This is going to be photo-heavy, but it’s not because it’s complicated – just difficult to explain, and much easier to show you. If you checked out my Beaded Family Tree from a few weeks ago, this is much the same – just on a smaller (wearable!) scale – it’s 1-1/2 inches from the bail to the bottom of the pendant.
What you will need:
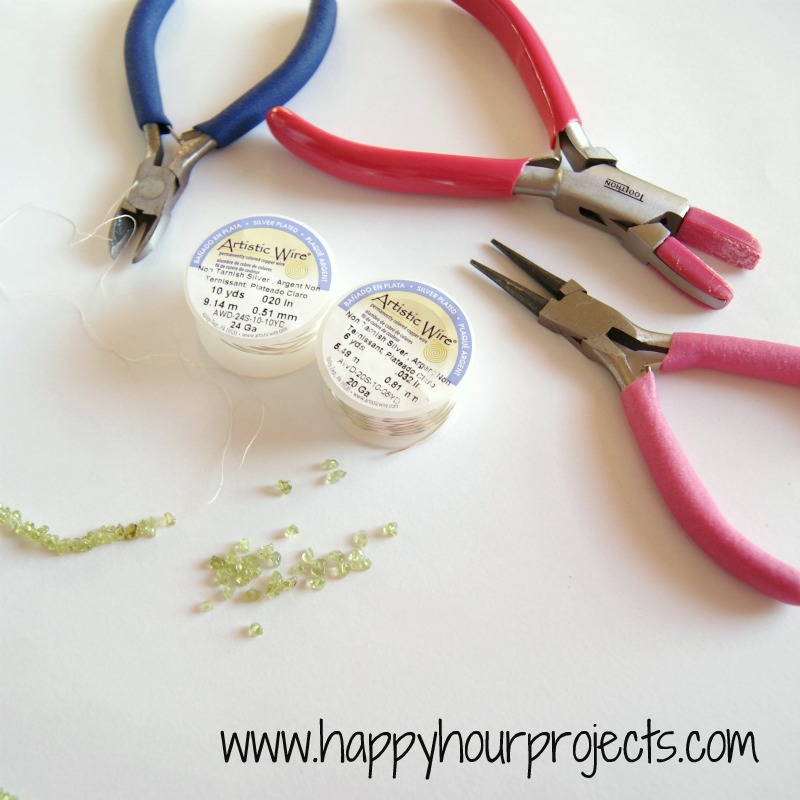
- Around 30″ of 24 gauge wire (I like to use a silver plated wire as a good mix of economy and quality, but go with whatever you like) to make your tree
- Around 5-6″ of 18 or 20 gauge wire to form the base of the pendant
- Stone chip beads (I used peridot for mine – you can find these at Hobby Lobby)
- Ball chain or box chain
- Wire tools: round pliers, wire cutters, nylon pliers, file – you can get by without some of these, but it makes the job much easier
The first step is to prepare your wire. Trim up your 5-6″ base wire (depending on what size you ultimately want your necklace to be), and 6 – 5″ tree wires (give or take, these are estimates). They may be a little bent, so if that’s the case, I like to take my nylon pliers and pull them through a few times to straighten them out.
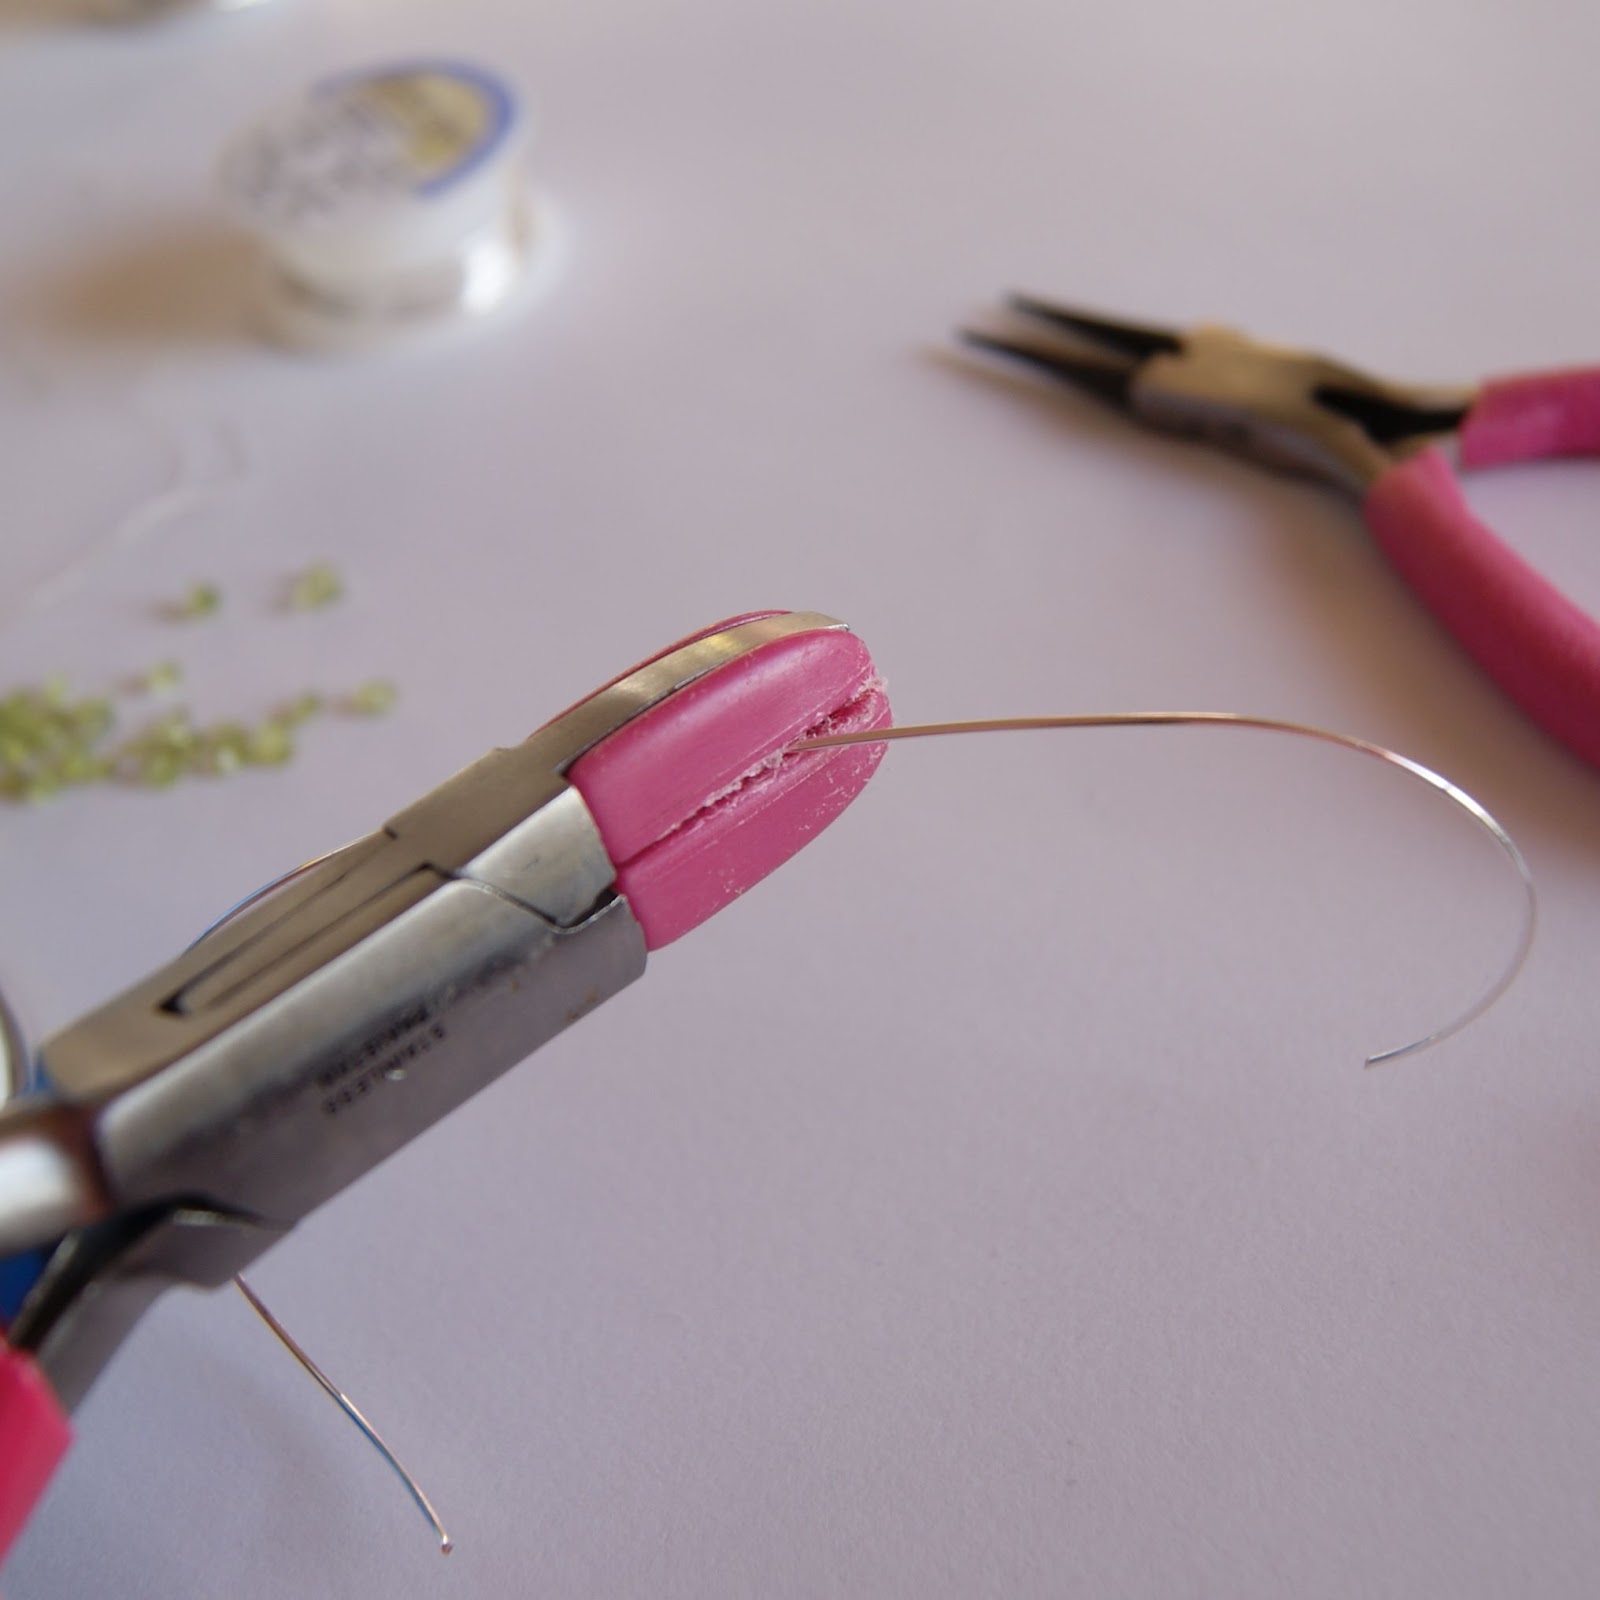
See? Nice and straight now. You want all the bends out of your base wire if possible.

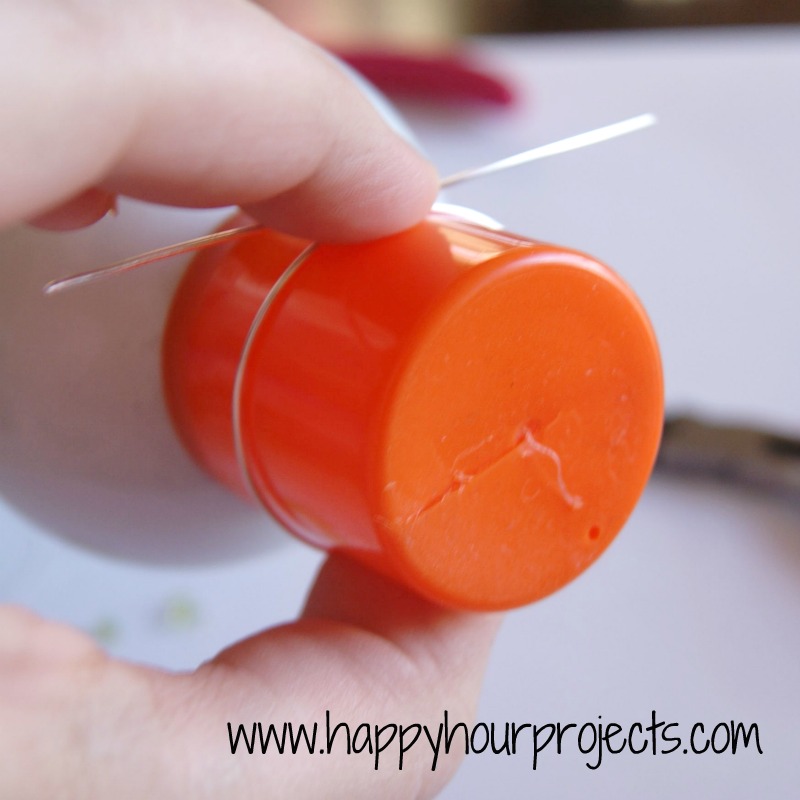
The easiest way I have found to form the base is to find something that’s already the shape and size you want, and wrap your wire around that. You can find special tools for this, or you can just look around for something you might already have, like a pill bottle, or in my case – the cap to my spray glue, which makes a nice 1-1/4 size circle.
This next bit is hard to explain and it might feel tricky at first, but I promise, it’s not as bad as it sounds. I’ve found it’s easiest to make the bail of the necklace right now, rather than adding a jump ring later. this is mainly because you can make it whatever size you want, and with it being part of the necklace, you don’t have to worry later about soldering your jump ring or it being strong enough over the long-term.
You’ll take one half of where your wires overlap, and wrap it around your round pliers (if you have a pair). It doesn’t have to be perfectly round if this is something you’re just making for yourself and it doesn’t matter to you – don’t buy a special set of pliers just for this project if you’re not going to be doing a lot of wire wrapping.
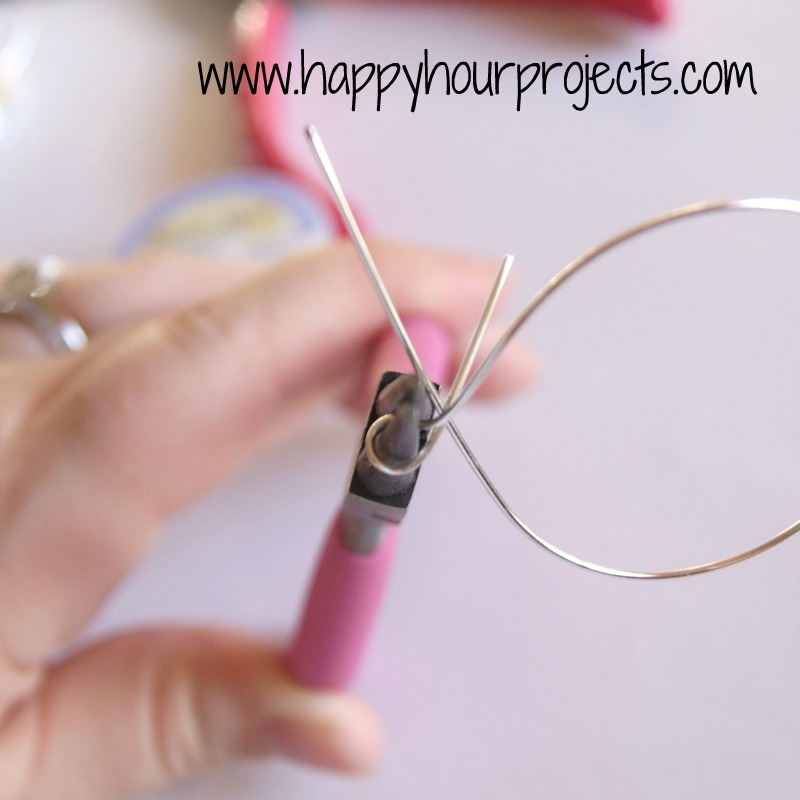
Now, take those little tails, and wrap them around the “neck” of the loop you just made. You’ll probably have a little extra – I usually do.

Just trim the excess off, and if you have a jewelry file, you will probably want to file the sharp edge down too. Straighten your loop so that you’ll be able to run your chain through it. Now you have a lovely round base to start work on!

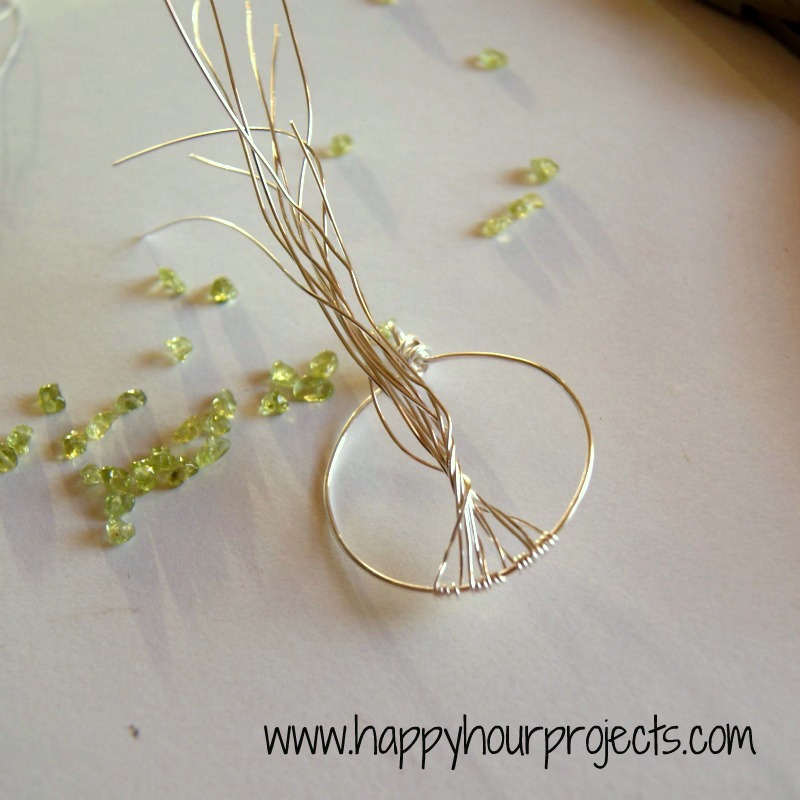
I usually bend my tree wires in half before I get started, you will be wrapping the centers around the base of your pendant to create the trunk.

I wrap each one about 3 times. If you want a wider-looking trunk, you can wrap it more, like 5 or 6 times or whatever you like the looks of. Do this with all your wires. You can also use more or fewer wires than 6, if you think it needs to be a little more or less full – I just find 6 is usually a good number to work with for the 1 – 1/4 inch size round frame I usually make.
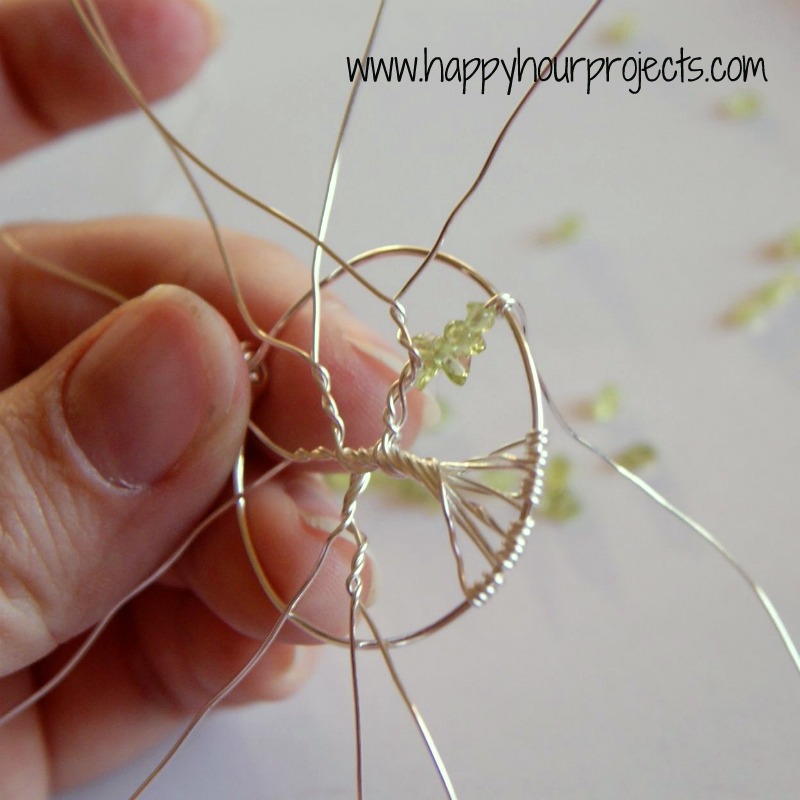
Once they are all added, you can begin twisting them together to form your tree trunk.
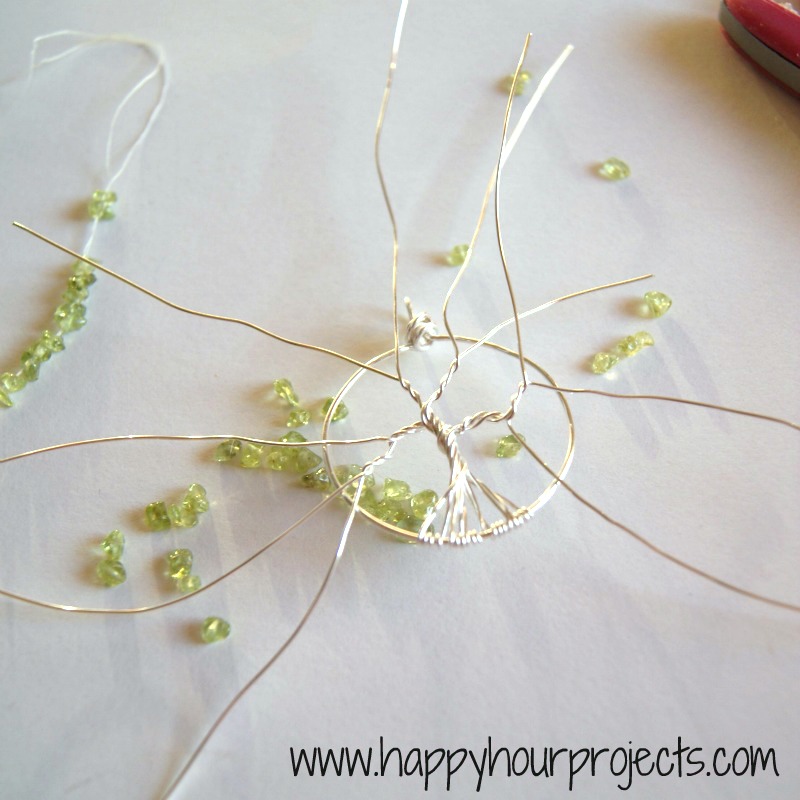
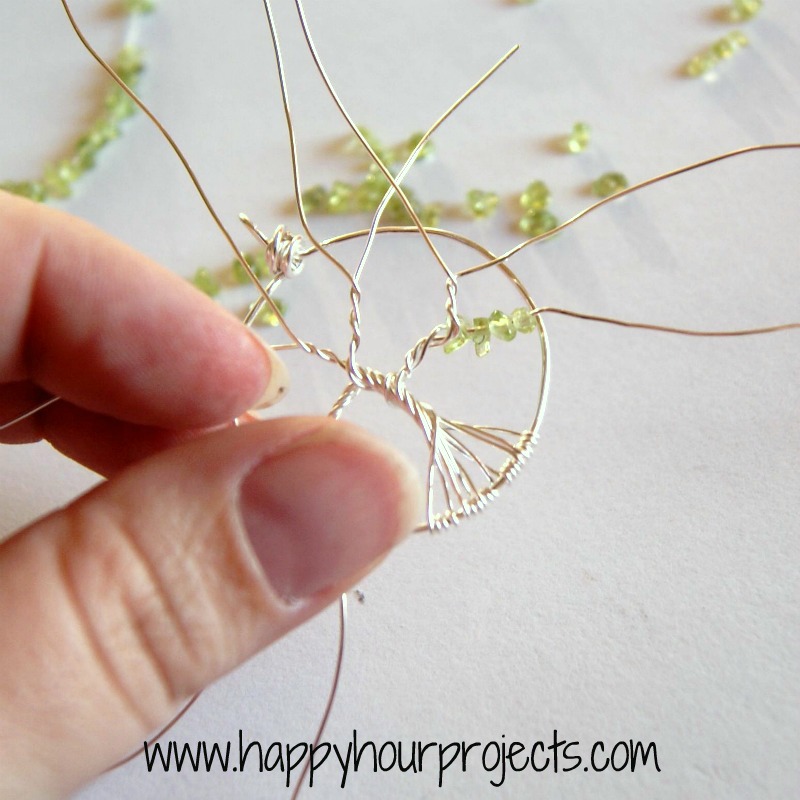
When you get to about the center of the circle, start separating your wires into the individual branches.

I like to keep a few together for a twist or two, to make thicker branches, before separating them out to bead the leaves. This really makes your tree look more tree-like – but it will cut down on the number of beads you’ll use. So test it out and see what you like best – whether more tree or more beads. :)
Try to be somewhat random with your branch bends, it will look more natural that way. It can be tough to vary something so small, but just play with it until you like how it looks.
Now, you can begin beading. I tend to work my way up from the lowest branches, but I don’t think it makes a difference.
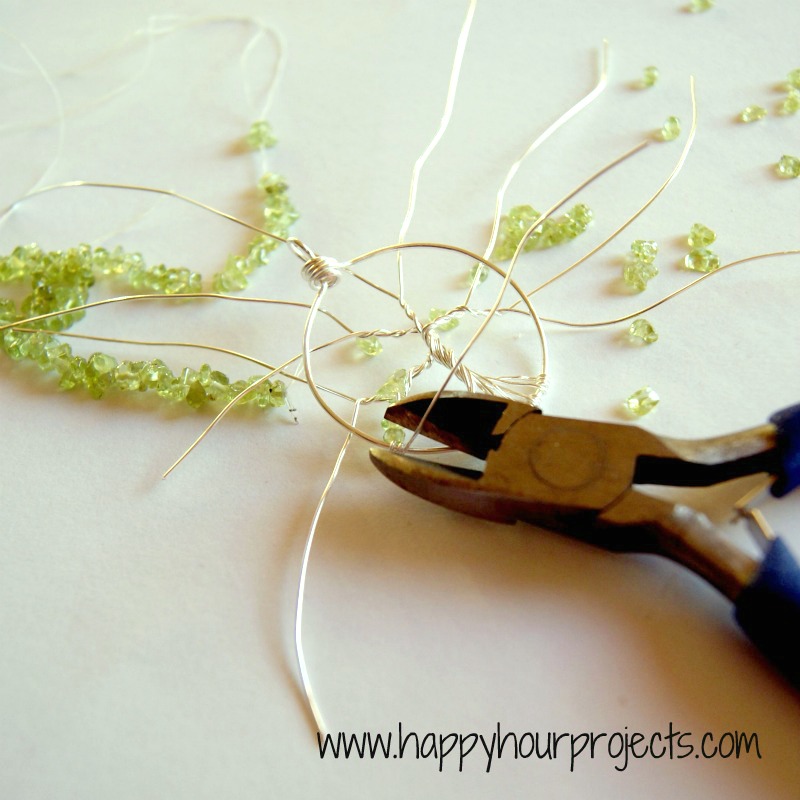
Add as many beads as you can fit. Then, wrap the end of your branch wire around the outer wire a few times.
Then you can just nip off the excess with your wire cutters. You may want to file the edge if it’s still a little sharp. (Don’t let the photo below throw you, I turned it over to show you better – I had to set it down to get a photo because I don’t have three hands.)
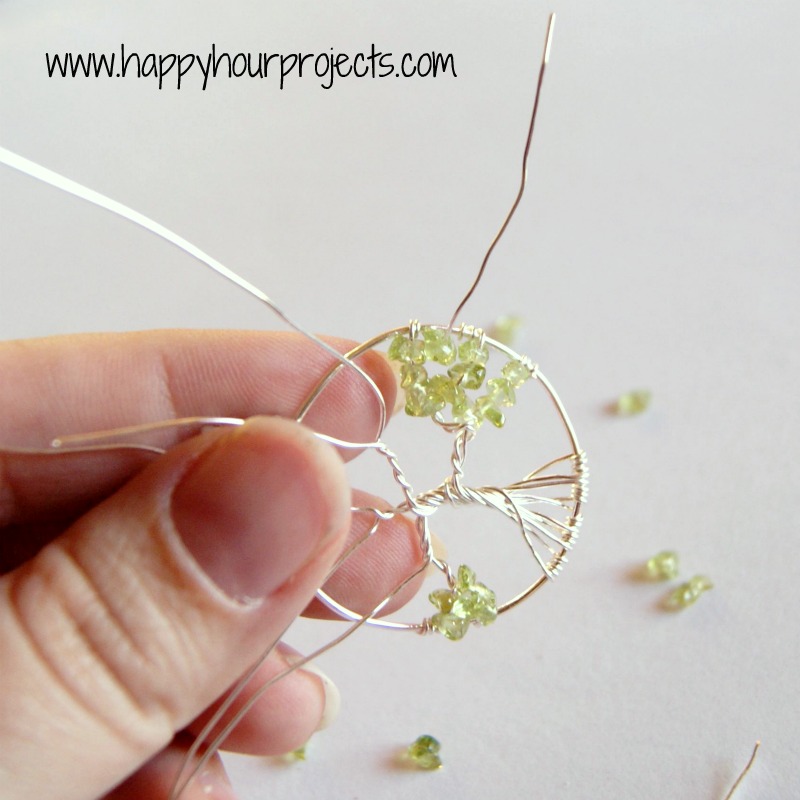
Continue on to the next branch, and keep going with the lower branches. These brances were spaced pretty close together, so they look decently “full”.

If/when you run into space between branches that leaves a gap, you can fill it in with extra beads.

Instead of nipping off the wire after wrapping it on the outer edge, thread an additional bead onto it. Position it to the inside of the circle, and then wrap your wire another couple times to secure it.
It’s hard to see, because it does blend in – but that’s the point. :)
Just keep doing that until you have filled in all your empty branches. One thing you will want to be careful of is that when you wrap wire, it’s easy to get it too tight – which will distort your circular frame. So as you work, keep an eye on it and make sure you haven’t pulled any of the wires too tight. If you do – unwrap and re-wrap them, re-positioning your wires as necessary.
When it’s more filled in, you’ll probably need to use your pliers to thread your wire through and to get it nice and snug.
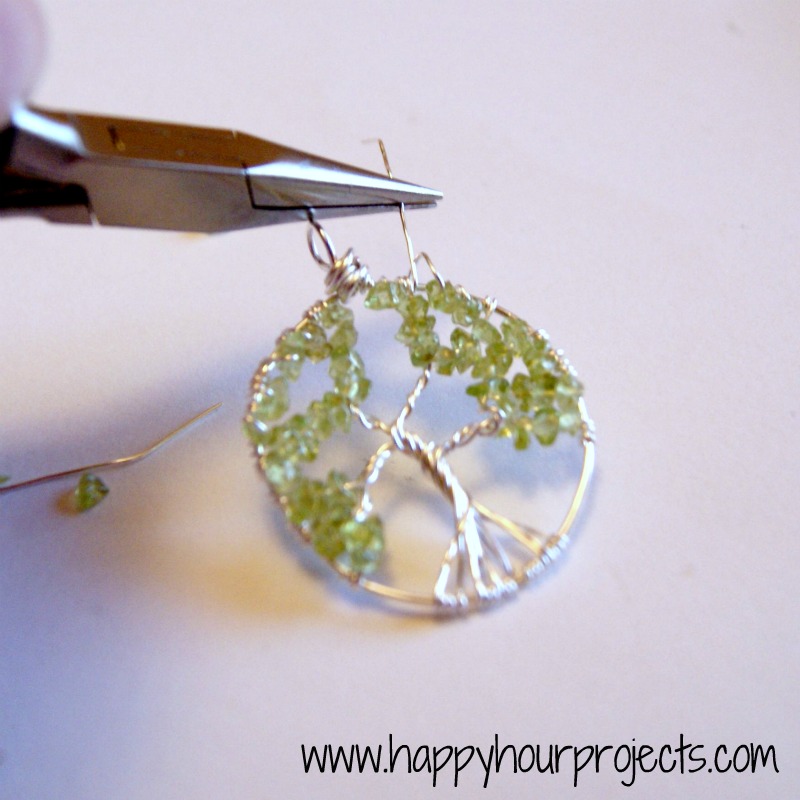
Now, all that’s left to do is string it on your chain!
For this one, I have used a sterling silver ball chain, because it’s a giveaway piece and I like to make sure it’s as hypo-allergenic as possible. Do you like it? You can enter to win it at Kadie’s Birthday Bash at SevenAlive tomorrow! I’d love for one of my readers to get this piece. She has a really nice lineup of sponsored prizes all day – so be sure to check them all out!
I link up to these great parties!

Your post is very nice and informative. It taught me a lot of useful things. Thanks
I made this today. It was the first time I’ve ever attempted any type of art project, and I was terrified. However, the instructions were so easy to follow even I could make it. I messed up so many times, but in the end it was worth it
Thankyou for sharing.
Nice post.
keep it up
Genera?ly I don’t read post on blogs, ho?ever I wish to say that this w?ite-up
very forced me to t?ke a look at and do it! Your writing taste has been amaze? me.
Thank you, ver? gr?at article.
love tree,very nice project thank you for sharing;
These are beautiful! What size beads did you use?
They are peridot stone chips, so they vary, being natural tumbled stone, and not carved. I’d say the size of the ones I used were around 3mm.
Great tutorial, I just made my first of many to come, using turquoise chips. Thank You!!!
Adrianne, I love your pendant, and your tutorial is so easy to follow. I’m trying it on a larger scale to hang in my window. Wish me luck.
Thanks for the posting
I also am a jewelry maker & have always wanted to learn to make this! It’s soo beautiful & ur tutorial is very well done. U are truly talented & I hope my skill will one day reach your level..very inspiring! My website & blog are http://youbling.weebly.com if you’d ever like to stop by and take a look..Keep up the great work!
And because I love this so much, it's being featured on the All Star Block Party!
This looks just lovely. My mom would love this. Thanks for sharing at the All Star Block Party.
Holly
This is INCREDIBLE! I really like it and I am definitely going to give it a try. I totally just pinned this yesterday, and then I saw your link at a linky party and I had to come over and let you know how AMAZING I think this is. You are SO creative. I'm excited to be your newest follower!
What a smart, pretty project! Thank you for sharing your tutorial. I'm looking forward to trying this one myself.
I have a thing for trees too. I even have a board started on Pinterest. And I'm pinning this to it.
Wow! This is wonderful, Adrianne! I love it. Can't wait to try it :)
I love this – it's just beautiful! Thanks you for sharing! I am now a follower of Happy hour! :) I hope you can come visit me at Eat.Love.Inspire for more fun and creative crafts!
http://www.eatloveinspire.blogspot.com
This is great! Thank you for the share, I love how you so clearly explained each step. I sometimes find crafts hard to follow from online instructions, but you made it seem so simple, can't wait to try! Stopping by from the hop and am now your newest follower:) Hope you can come check out Crazy Mama Drama !
http://crazy-mama-drama.blogspot.com/
http://www.facebook.com/pages/Crazy-Mama-Drama/259491484156846
Love, love, love!
Hi! Very pretty and great tutorial! I just pinned this so I can show my oldest daughter. She loves doing wire crafts and jewelry!
I'd like to invite you to join in A Crafter's Dream Group Giveaway, hosted by My Merry Messy Life, Little Becky Homecky, and me. Each blogger is offering her/his own giveaway worth $25 or more. Please stop by and check out the details!
http://earning-my-cape.blogspot.com/2012/07/crafters-dream-join-our-group-giveaway.html
I hope to see you there!
~Susie~
Absolutely beautiful!!
This is so beautiful! You have quite a talent. Please come visit my linky party tomorrow at OneCreativeMommy.com. I'd love for you to link up this idea and/or anything else you'd like to share. That necklace is amazing.
This is really beautiful! And I really like your pictures…. they make it easy to follow along. :)
Lovely! Maybe I can win it! haha :)
All I can say is Love It!
JoAnn
Aaaahhh I was looking at this tutorial this morning, it's amazing! I'm so glad you shared it at The Fun In Functional! I'm no good at making jewelry, but I love this tree and it looks simple enough, so maybe I'll try my hand at it :-)
This is totally awesome and it seems so simple too!! Thanks!!
Visiting via the Crafty Blogstalker Hop :)
Sarah
http://acatlikecuriosity.blogspot.co.uk
I love it!! Thanks for the great tutorial!
Wow, wow, wow!! I've always loved your jewellery projects, but this one is the best by far! Hope you'll share it on the All Star Block Party!!
P.S. Can we buy this anywhere?
I love trees too, and this necklace is beautiful!
Oh WOW! You really are so very Talented lady!! This is so pretty!!
Wow, this is really beautiful! Liz
Gorgeous. I don't think I've ever actually seen how to make one. Fabulous tutorial as always!